Custom Order or Any New Project ?


Installation
The installation of this script is super easy. If you can install normal php based scripts on your server, you can install our script. We will tell you how to install this script step by step on a server.
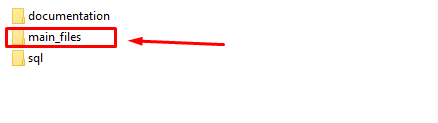
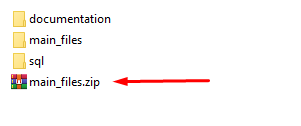
If you extract the zip file, you will see that there are total three folders.

The folder names are: sql, documentation and main_files. The "main_files" folder is the main laravel source codes. The "sql" folder contains the main database file "database.sql"
Creating Database using Cpanel
1. Login to your hosting's cpanel using the login information. You will see an interface like this:
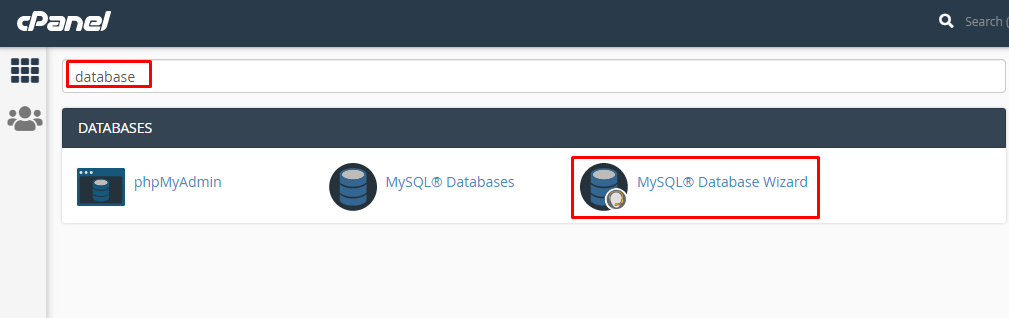
2. You will get a search section in the cpanel. Search there by writing the word "database". You will get some options. Click on "MySQL® Database Wizard" option.
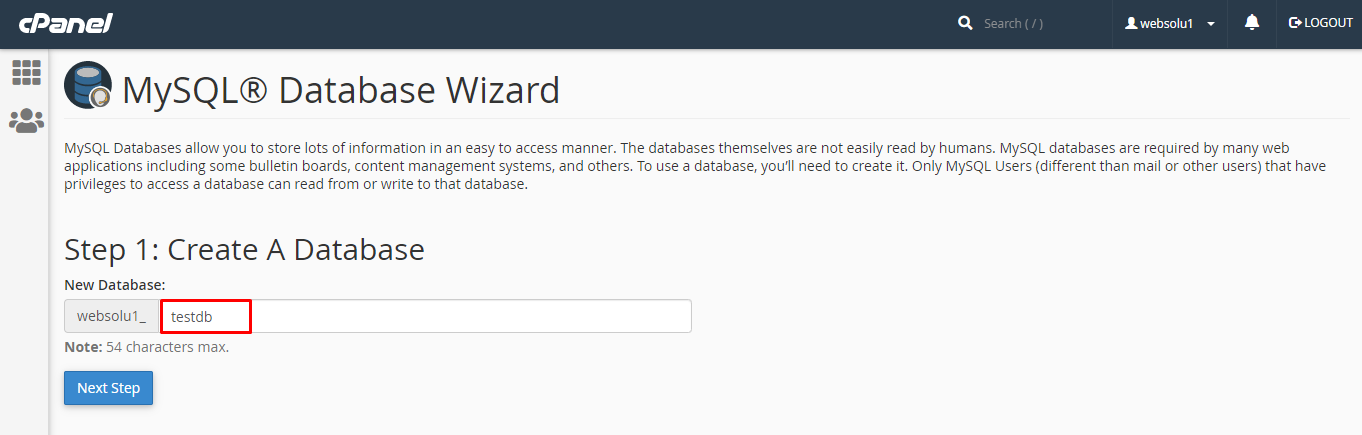
3. Then in Step 1, you will have to create a database. In the text field, give your database name and click on next step.
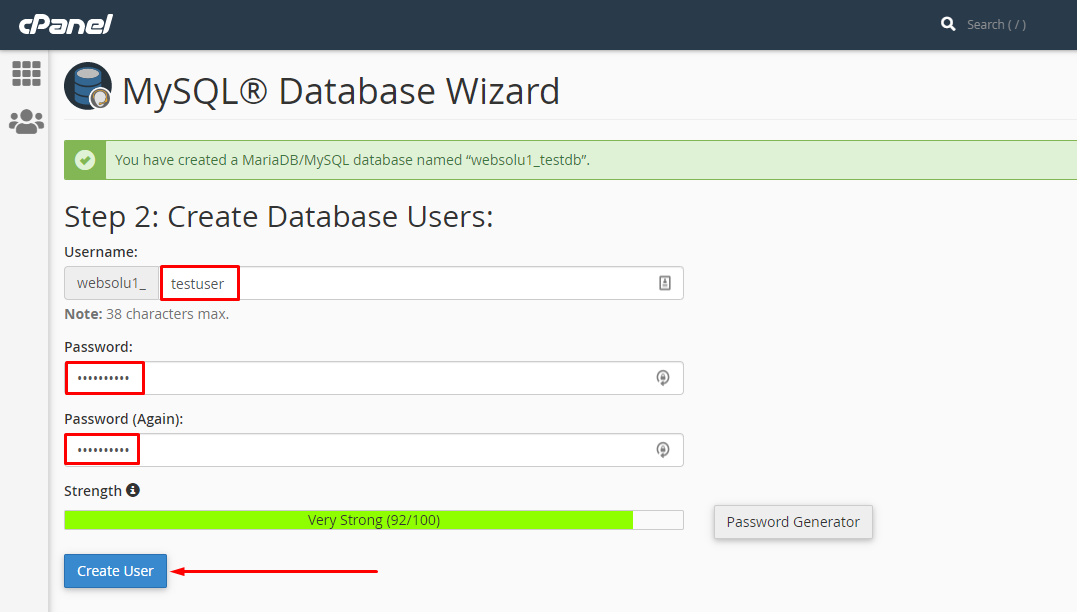
4. Then in Step 2, you will have to create a database user. Give your username and passwords here. Then click on "Create User" button.
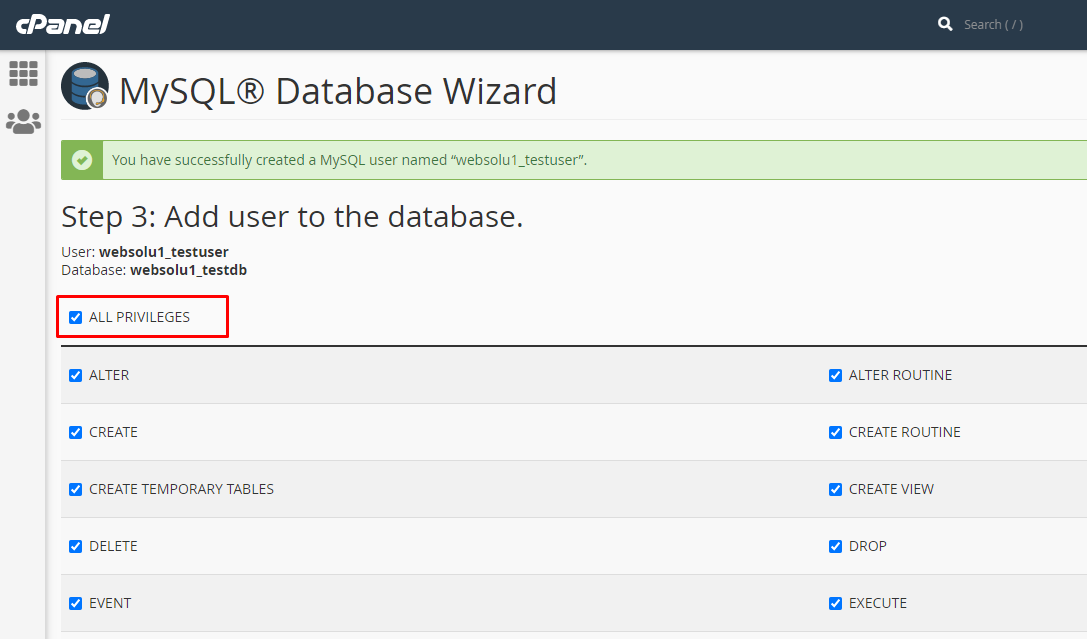
5. Now a permission page will come. Just check the tick mark on "ALL PRIVILEGES" and you will see all the options will be automatically checked.
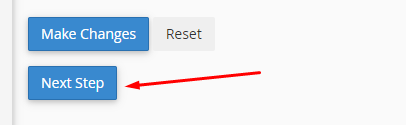
6. Click on the "Next Step" button in the bottom.
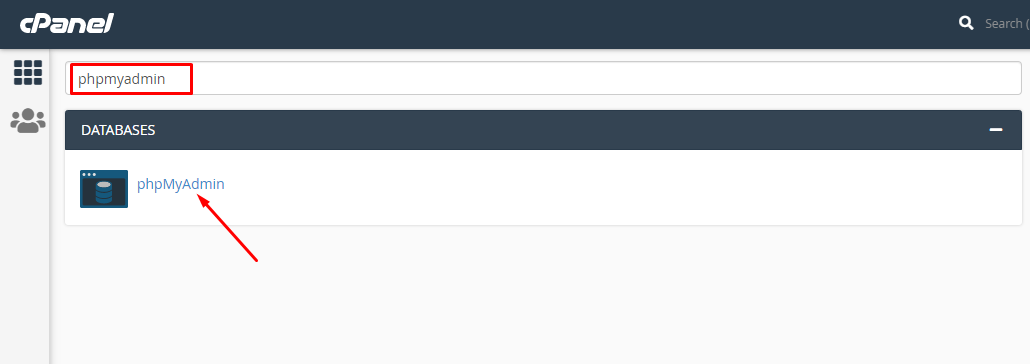
7. Database and user creation step is done. Now go back to home and again search like before with the word "phpmyadmin". Click on the "phpMyAdmin" option.
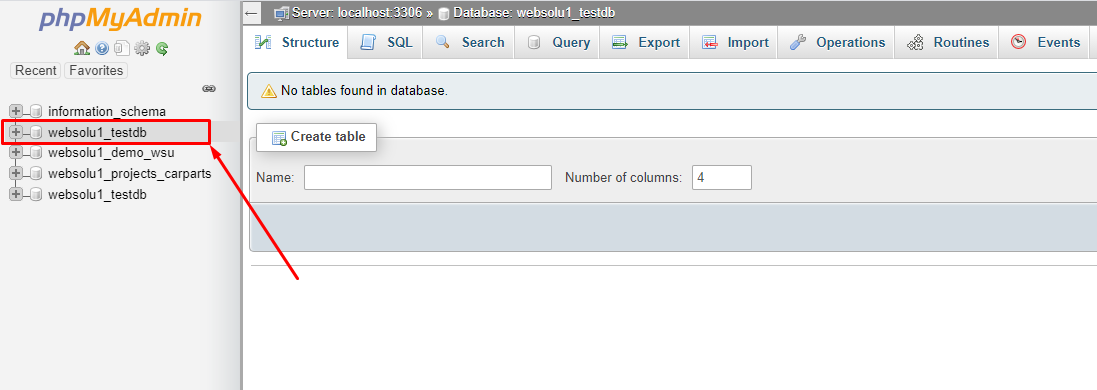
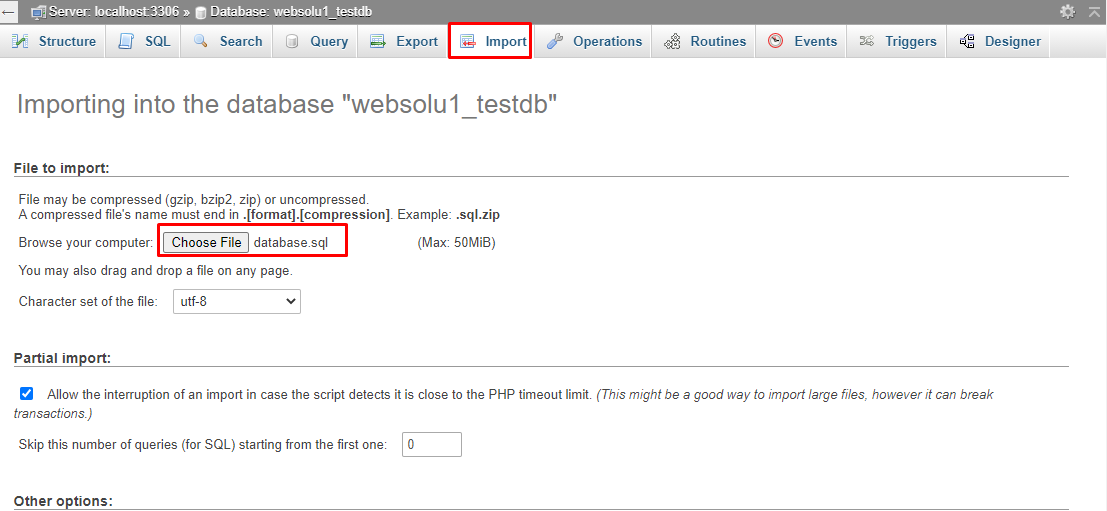
8. Now the main phpmyadmin page will come. Click on the newly created database "websolu1_testdb" from the left side.
9. Click on the "Import" option from top and then select the file "database.sql" that is in the "sql" folder of the script.
10. Then click on the "Go" button from bottom.
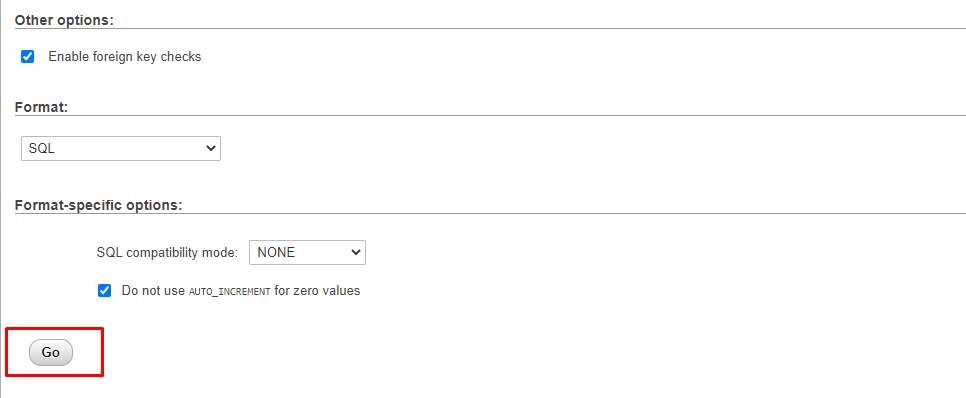
11. After the task is successful, you will get a success message.

12. All task related to database is done.
Uploading Files using Cpanel
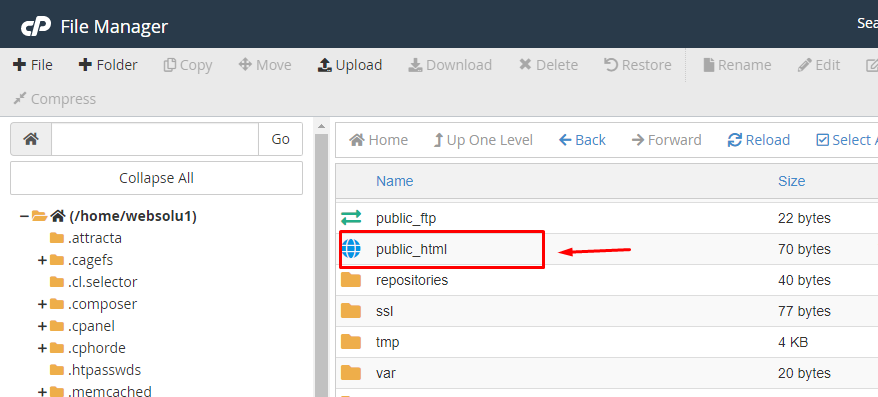
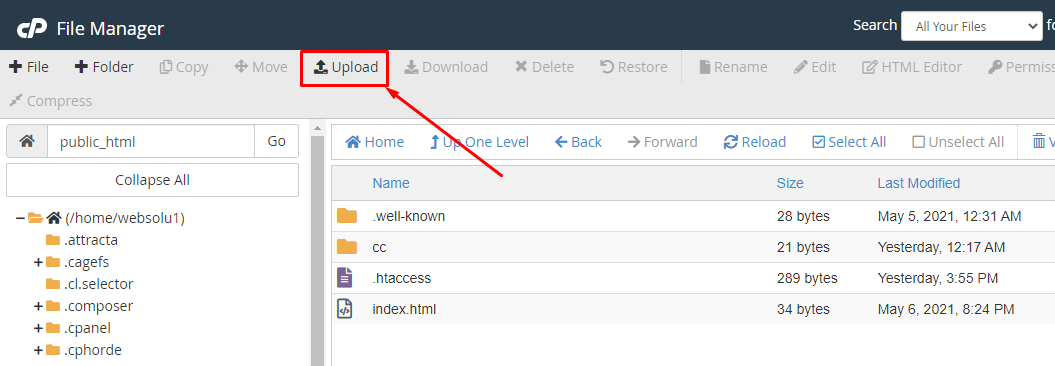
1. In the search field of your cpanel, write the word "file". You will get a "File Manager" option. Click on that option.

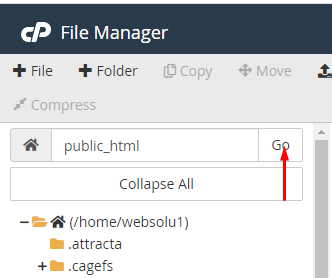
2. Search for the "public_html" and go into there.
3. Now go to the folders that you got after extracting the main zip and compress the folder "main_files" using any software like winrar.
4. The zip file will be like this.
5. In the cpanel's "public_html", upload this zip file.
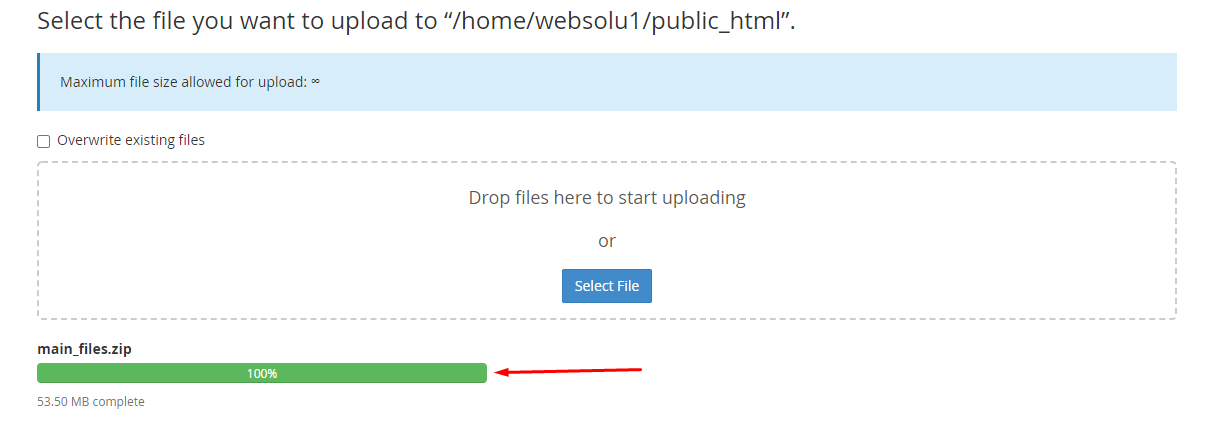
6. You will get an interface like this.
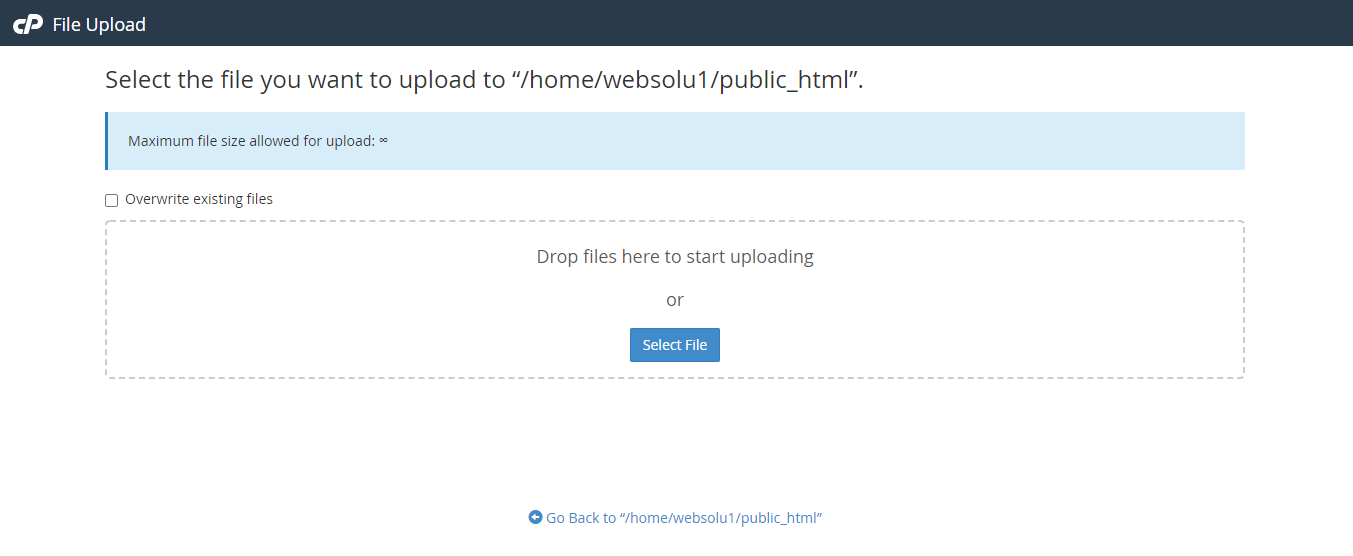
7. Drag and drop the zip file here or just click on the "Select File" and select the file from your computer. You will see a progress of uploading file. Wait until it is finished.
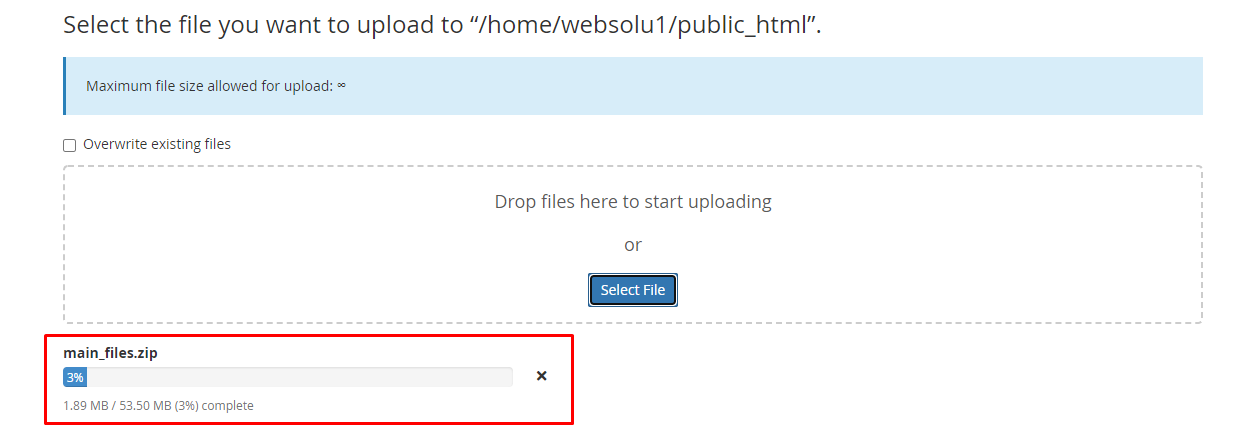
8. After finishing the upload, you will see a green bar. It indicates that upload is successful.
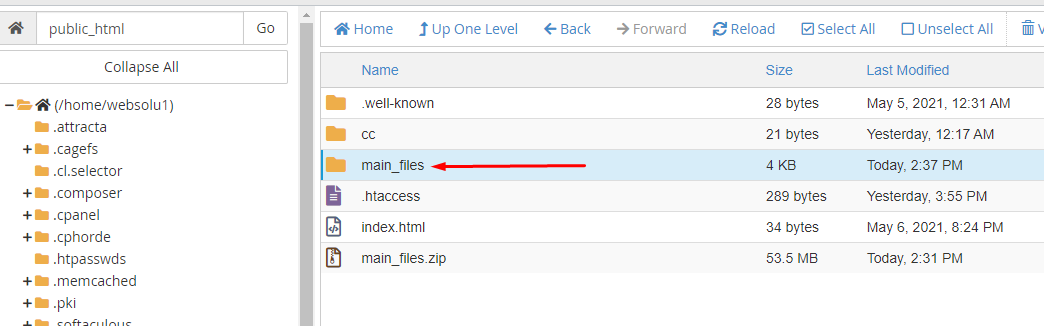
9. Now close the upload window. In the public_html section, press on "Go" button to refresh the page. Then you will see the zip file in the right side.

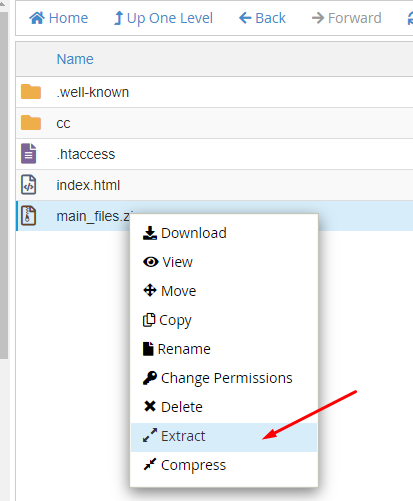
10. Do right click on that file and select "Extract" option.
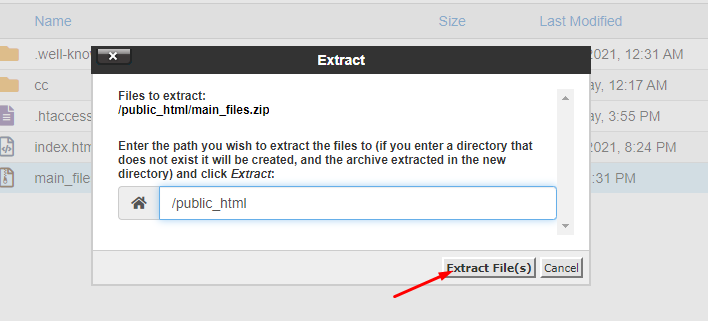
11. Press on "Extract Files" button.
12. It will take only a few minutes. After finish, you will get a window like this.
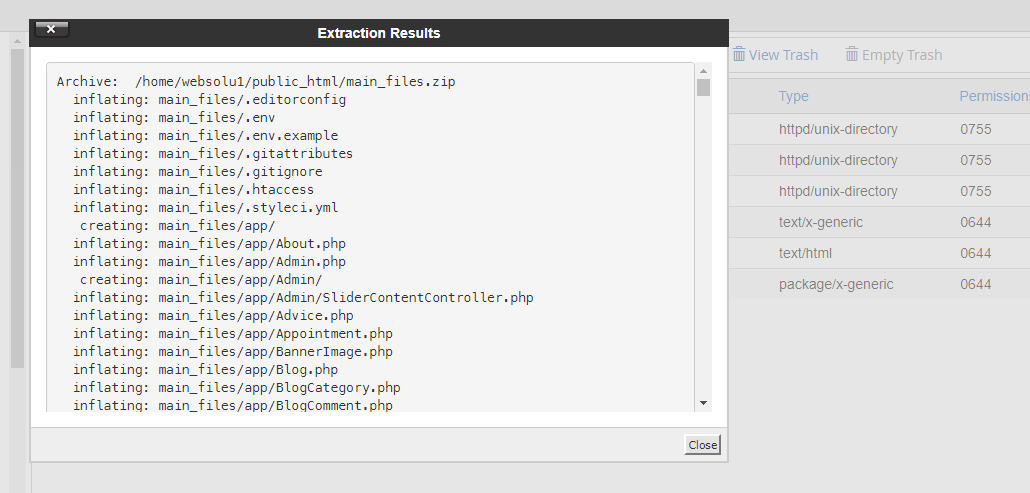
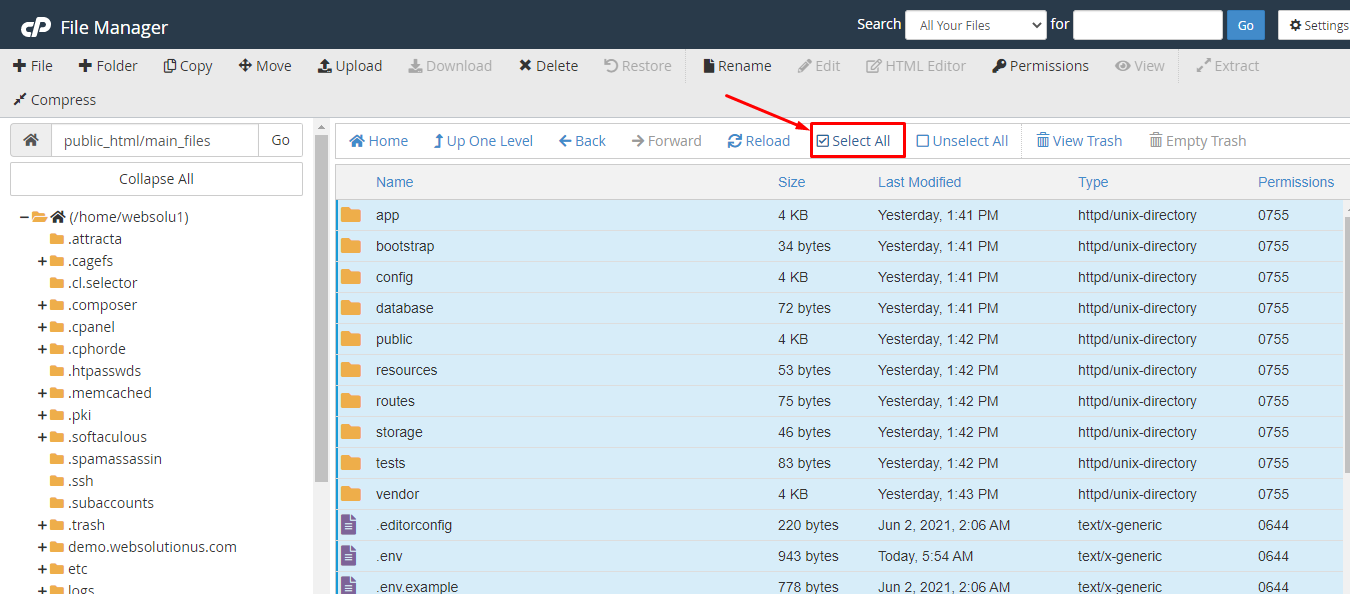
13. Just close this window. Then double click on the "main_files" folder and go into there.
14. Now click on the "Select All" from top section.
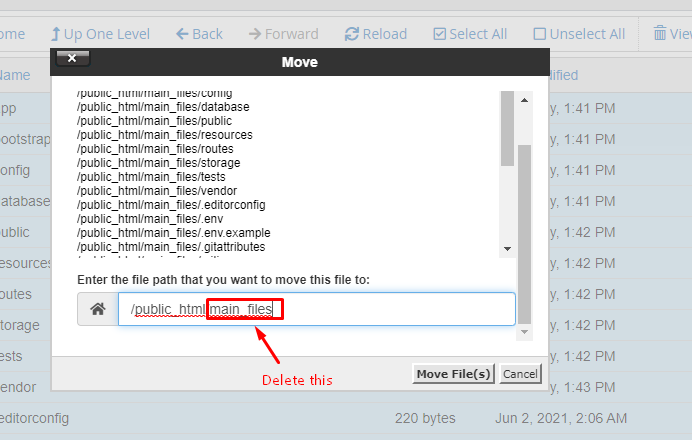
15. Click on the "Move" option.

16. Delete the "main_files" from the box. Only keep this "/public_html/". Then click on "Move Files".
17. Now, click on "Up One Level".

18. Right click on ".env" file and click on "Edit".
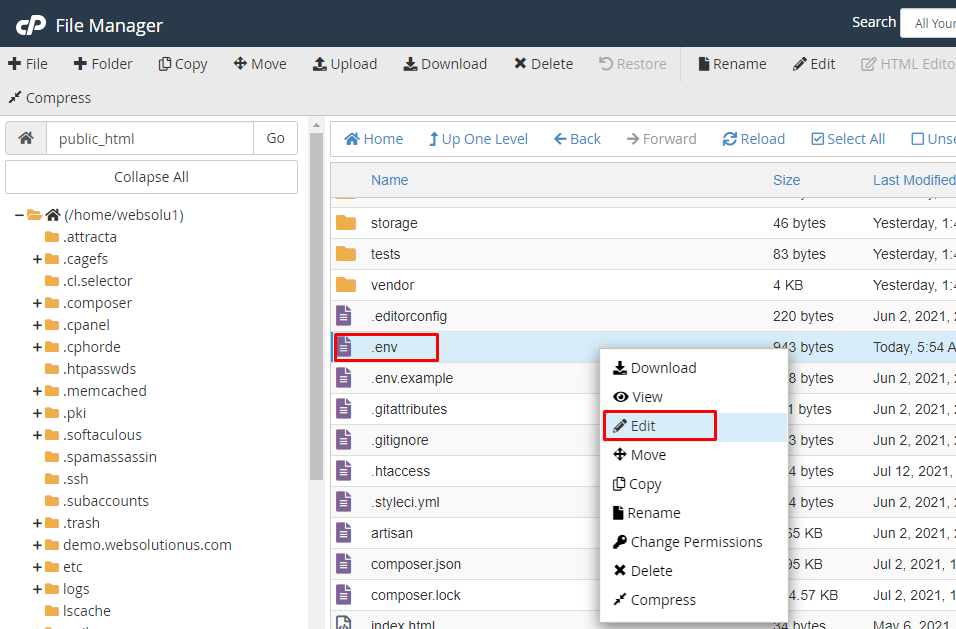
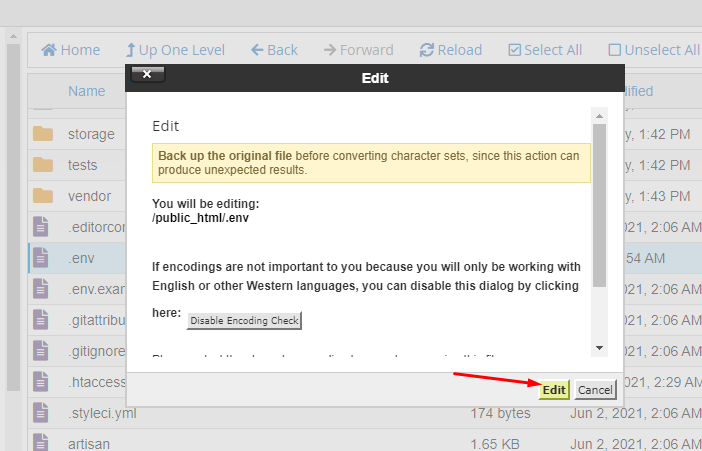
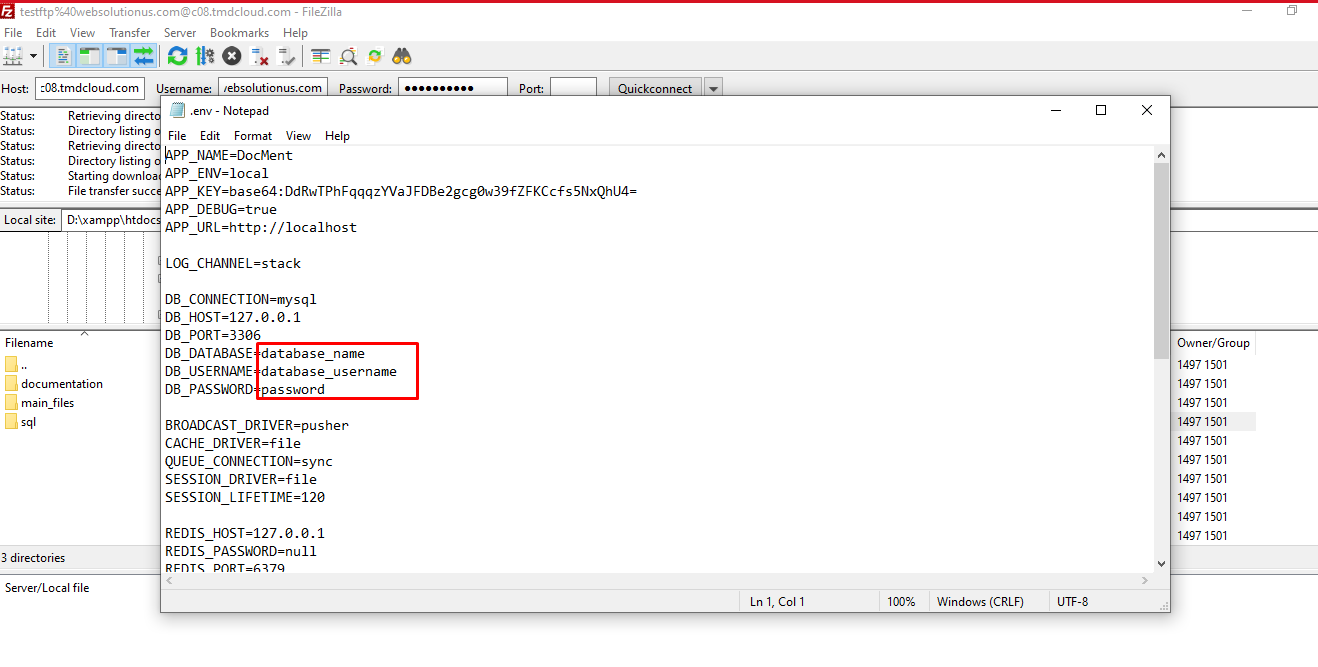
19. Now edit this file and put the database name, username and password you created previously here. Then click on the "Save Changes" button.
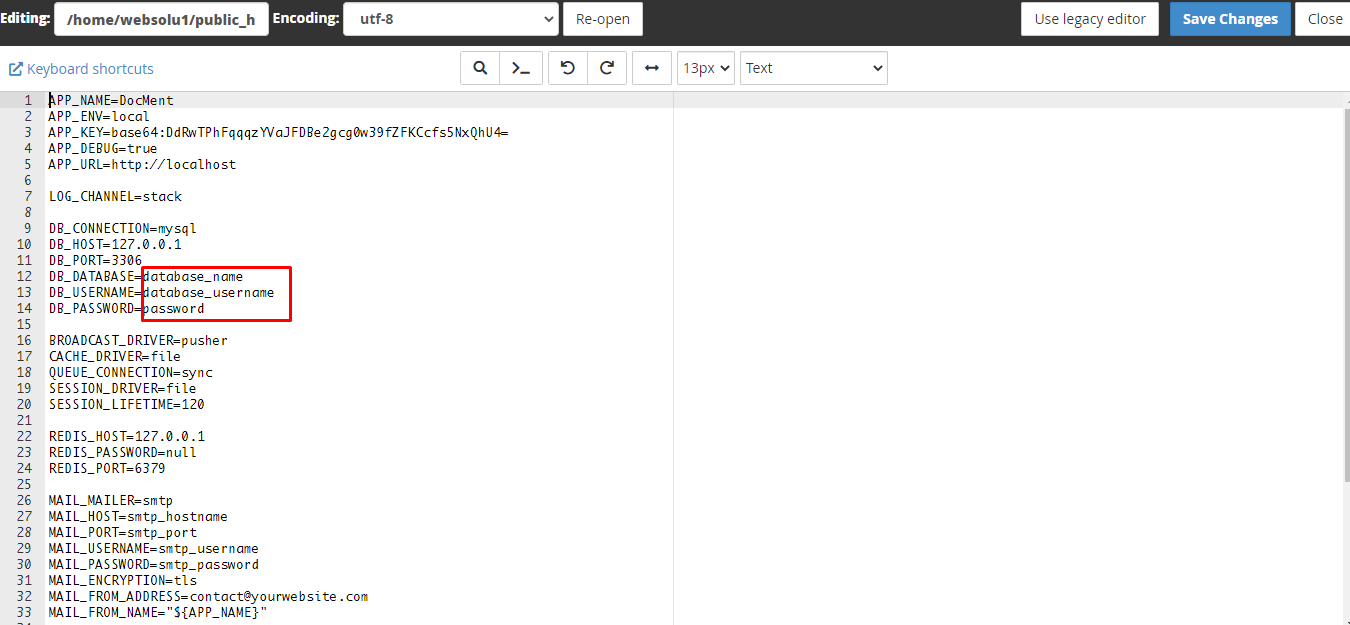
Your task is done and you can use our script without any problem. :)
Uploading Files using FTP
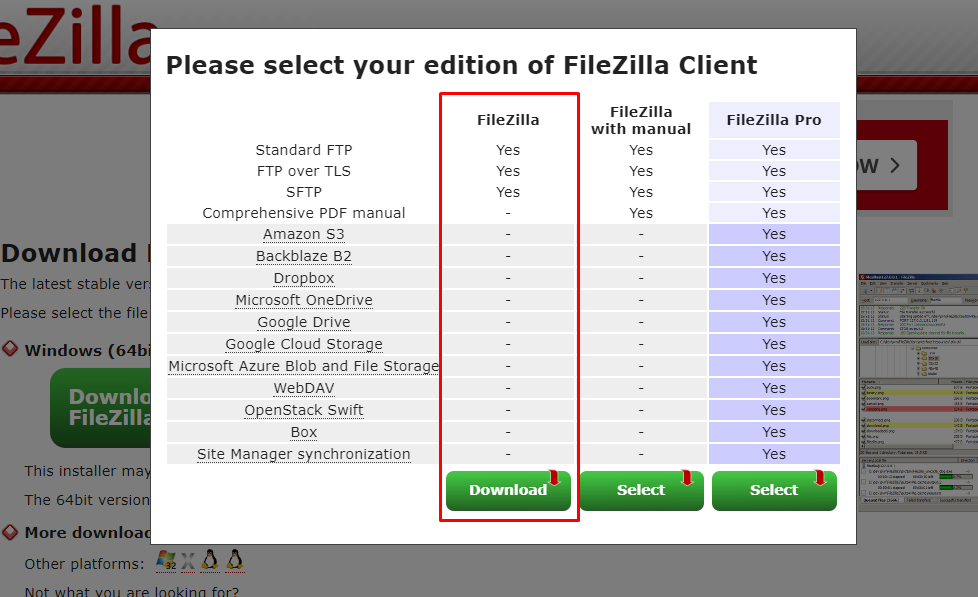
1. Download any FTP client on your computer like "FileZilla". Search on Google by "FileZilla" or go to their website to download:
https://filezilla-project.org/
2. Use the first option to download
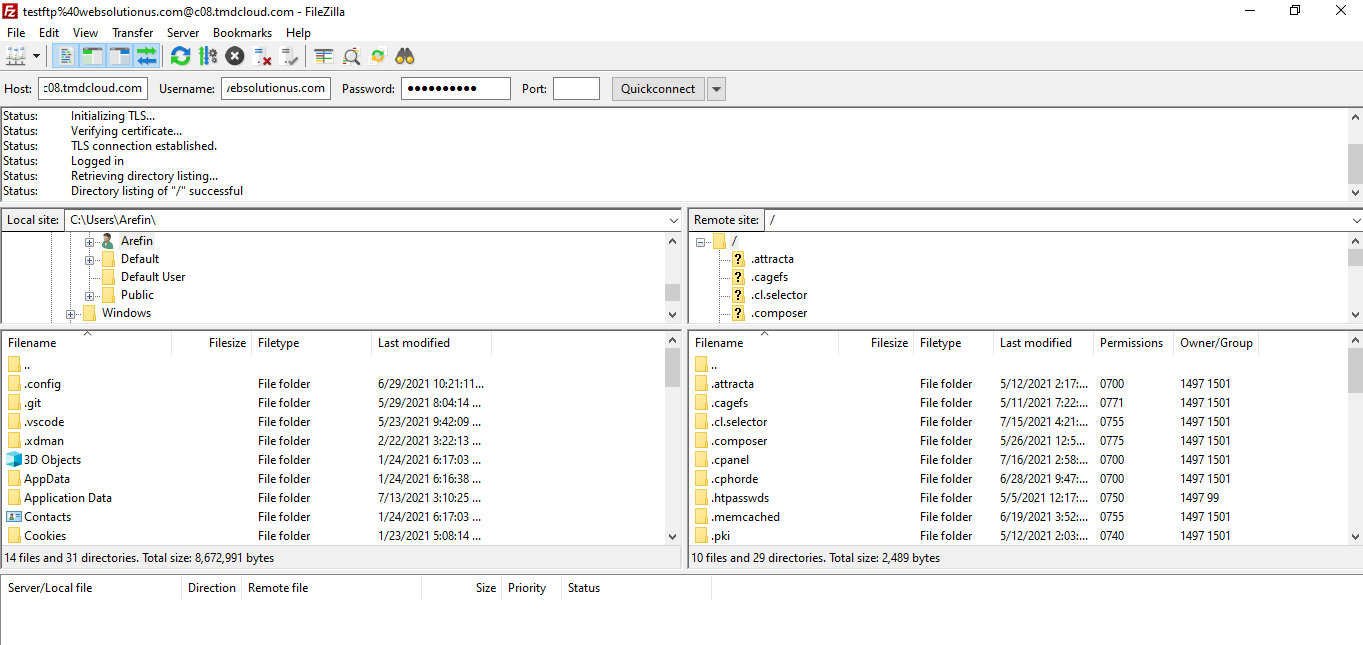
3. After download, install it and open. The interface will be like this:

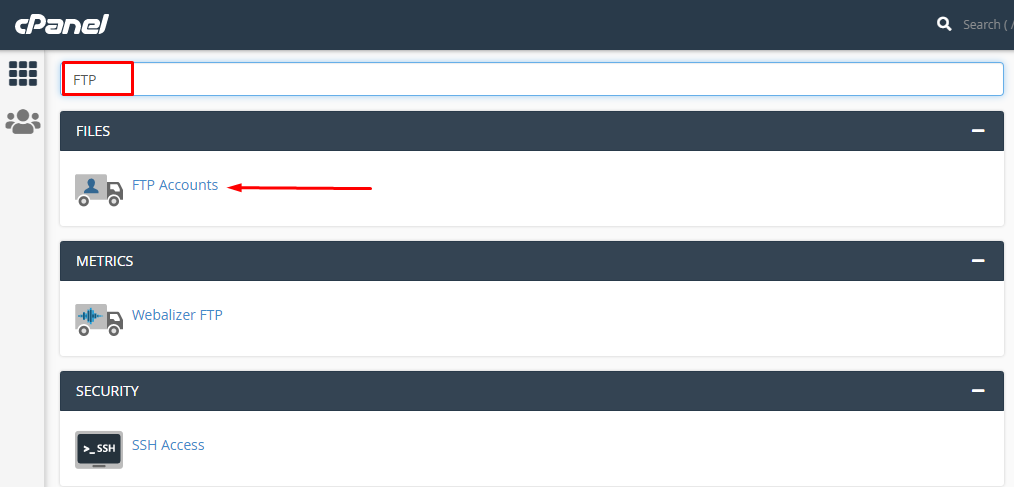
4. You can collect your FTP information contacting your hosting provider. Or, going to cpanel, you can create your FTP. In cpanel, search for "FTP".
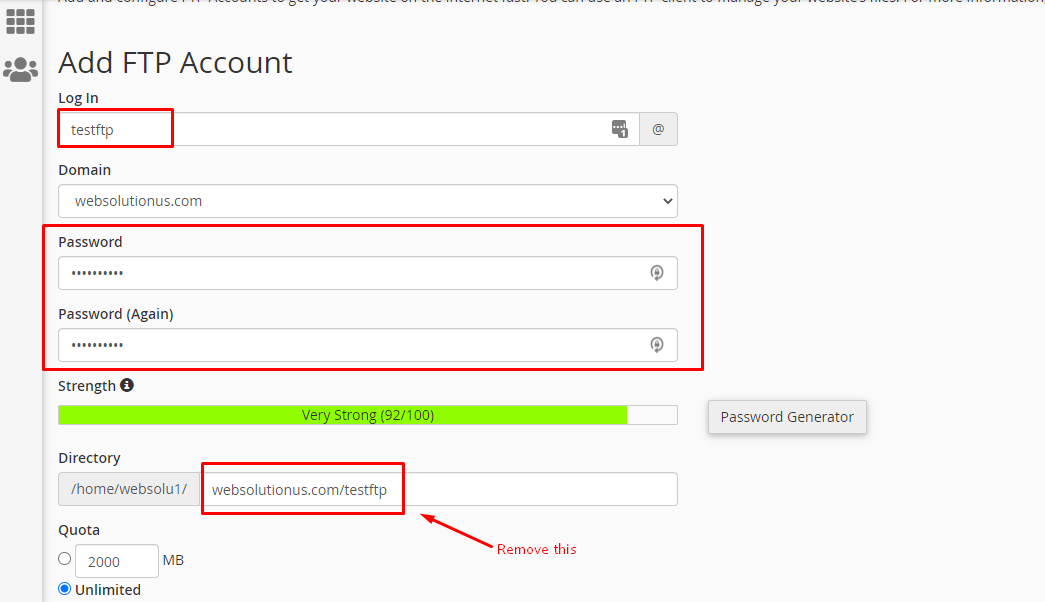
5. Put ftp username, password in the form. Become sure, you delete the marked box data in the following image.
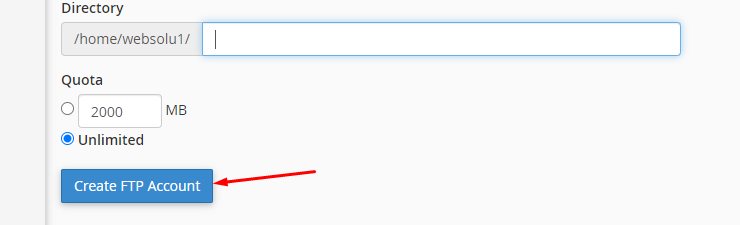
6. Click on "Create FTP Account" button.
7. Your FTP information will be like this:
FTP Host: {your hosting provider will give you host name}
FTP Port: 21
FTP Username: testftp@quomodotheme.com
FTP Password: {that you gave while creating the FTP}
8. Now in filezilla put those information and click on "Quickconnect" button.
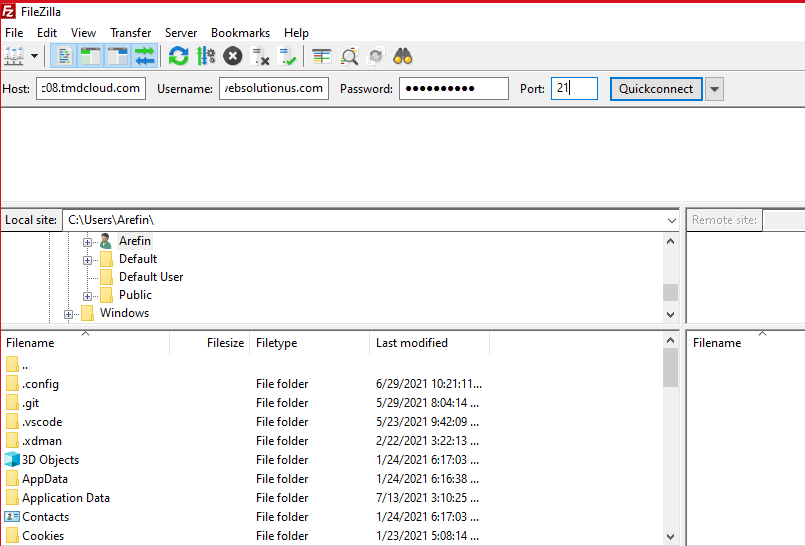
9. If connection is successful, you will get an interface like this:
10. Now in the left side box, go to the location where you have extracted the script's file. And in the right side, go to public_html.
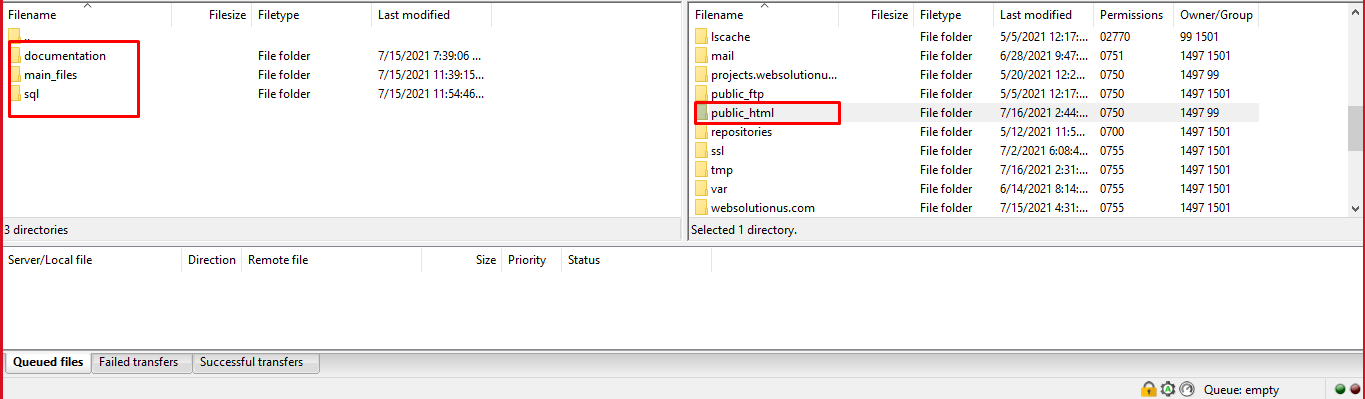
11. Then right click on the "main_files" from left side box and click on "Upload". All the files then will be uploaded into the "public_html" of the right side.

12. Search the ".env" file, right click on it and click on "View/Edit" option.
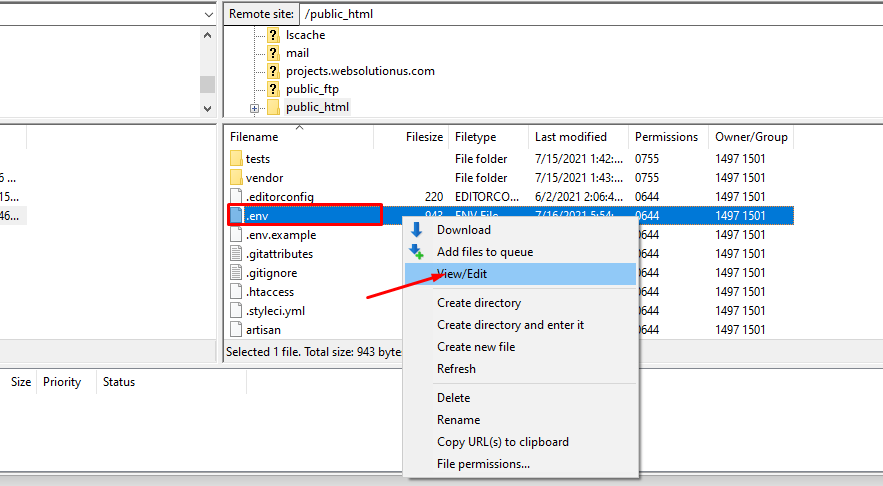
13. You will see an interface like this.
Installation
- Install Node and npm.
- Download and open project.
- Install packages: npm i, npm install or yarn install.
- Edit .env file and set your api base url
-
Example: - Start project locally: npm run dev or yarn dev
- Make necessary changes.
- Build app for production: npm run build or yarn build.
Cpanel shared hosting
-
Step 1:
After completing the installation proccess, proceed to step two.
-
Step 2:
If your application run local server without any issues then run command npm run build or yarn build
-
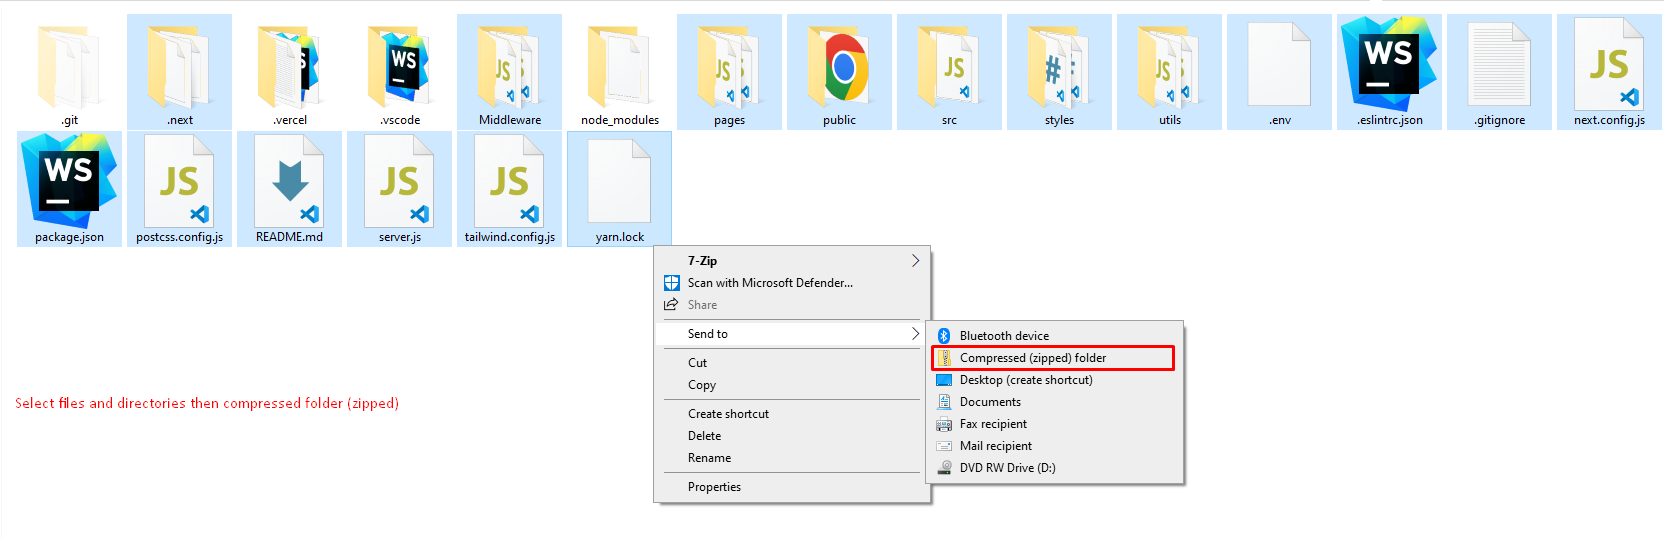
Step 3:
Select files and directories then Compressed zipped
-
Step 4:
Upload zip file in your application server then extract application root directory
-
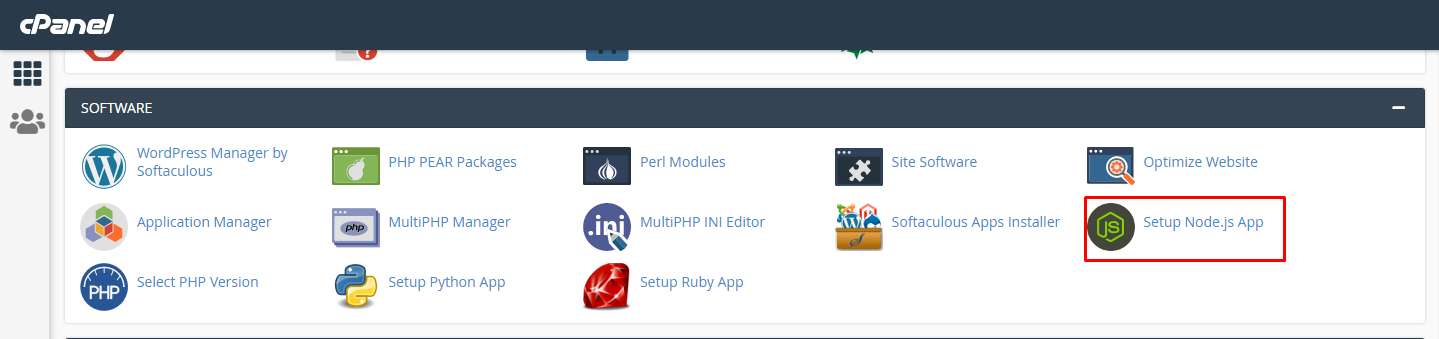
Step 5:
Setup nodejs application in your server panel
-
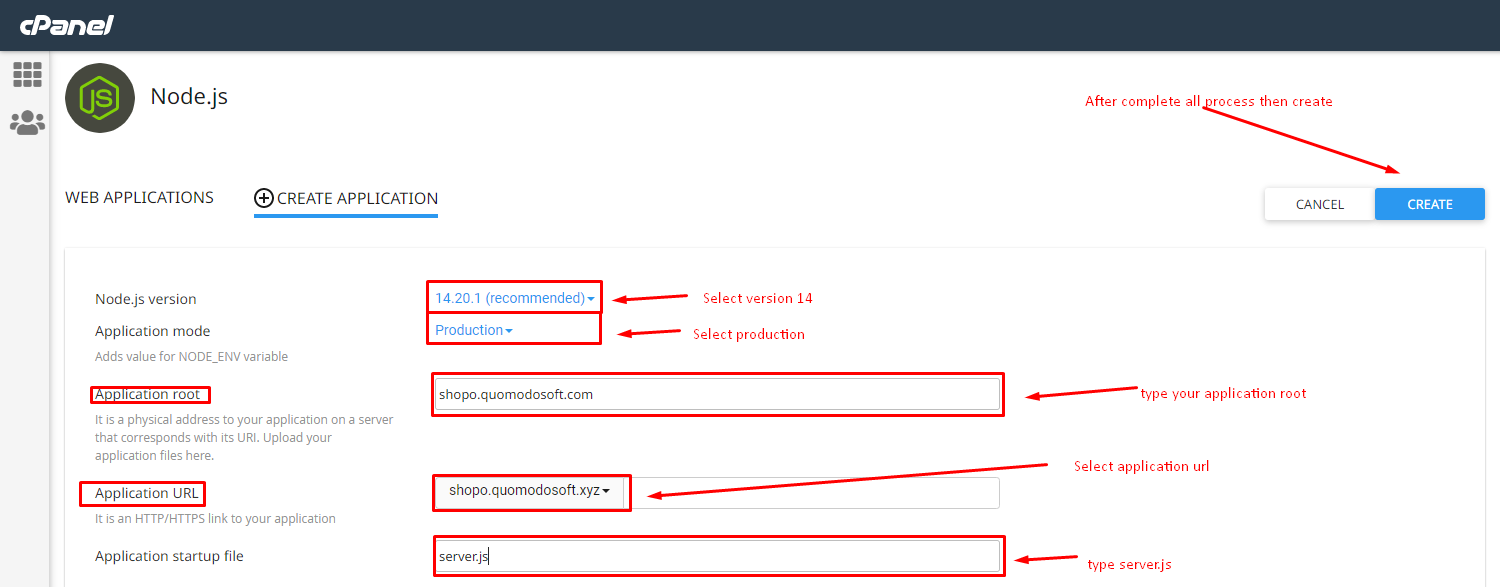
Step 6:
Create Nodejs app

-
Step 7:
Please follow the instructions below
-
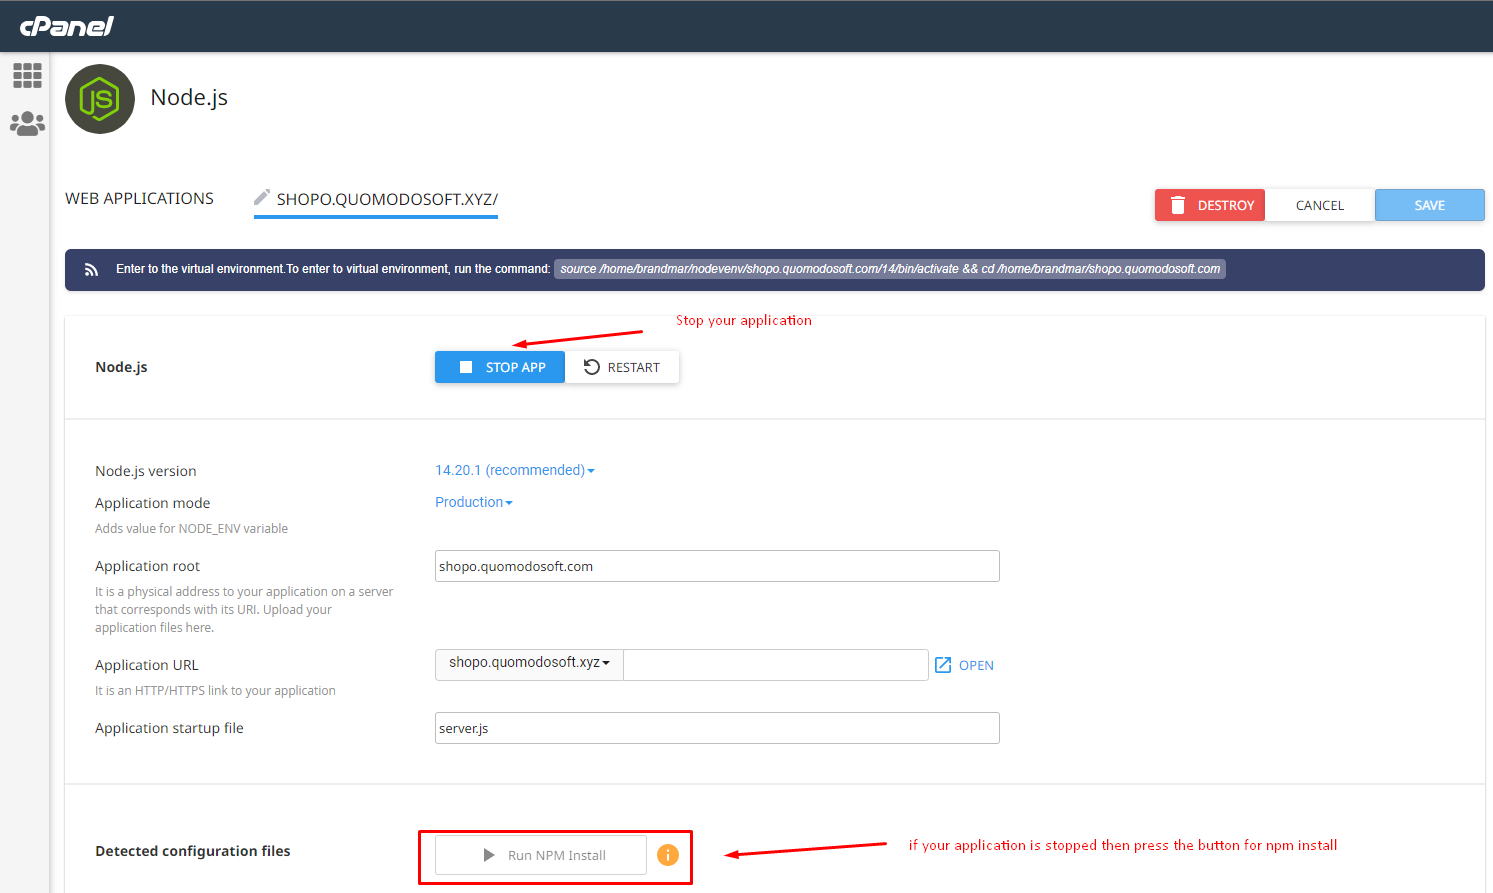
Step 8:
Firstly, stop your application then press run npm install button for package installation
-
Step 9:
When successfully npm install then press Start app button and go to your side and enjoy :)
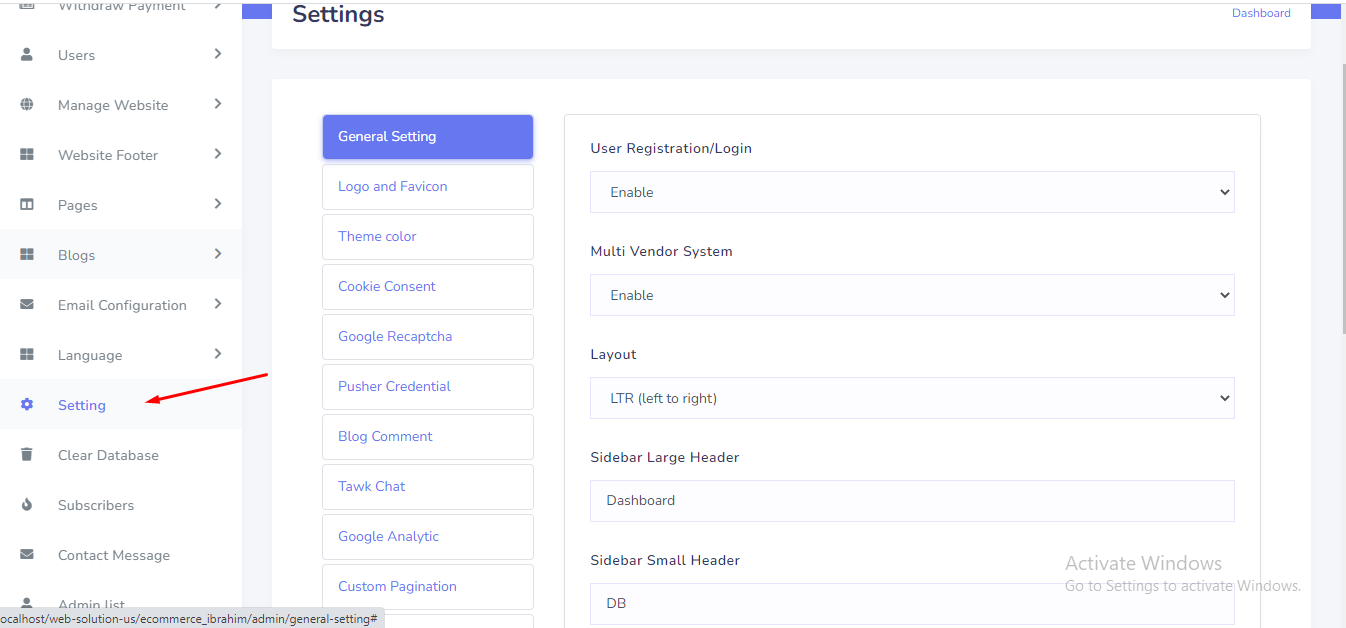
General Settings
Website General Setting can be set up from the admin panel. Go to "Setting" from the sidebar. See:
Logo and Favicon
Logo and favicon can be set up from the admin panel. Go to "Setting" from the sidebar. See:
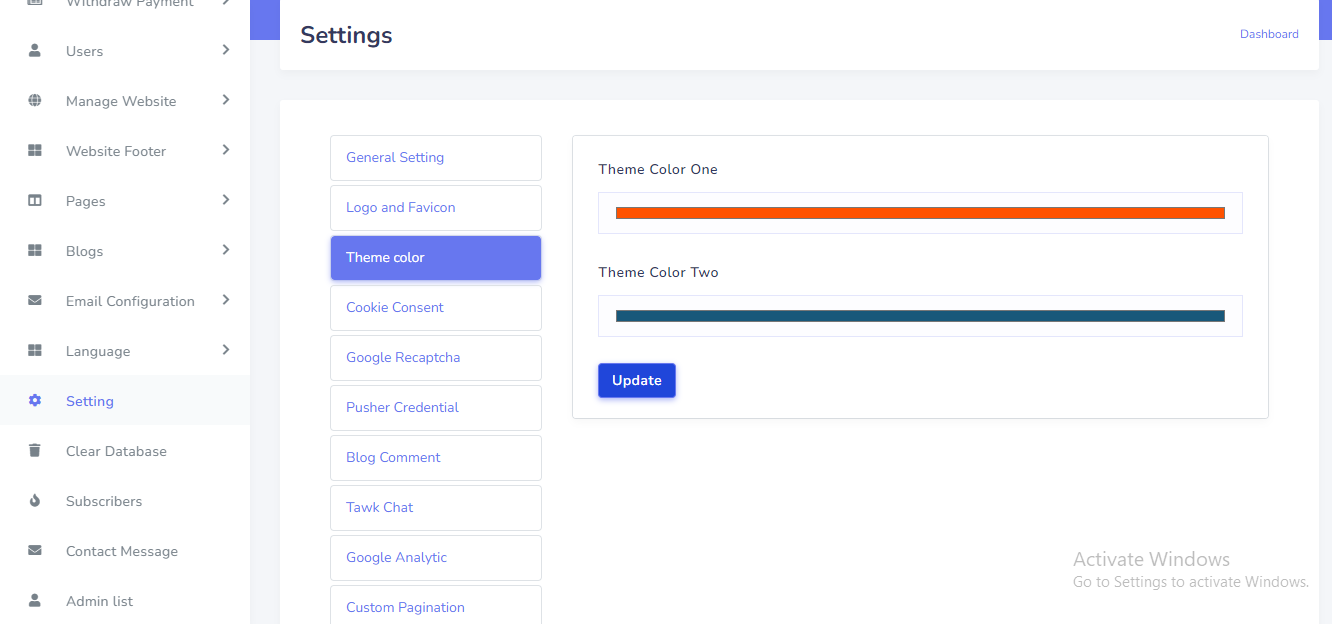
Theme Color
Theme color can be set up from the admin panel. Go to "Setting" from the sidebar. See:
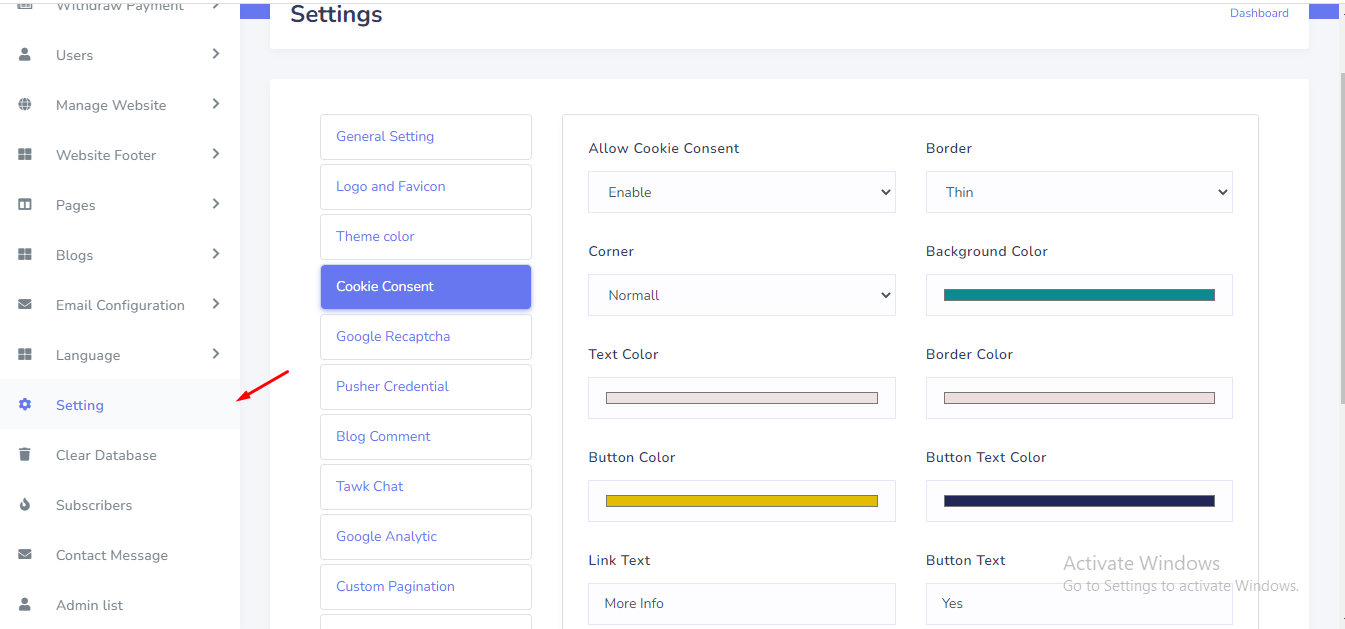
Cookie Consent
Cookie consent can be set up from the admin panel. Go to "Setting" from the sidebar. See:
Google Recaptcha
Google Recaptcha can be set up from the admin panel. Go to "Setting" from the sidebar. See:
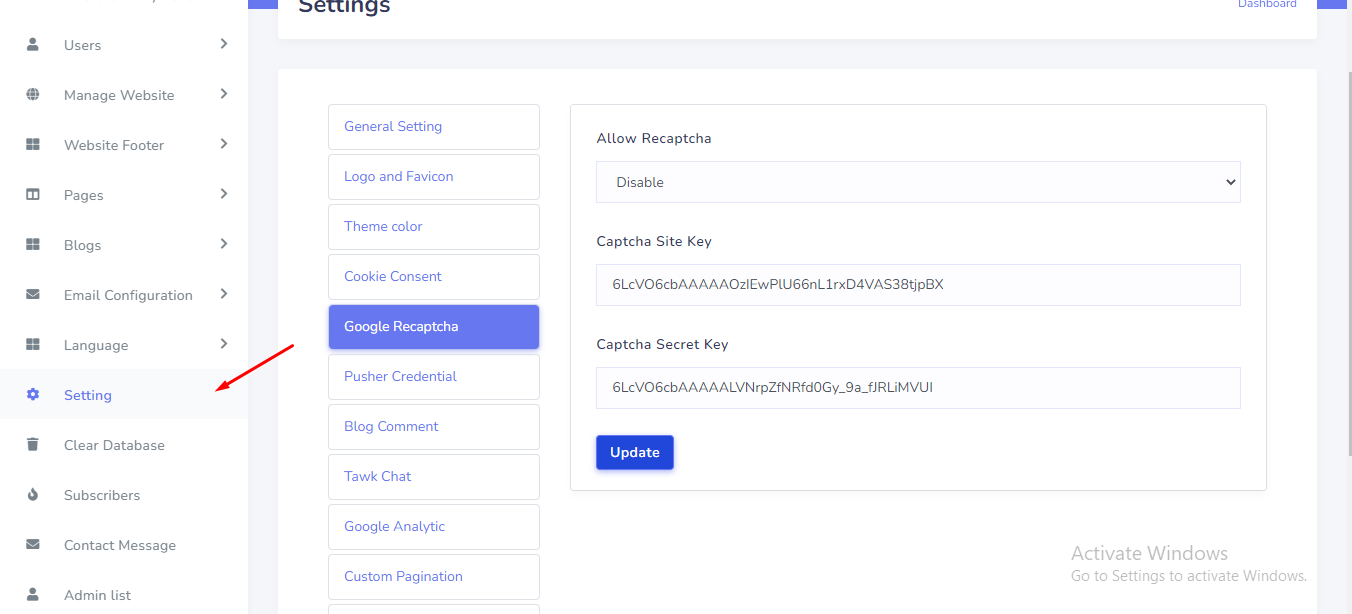
To get your recaptcha keys, go to this link:
https://www.google.com/recaptcha/admin/create
Select version 2.
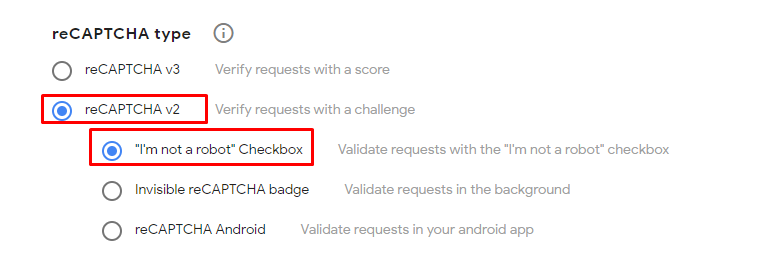
Add your website's domain name or subdomain name here and after submit you will get a site key and secret key.
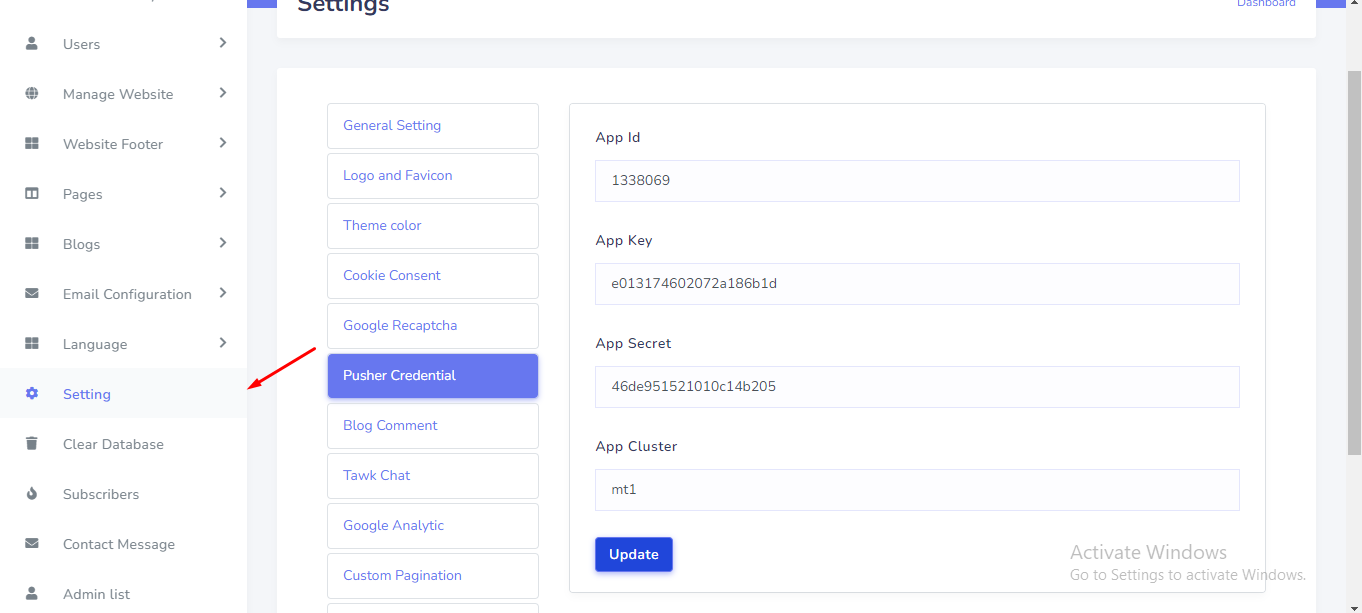
Pusher Credential
In this system need to pusher credentials for real time message between customer and seller. To get your pusher credentials, go to this link and sign in:
https://dashboard.pusher.com/
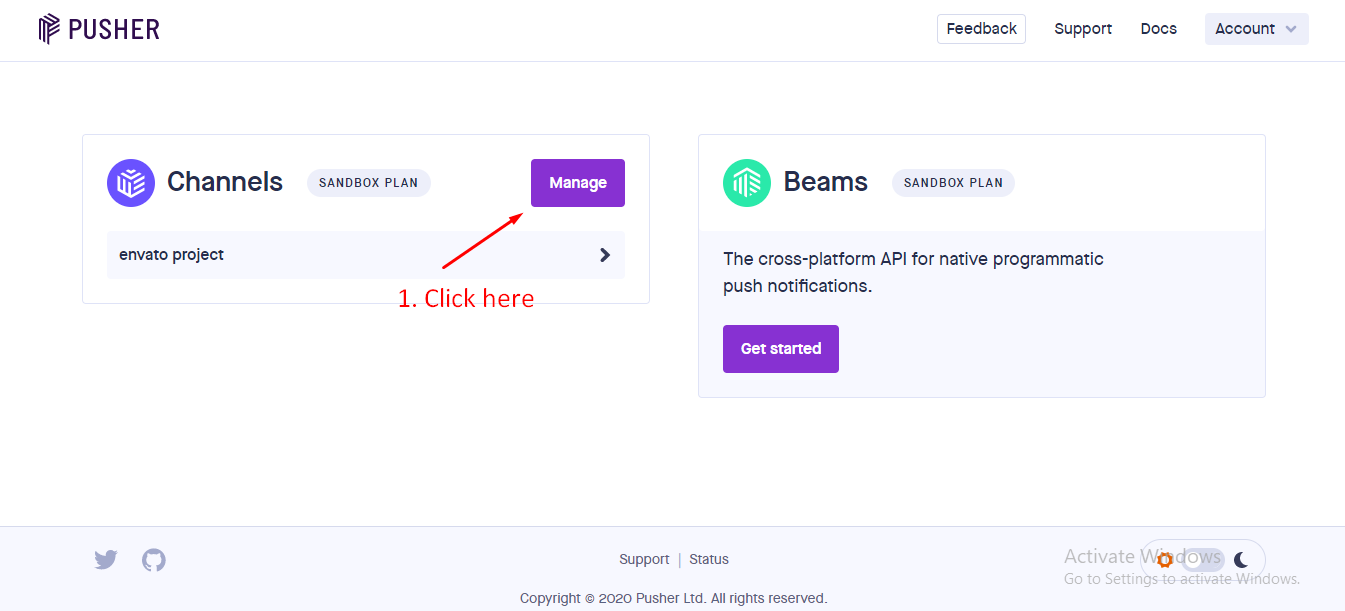
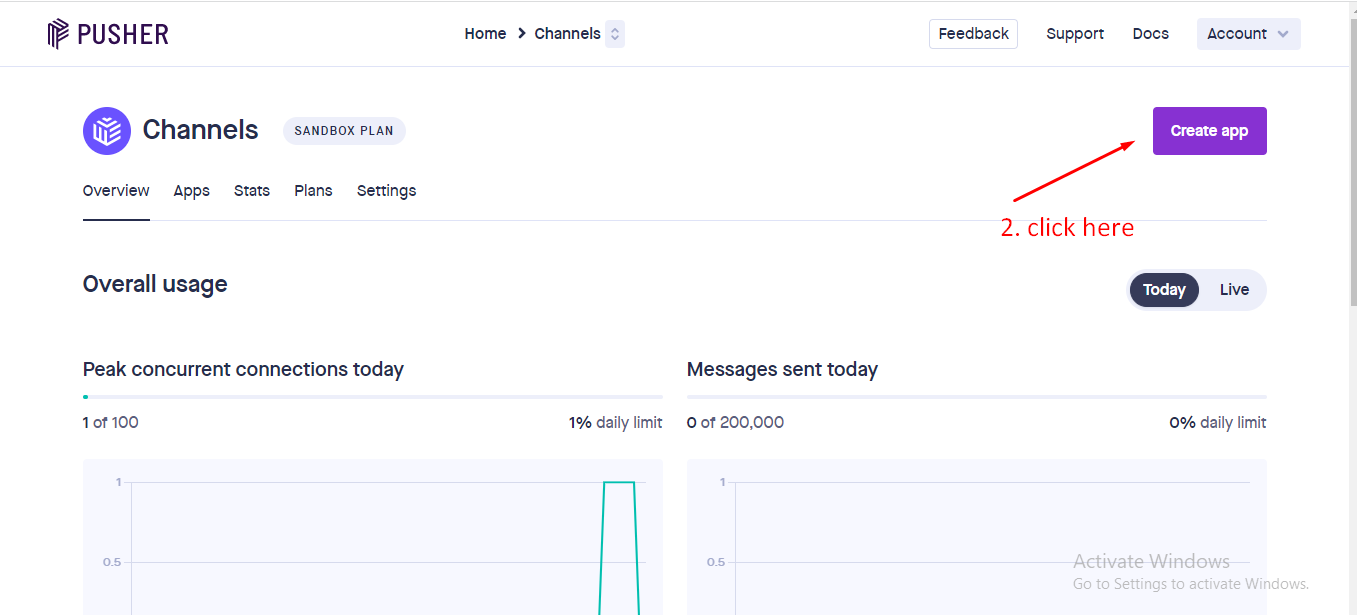
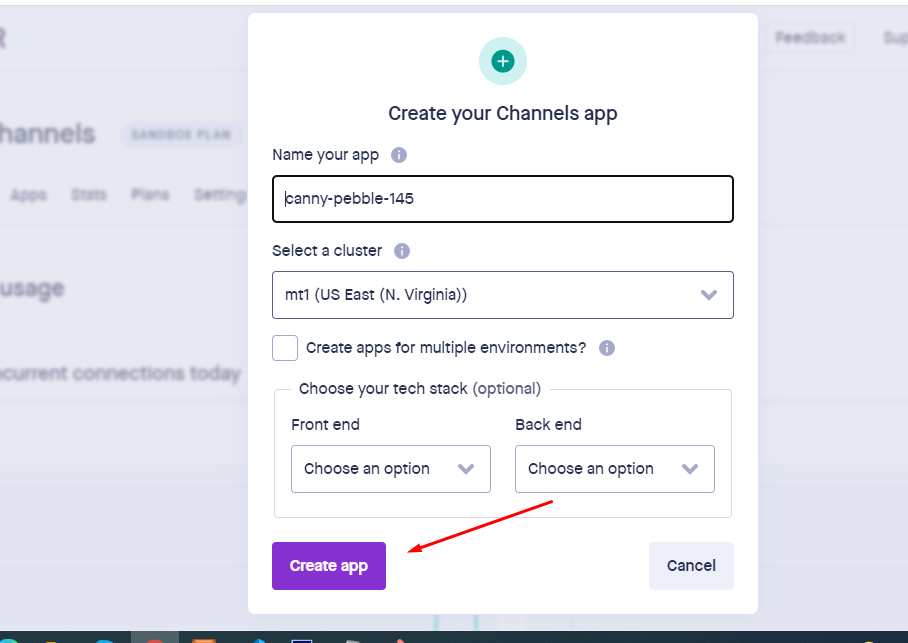
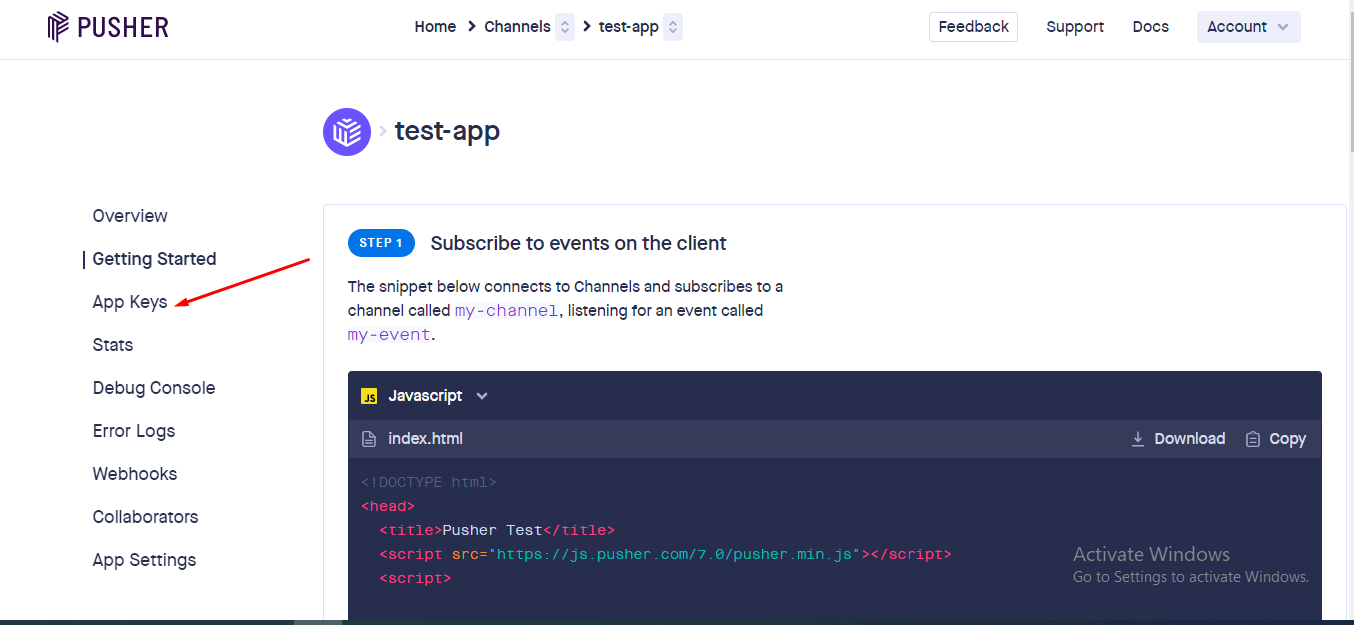
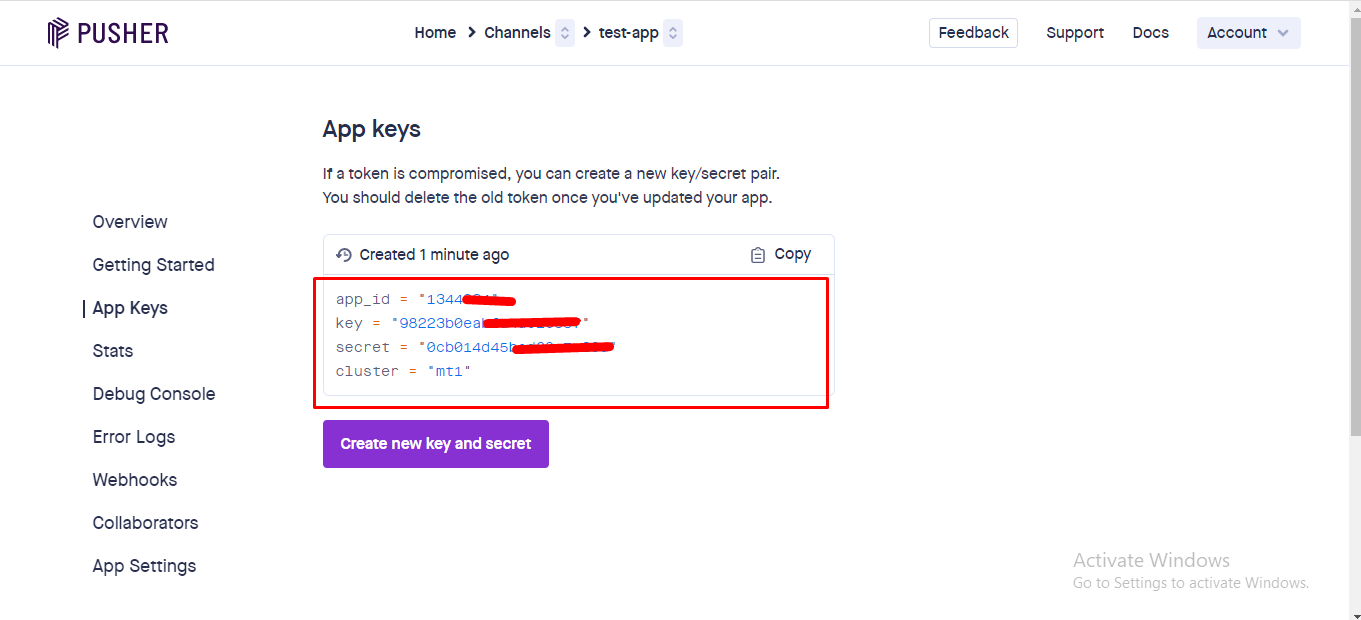
Pusher Credential can be set up from the admin panel. Go to "Setting" from the sidebar. See:
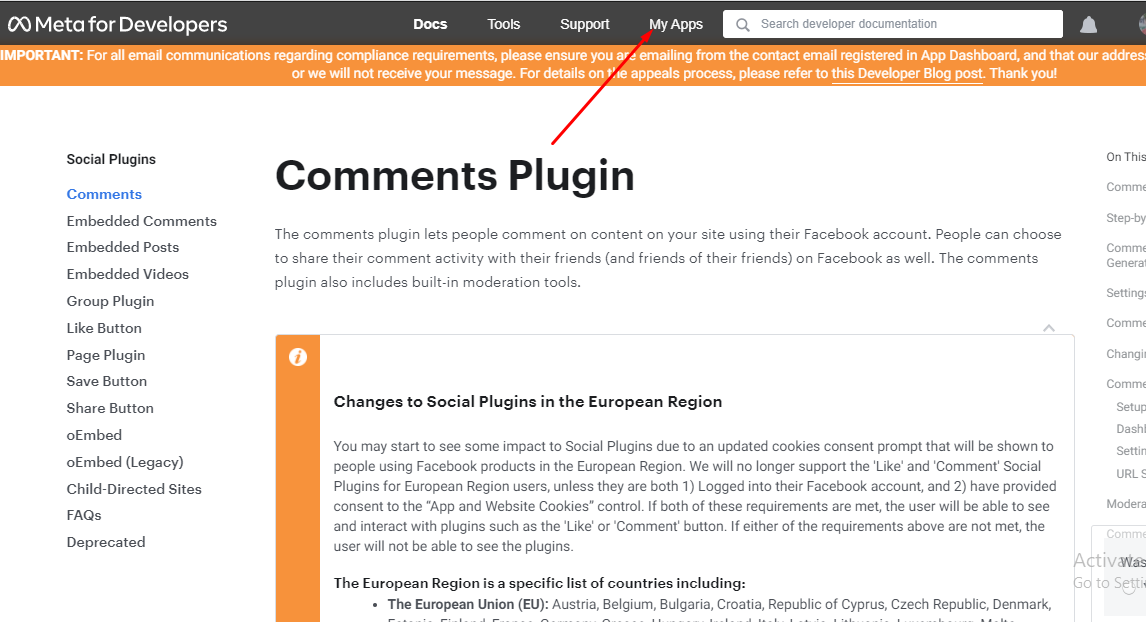
Blog Comment
Blog comment can be set up from the admin panel. Go to "Setting" from the sidebar. See:
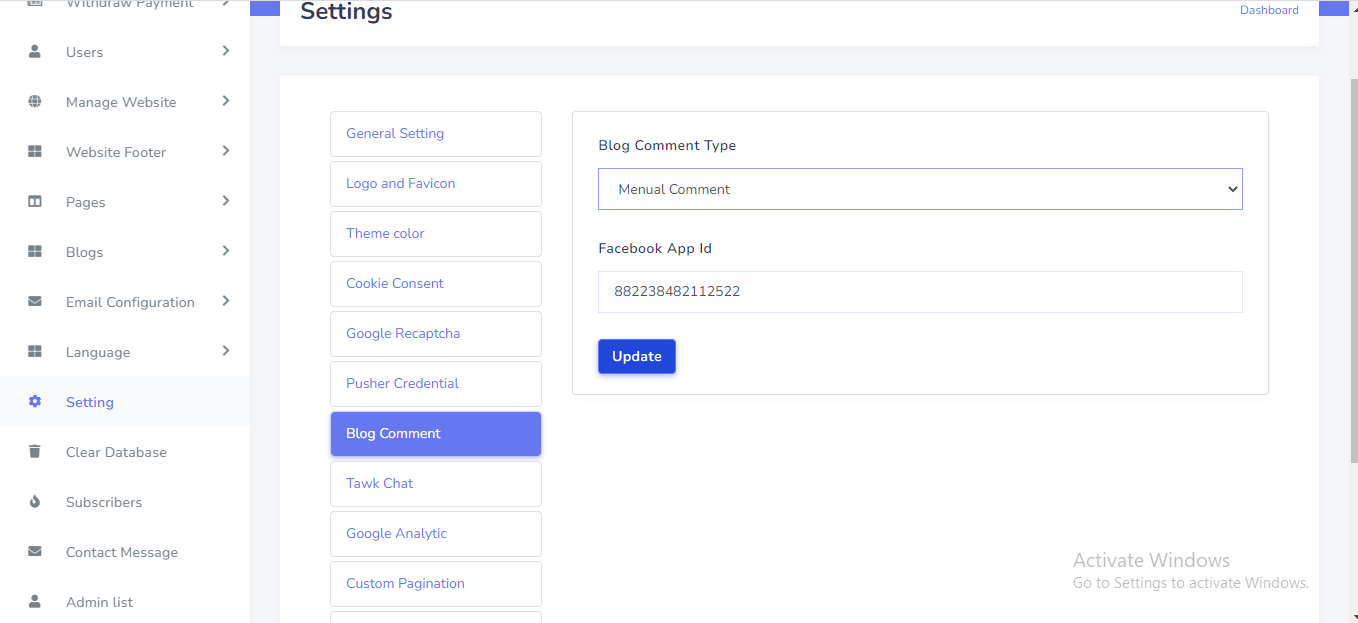
To get your facebook app id. go to this link :
https://developers.facebook.com/docs/plugins/comments
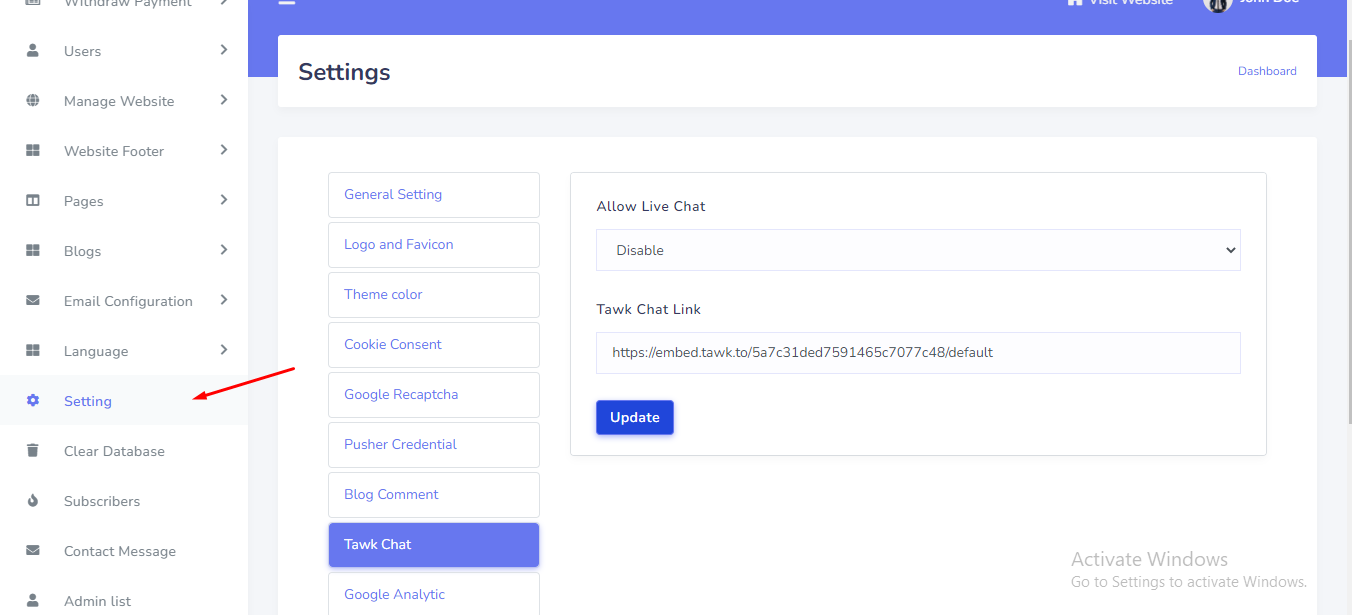
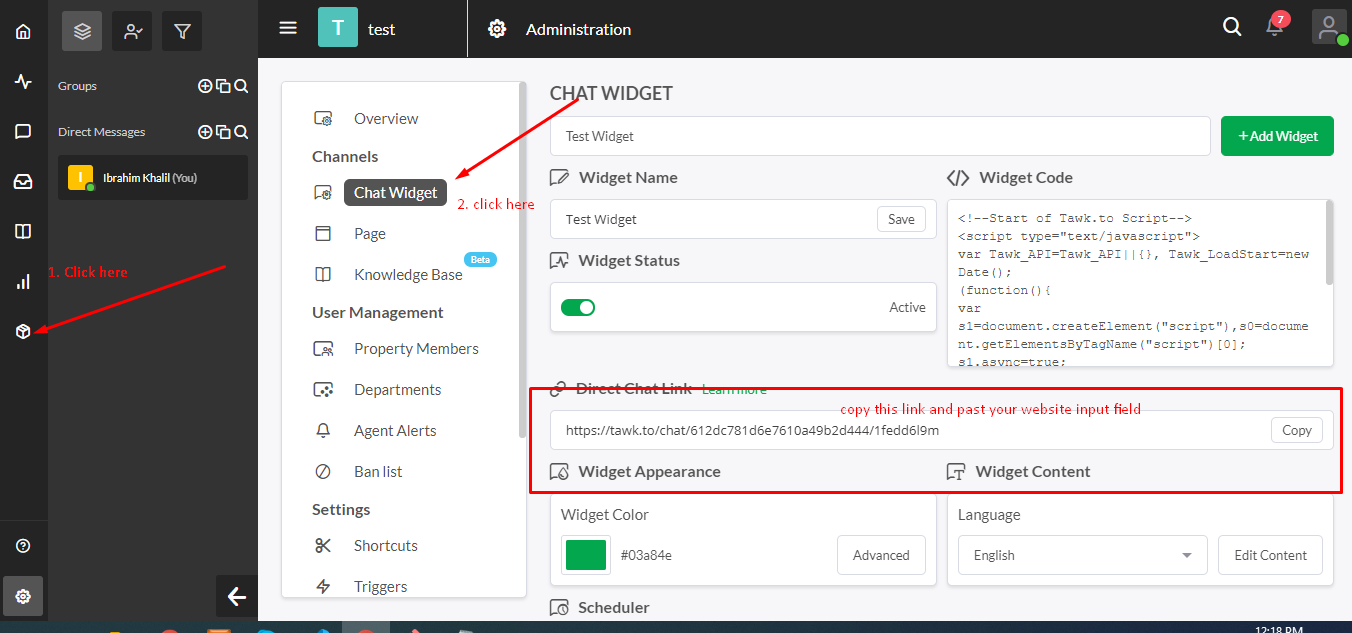
Tawk Live Chat
Tawk Live Chat can be set up from the admin panel. Go to "Setting" from sidebar. See:
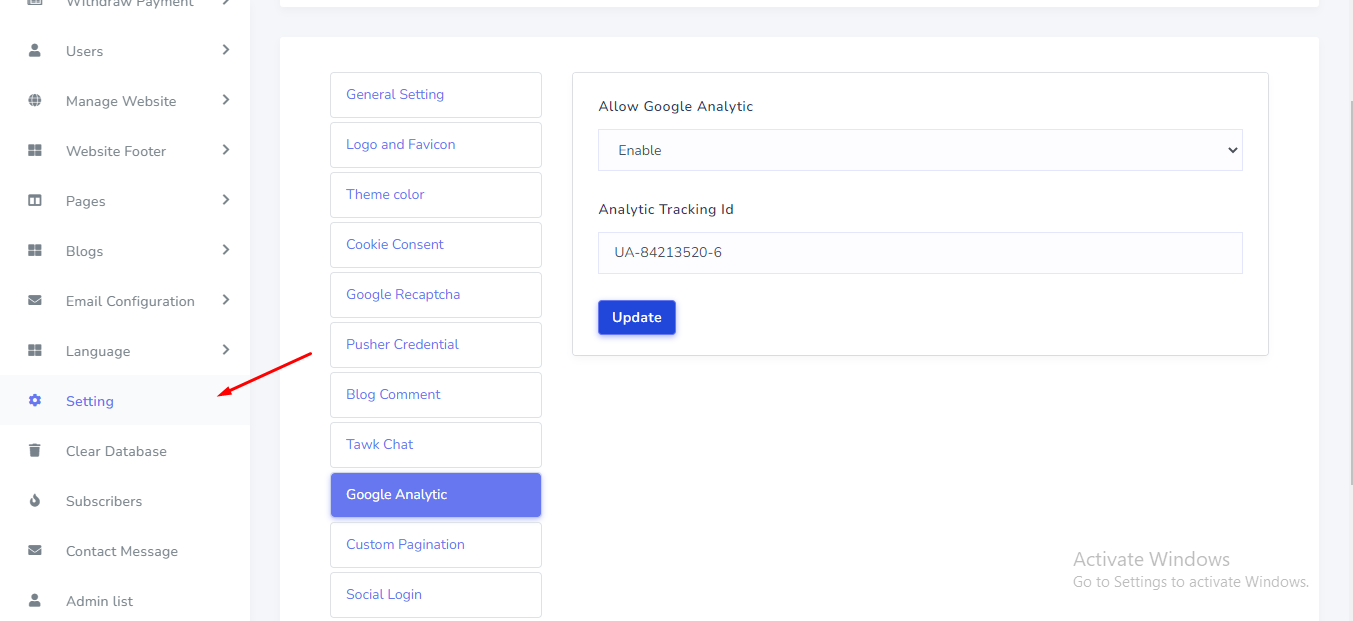
Google Analytic Settings
Google Analytic can be set up from the admin panel. Go to "Setting" from sidebar. See:
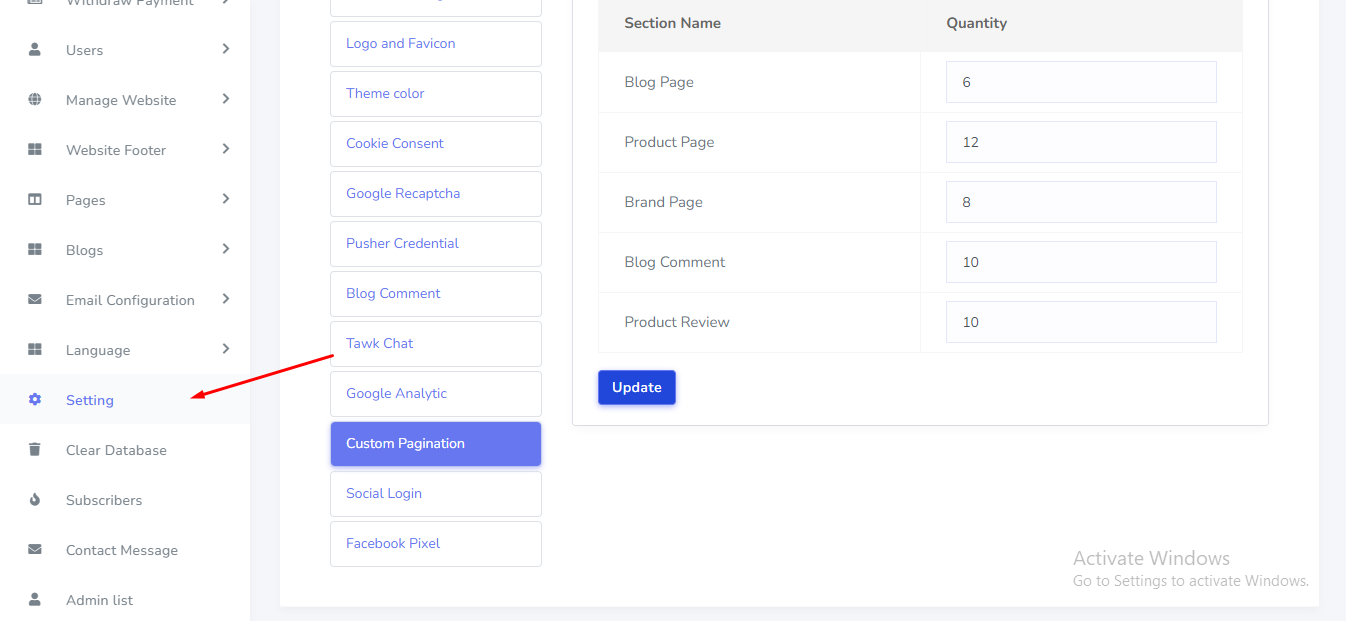
Custom Pagination
Custom Pagination can be set up from the admin panel. Go to "Setting" from sidebar. See:
Facebook pixel
Facebook pixel credential can be set up from the admin panel. Go to "Setting" from sidebar. See:
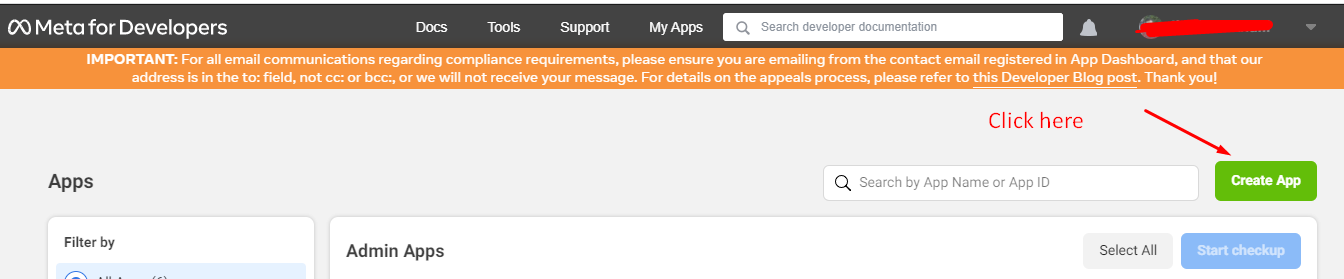
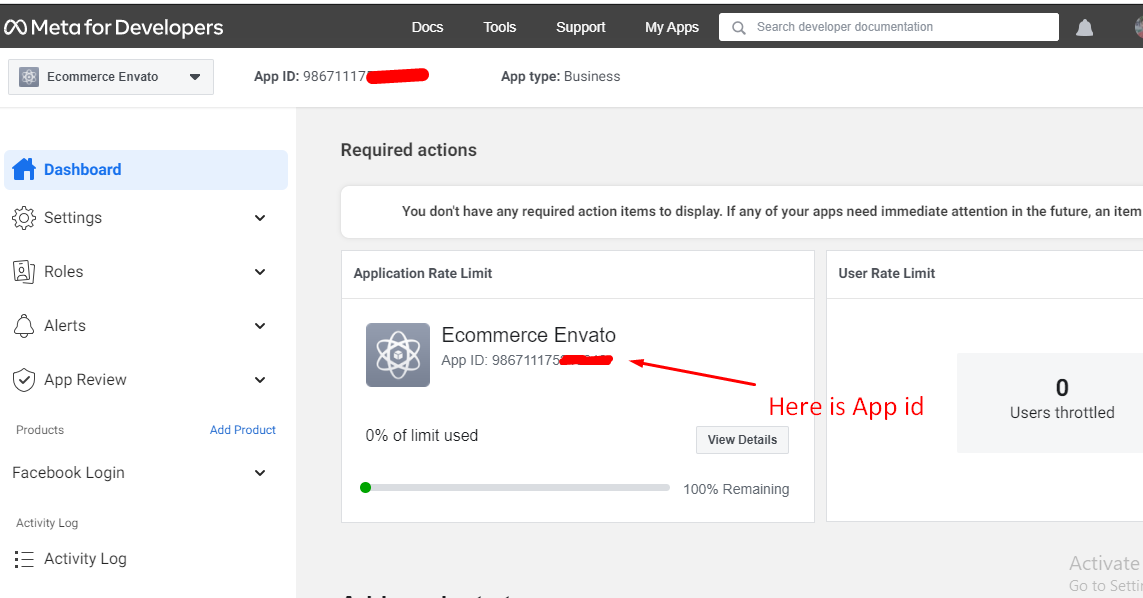
To get your facebook app id. Go to this link and create a new app:
https://developers.facebook.com/
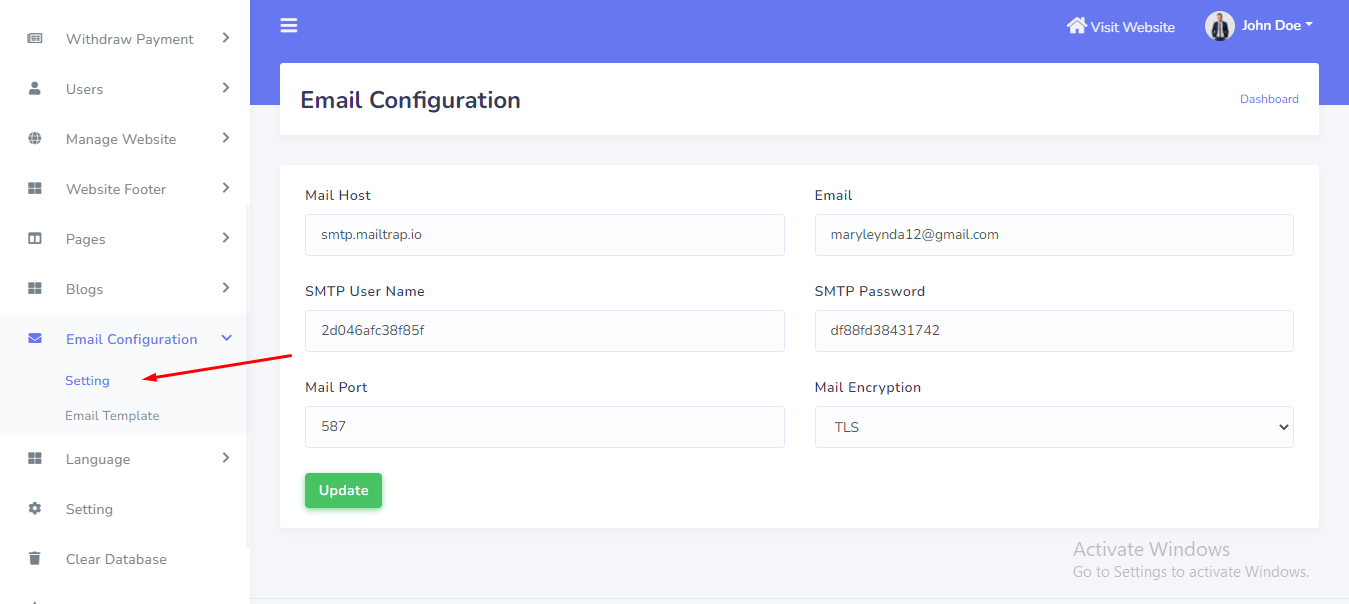
Email Setup
SMTP Email can be set up from the admin panel. Go to "Emai configuration > Setting". See:
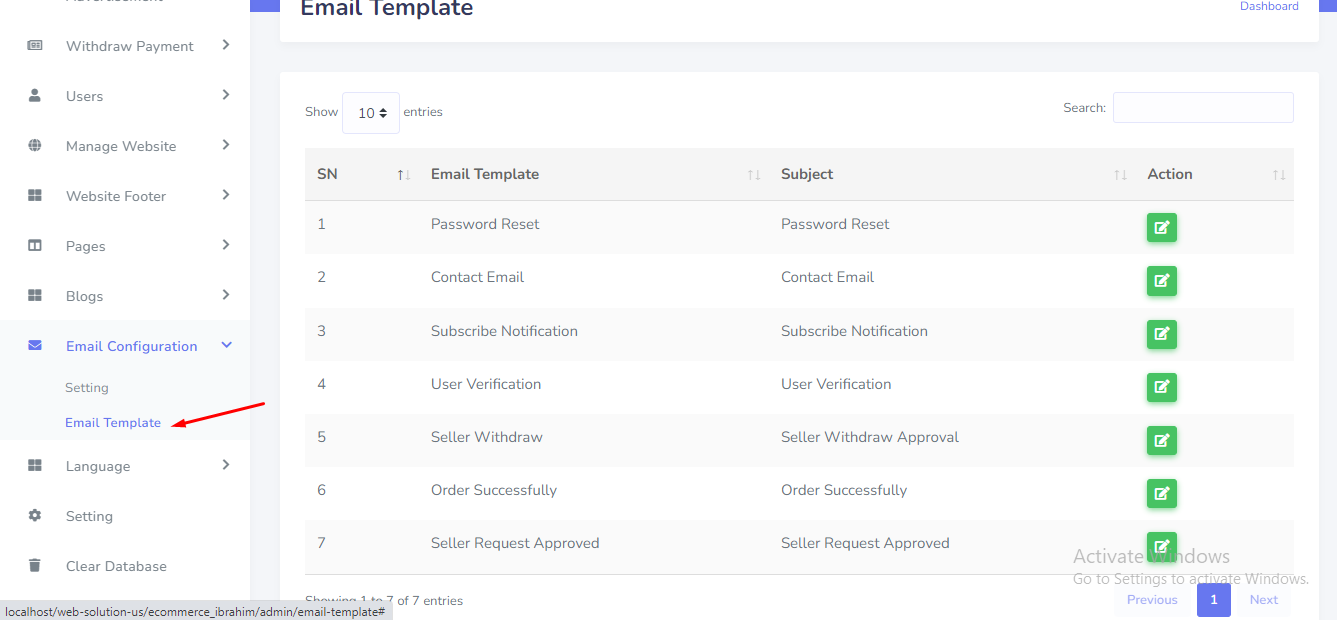
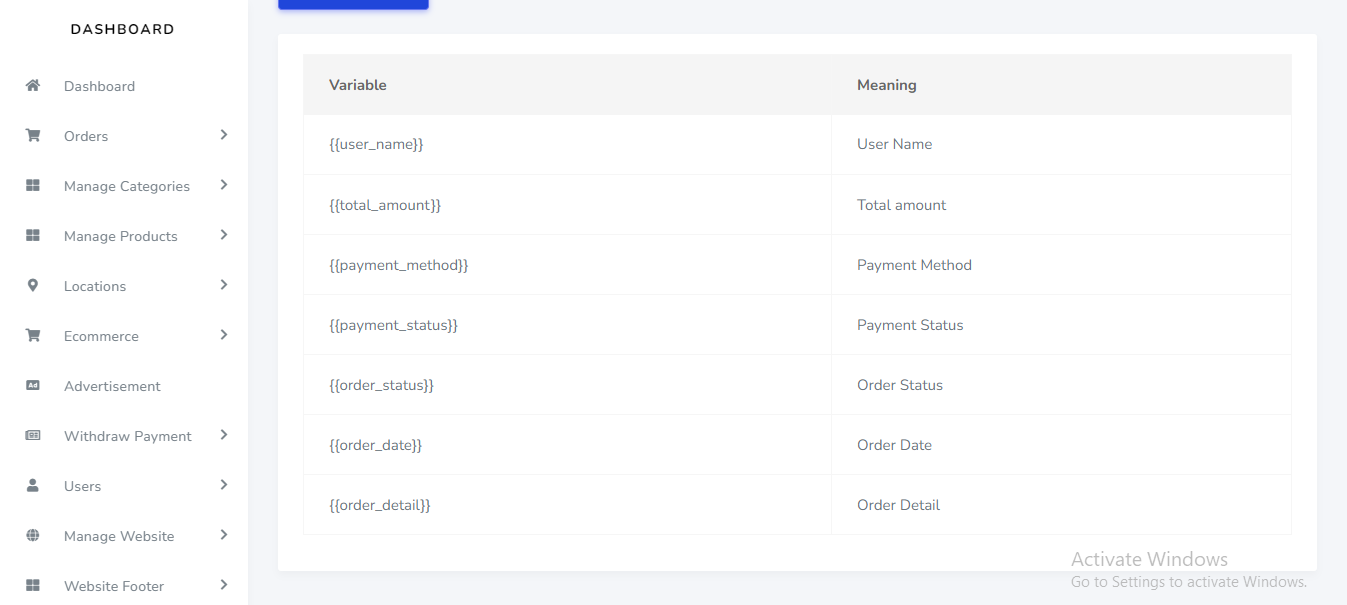
Email template
Email template can be set up from the admin panel. Go to "Emai configuration > email template". See:

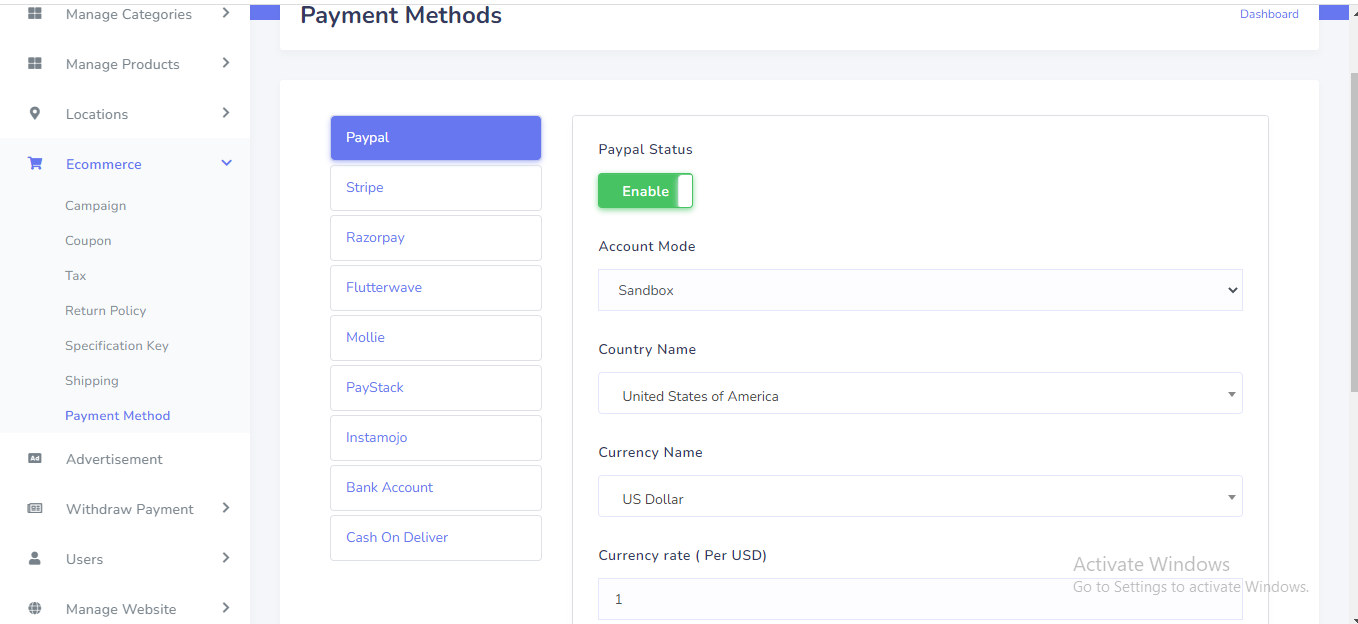
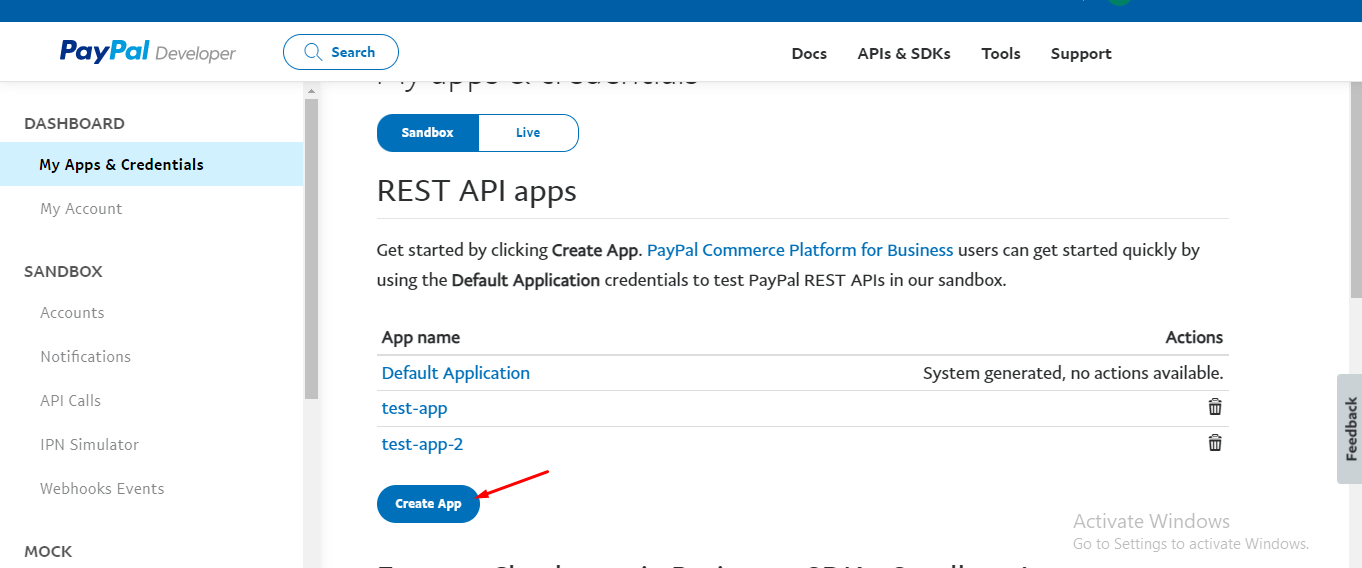
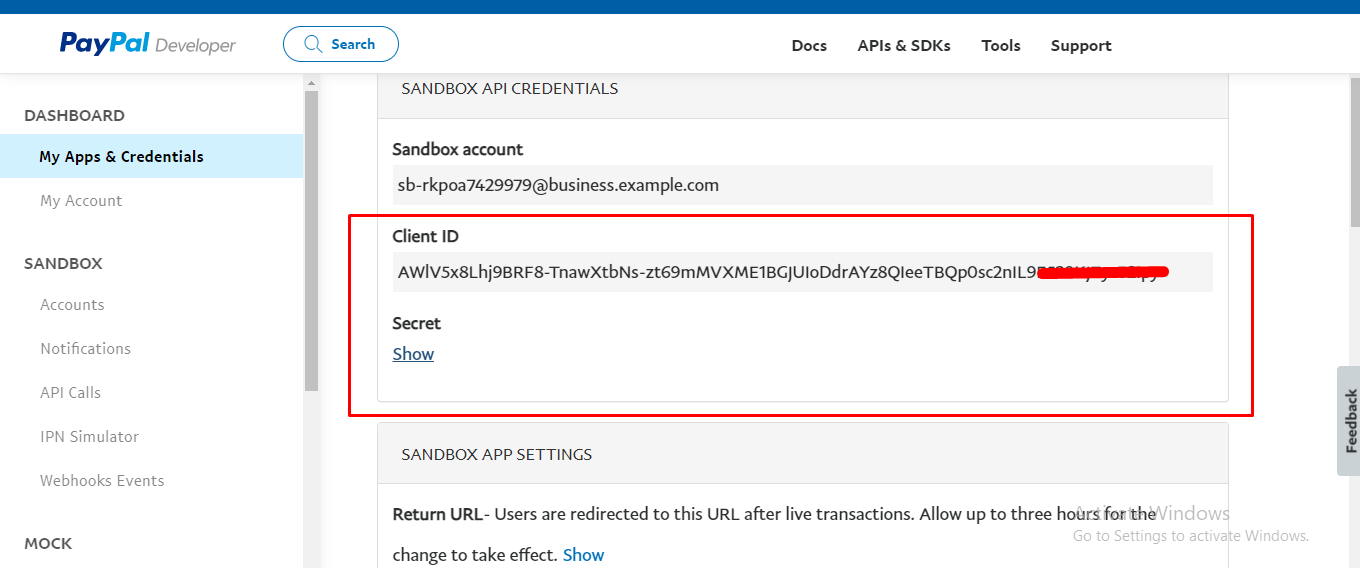
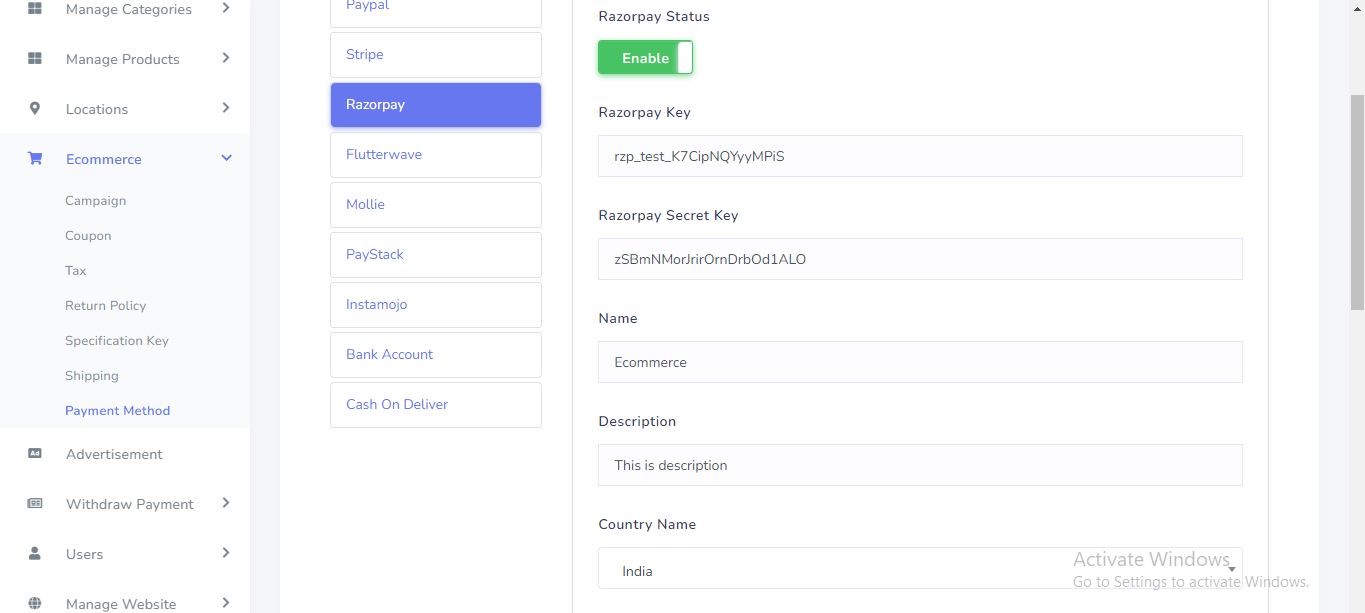
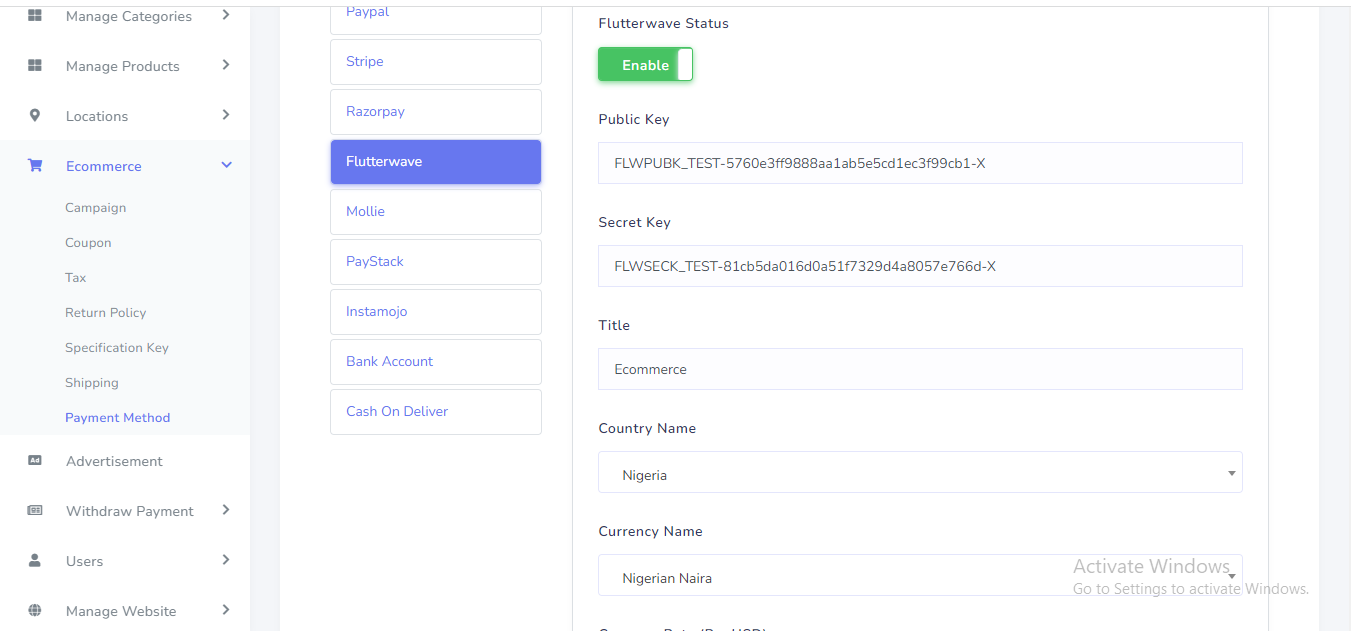
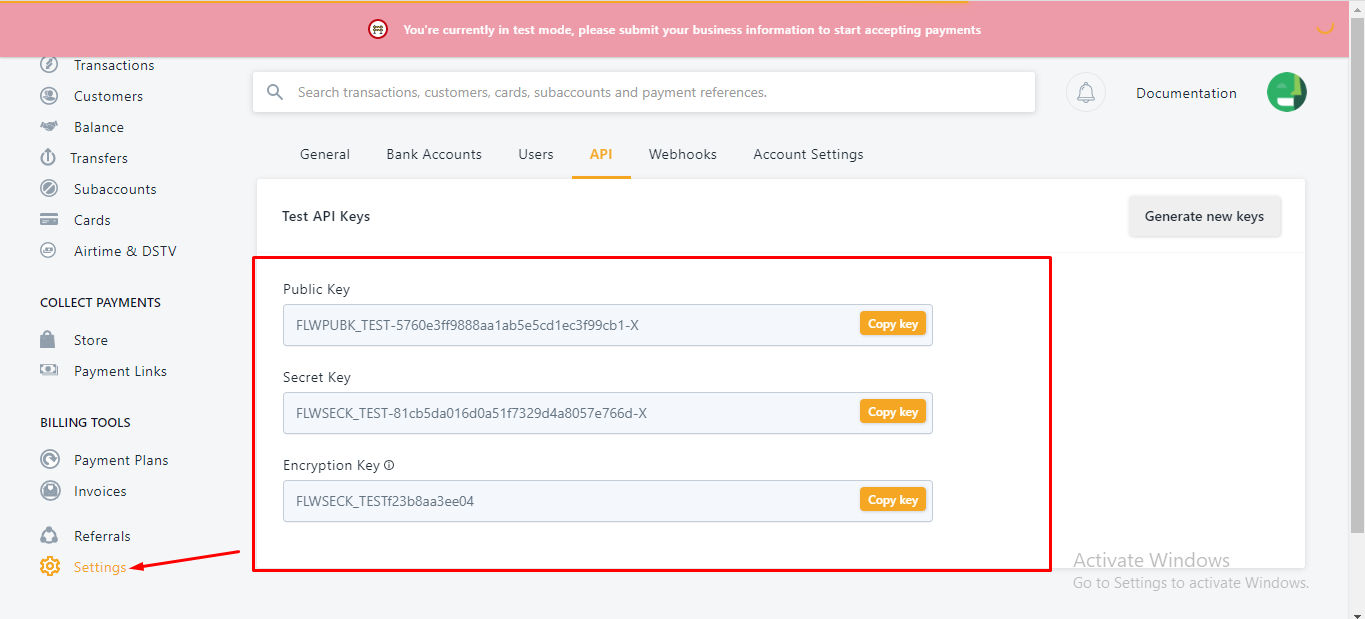
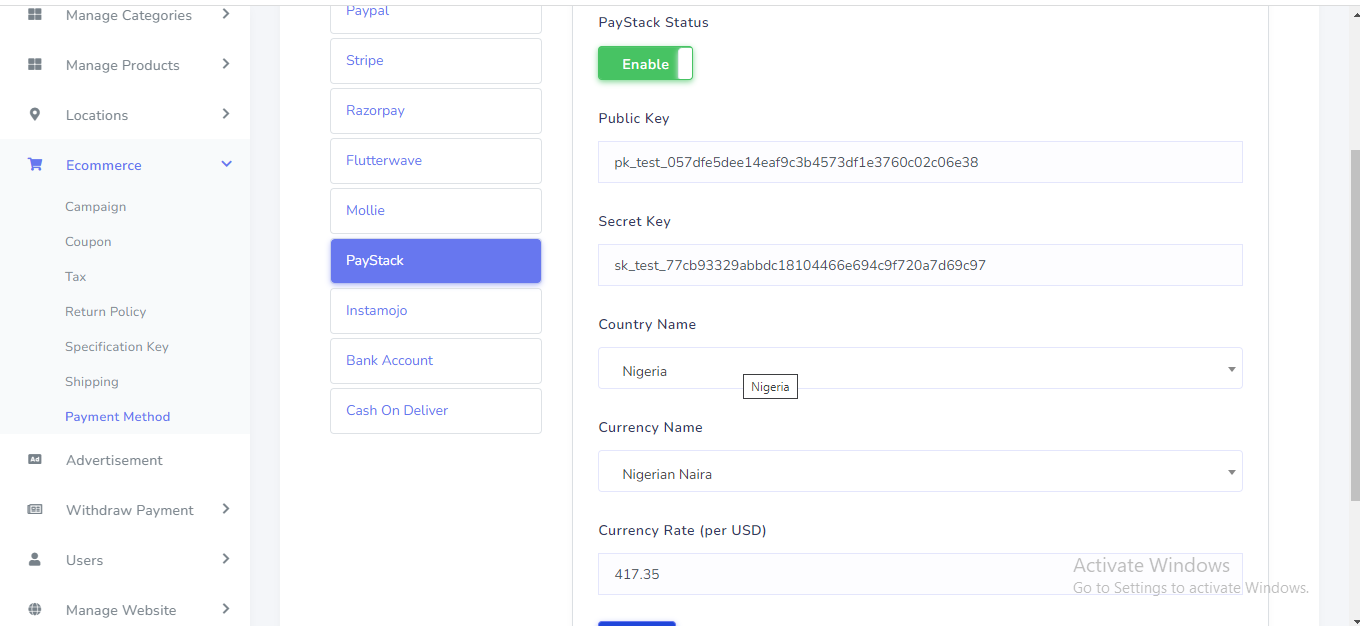
Payment Method
Payment Method can be set up from the admin panel. Go to "Ecommerce > Payment methods". See:

Clear Database Settings
Clear Database setting can be manage from the admin panel. Go to "Clear database" from sidebar. If you want to use the software from scratch, you have to select this option. You do not need to remove the existing data one by one. See:
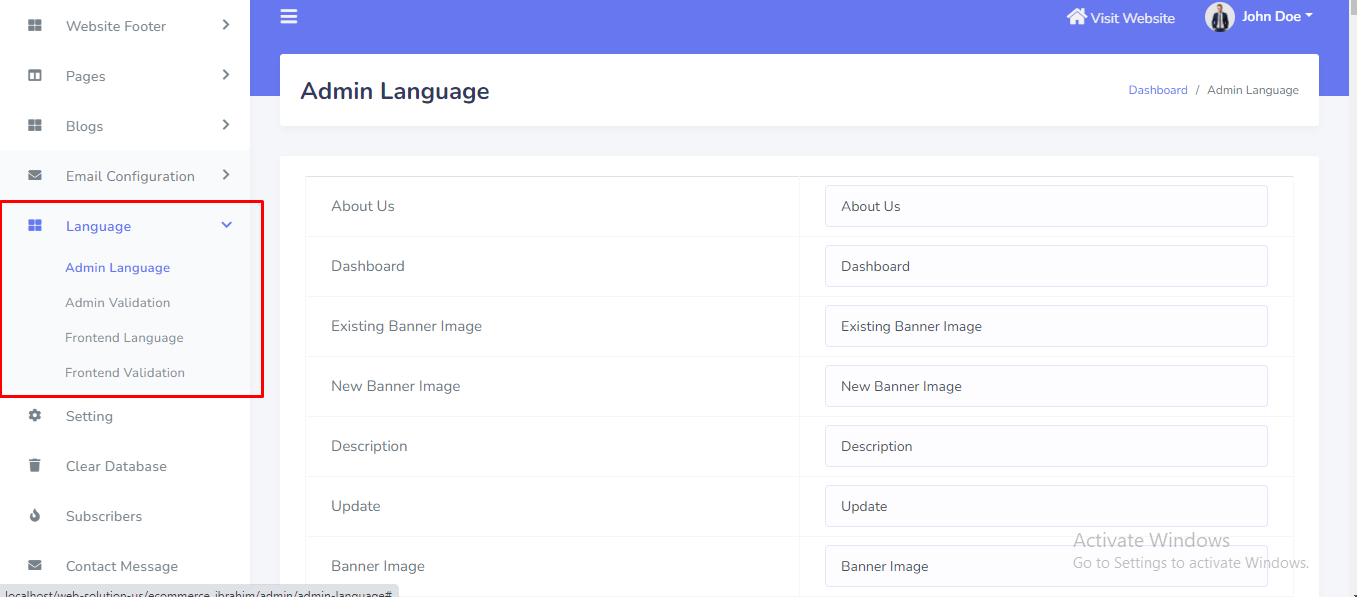
Website Language
Website language can be set up from the admin panel. Go to "Language >>...." from sidebar. See:
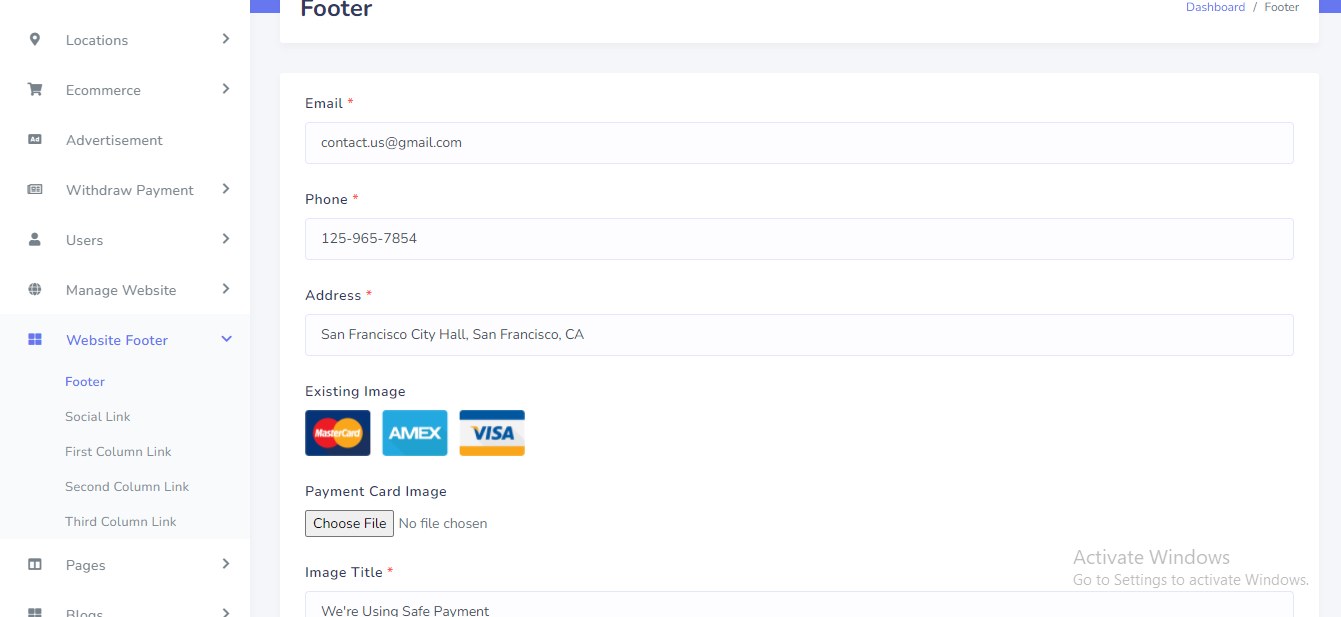
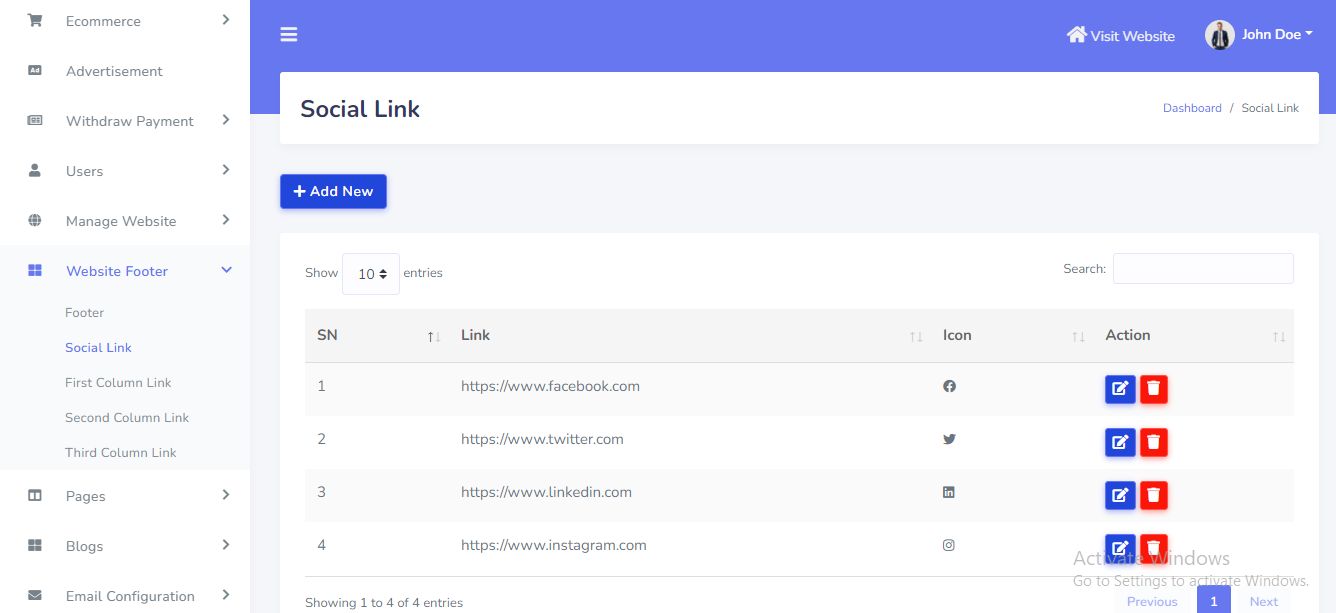
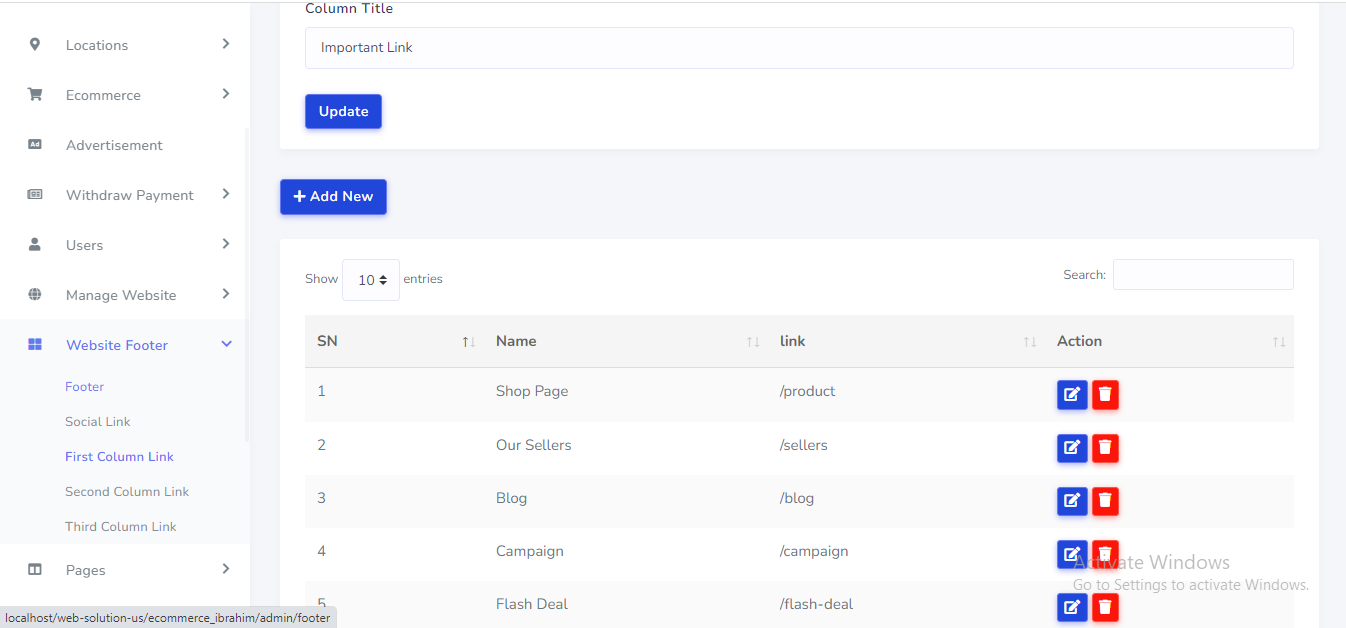
Website Footer
Website Footer can be set up from the admin panel. Go to "Website Footer >>...." from sidebar. See:
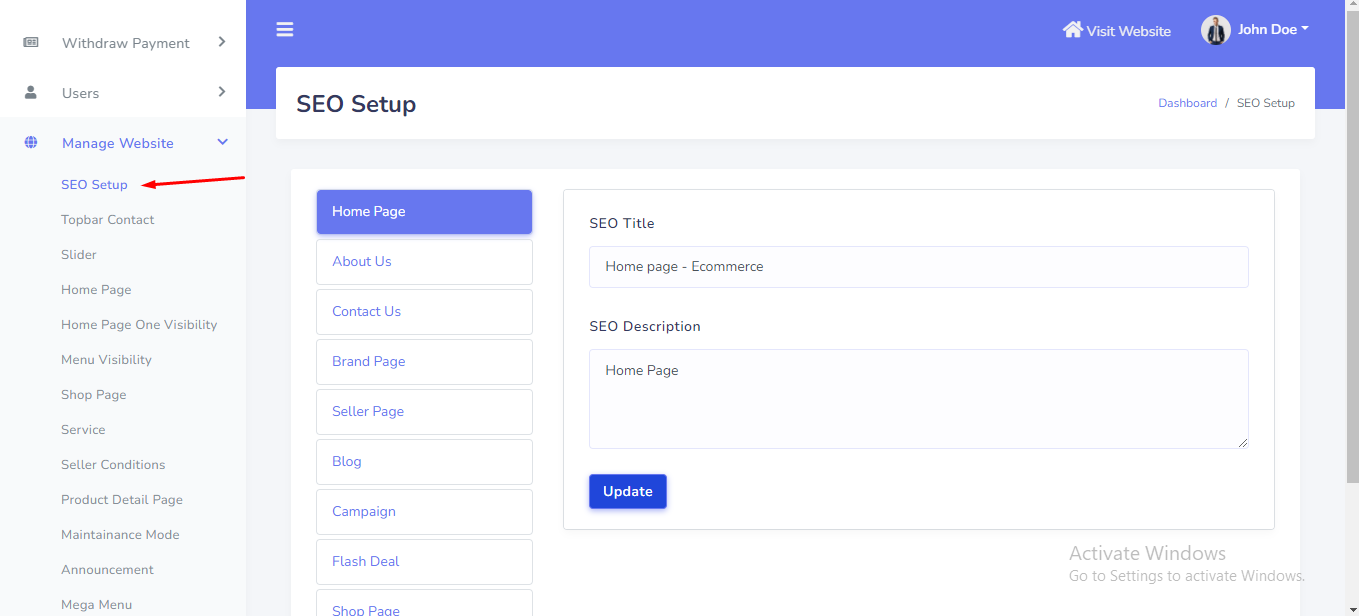
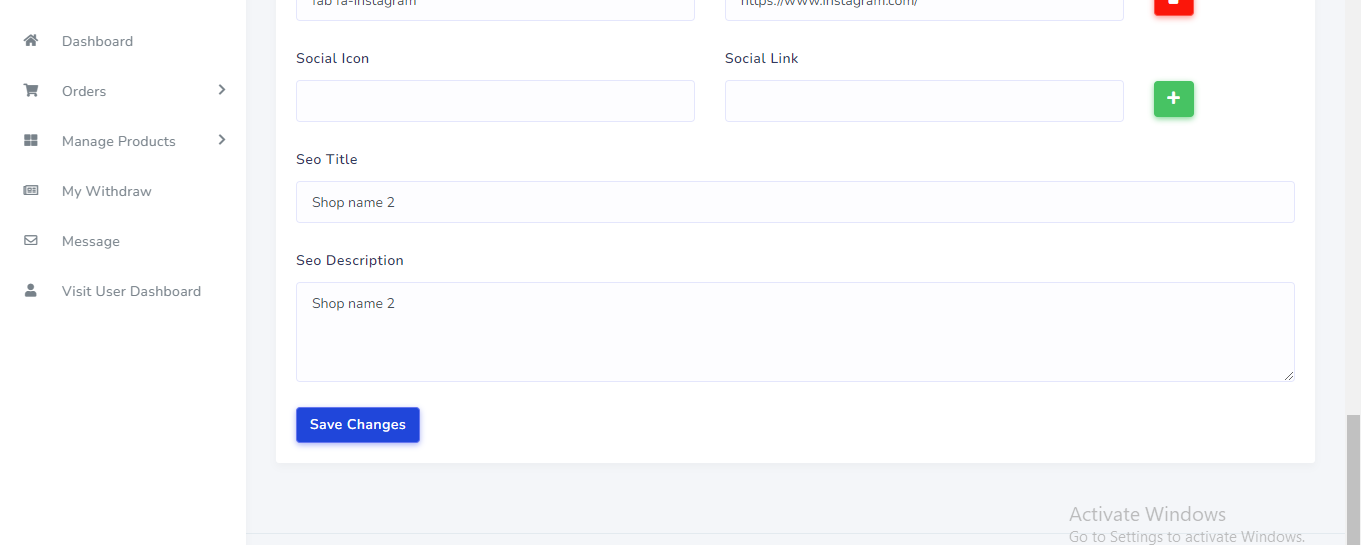
SEO Setup
SEO setting can be setup from the admin panel. Go to "Manage website >> SEO setup" from sidebar. See:
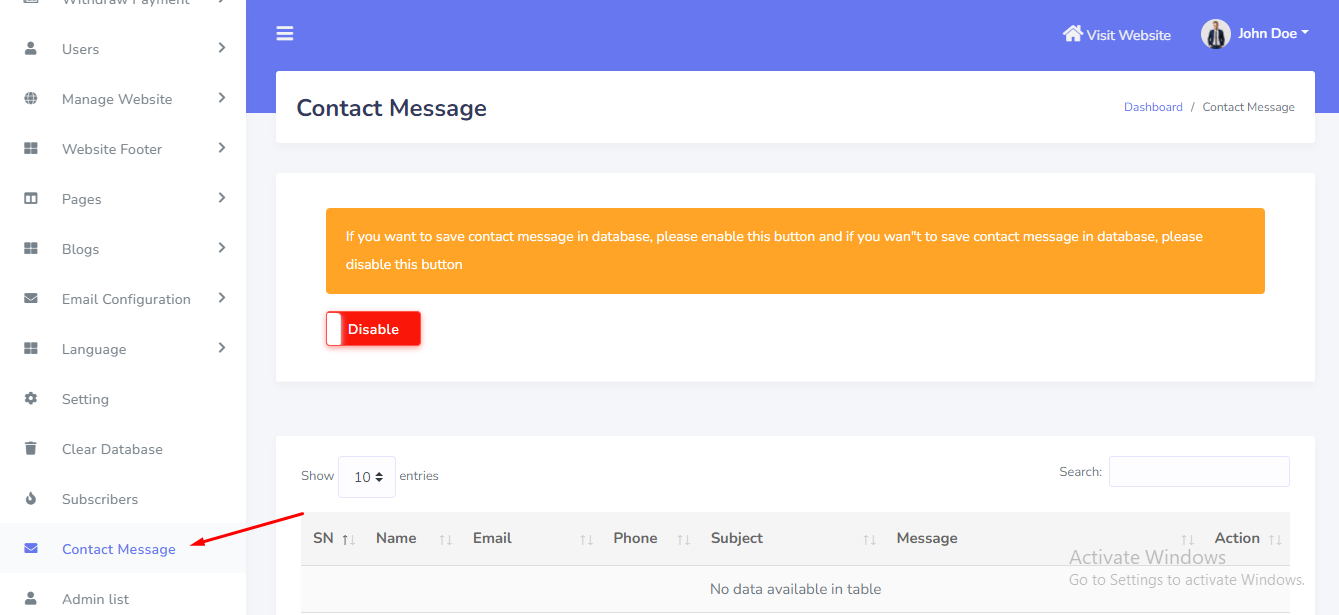
Contact Message
Contact Message can be manage from the admin panel. Go to "Contact Message" from sidebar. See:
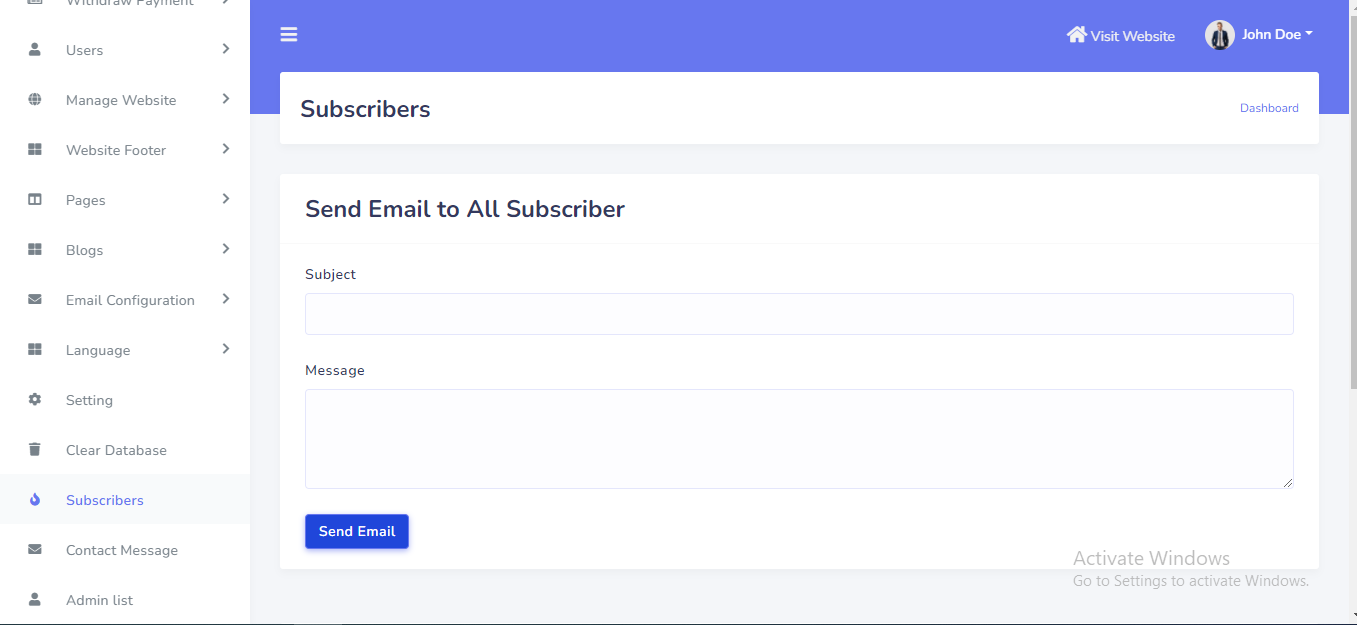
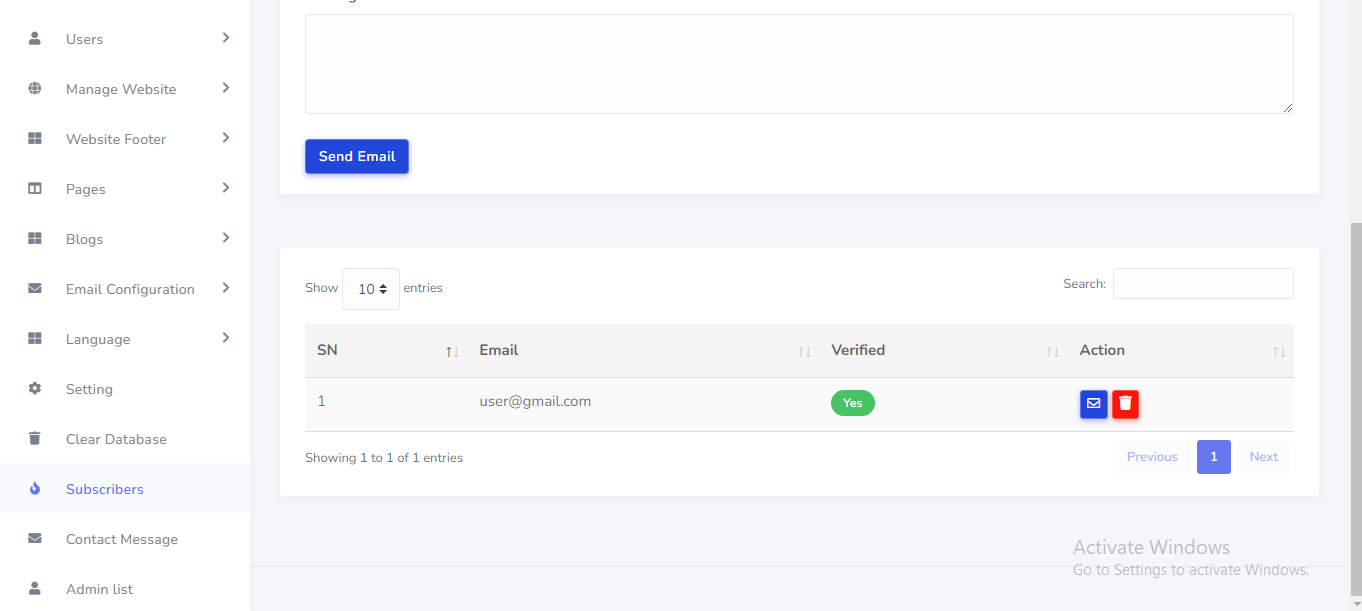
Subscriber
Subscription email can be manage and send mail from the admin panel. Go to "Subscribers".See:
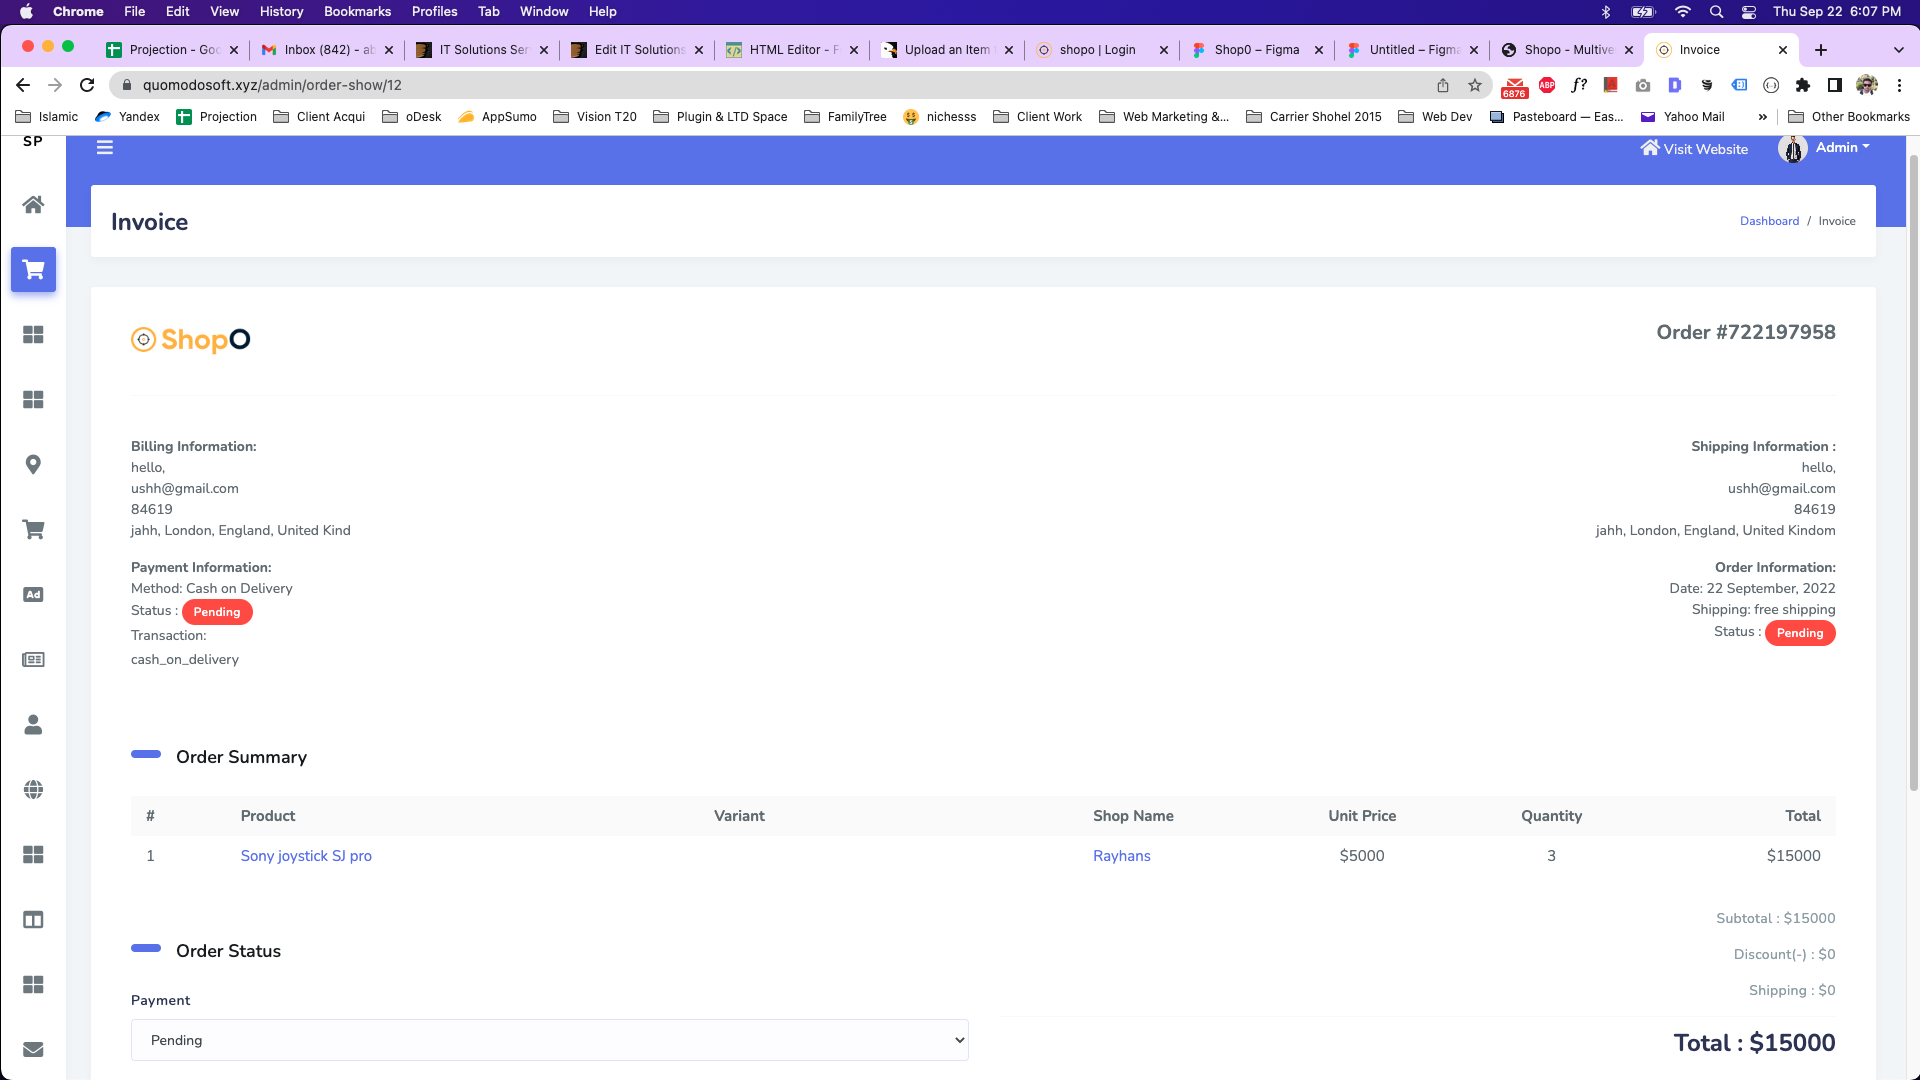
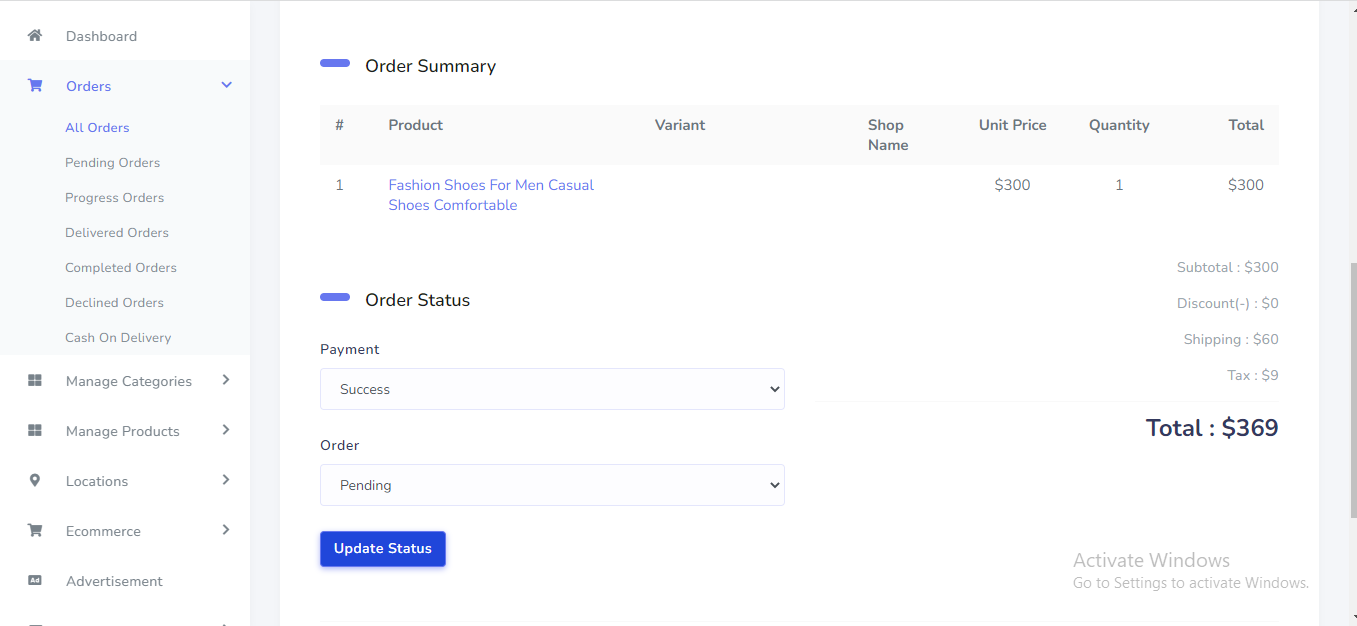
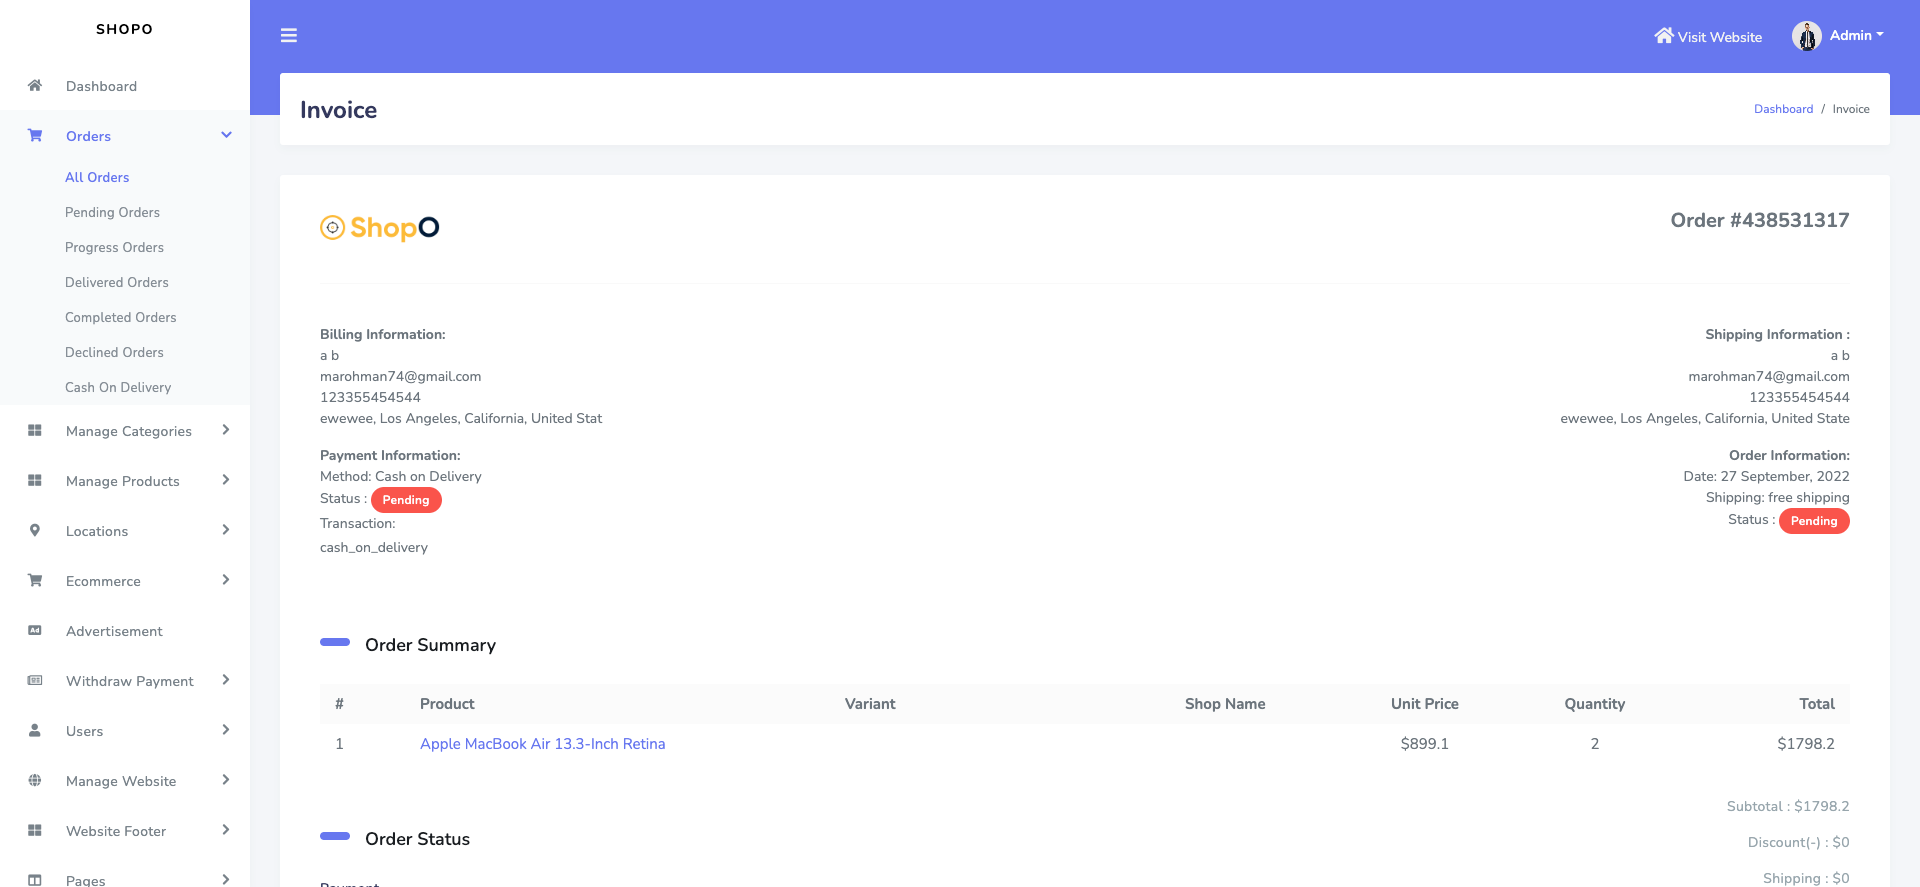
Orders
Order can be manage from the admin panel. Go to "Orders >>...". See:


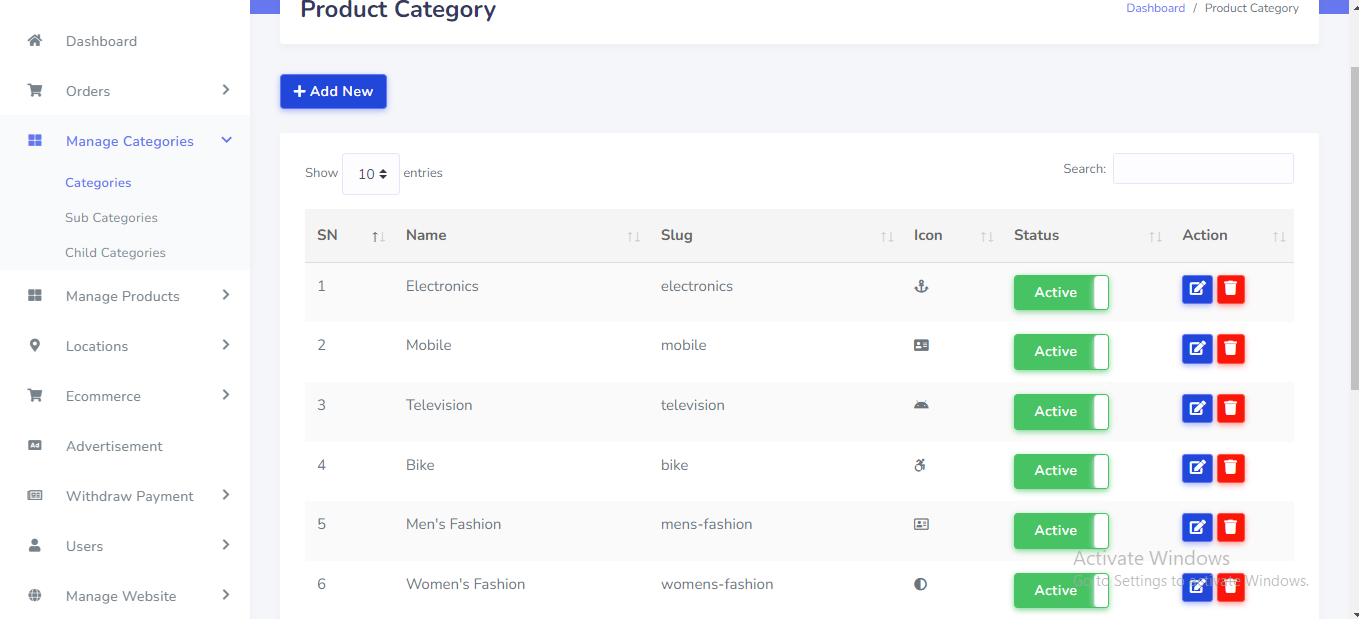
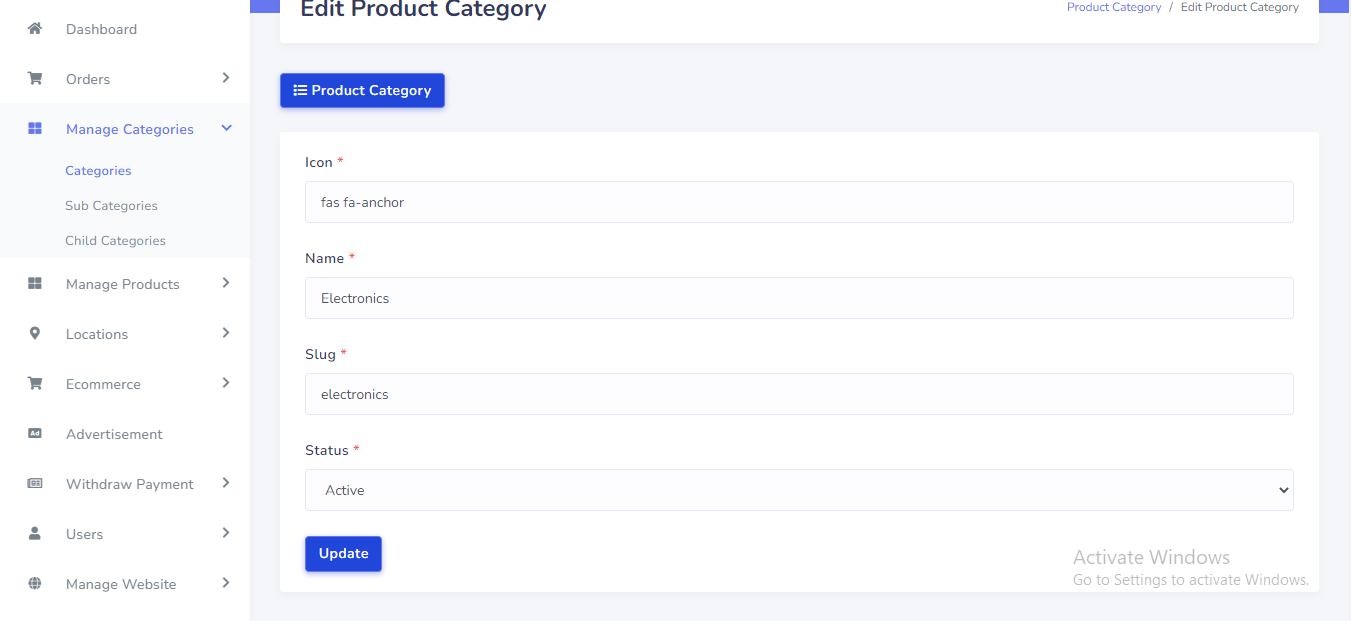
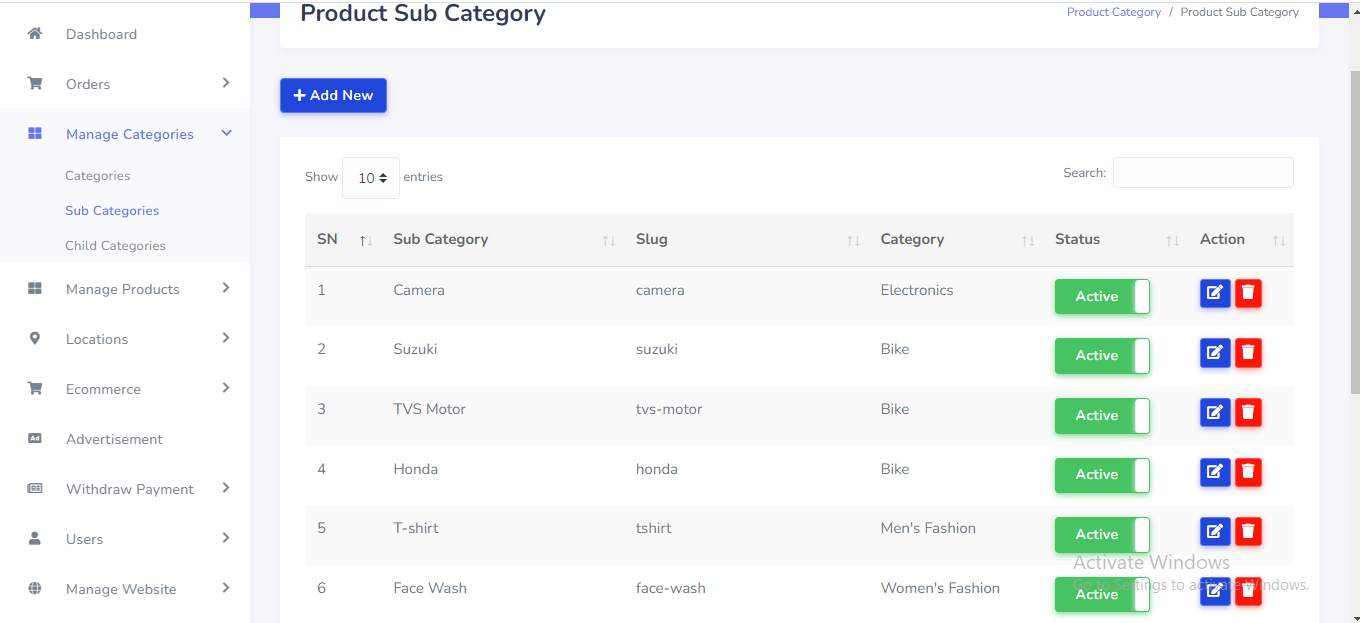
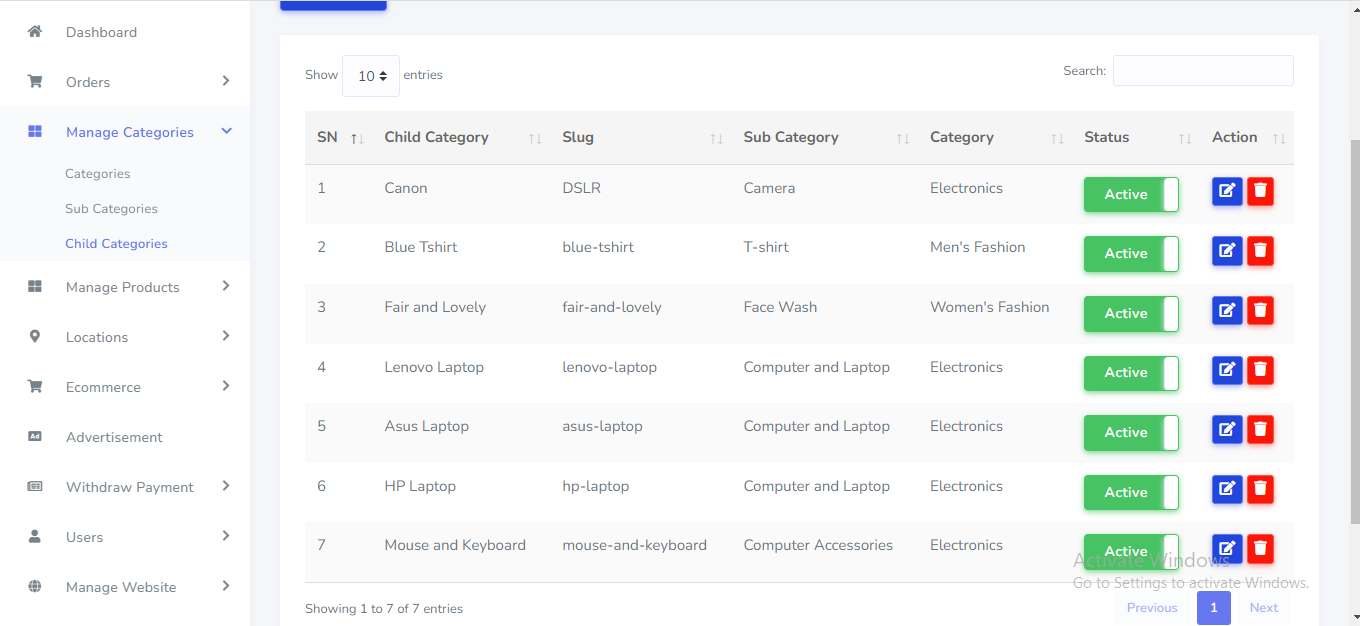
Product Category
Product Category can be manage from the admin panel. Go to "Manage Categories >> ..". See:
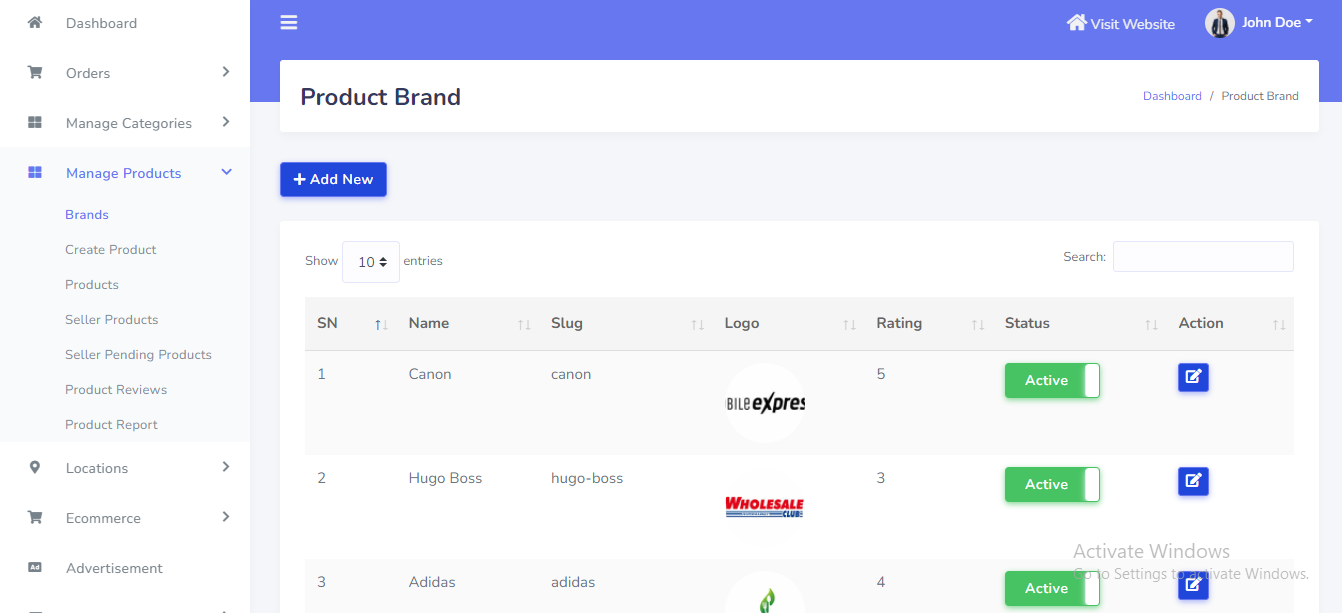
Product Brand
Product Brand can be manage from the admin panel. Go to "Manage Products >> Brands ..". See:
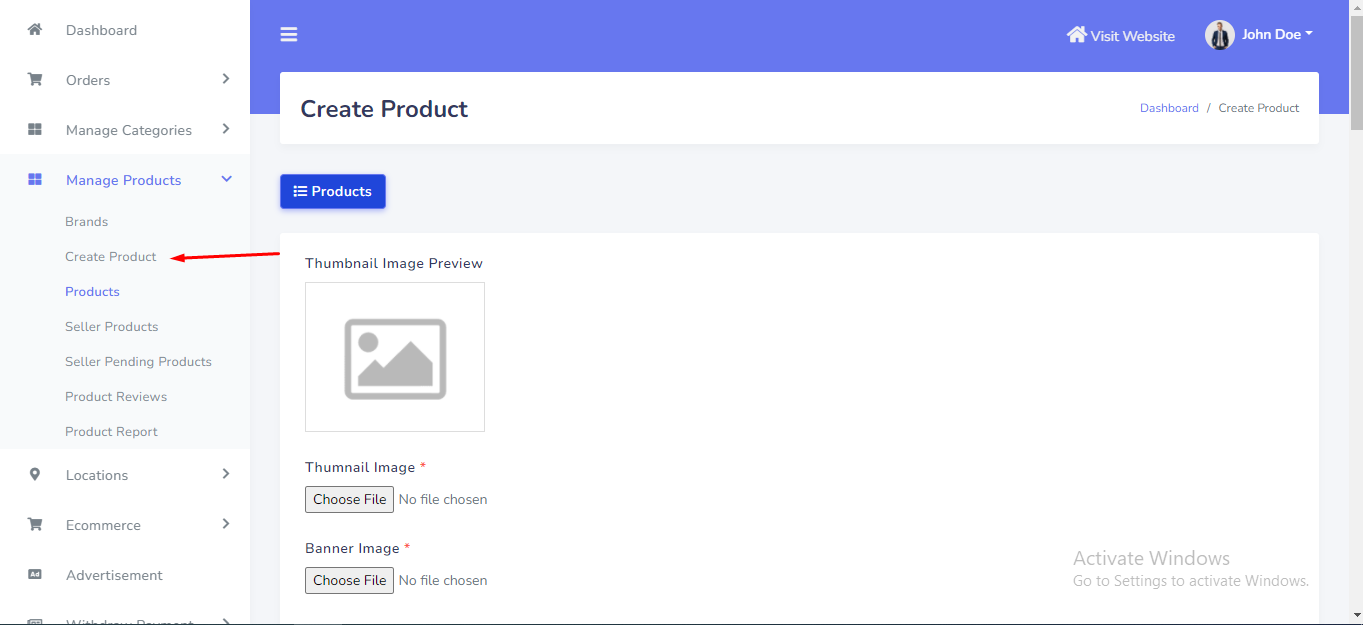
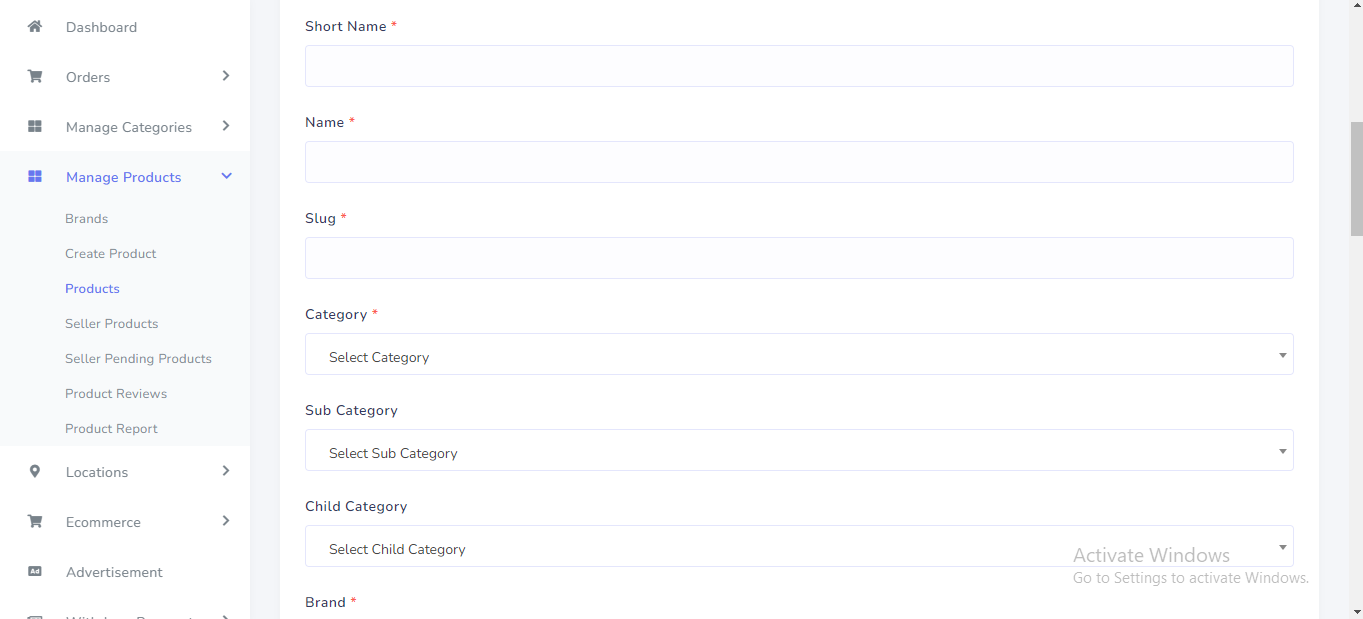
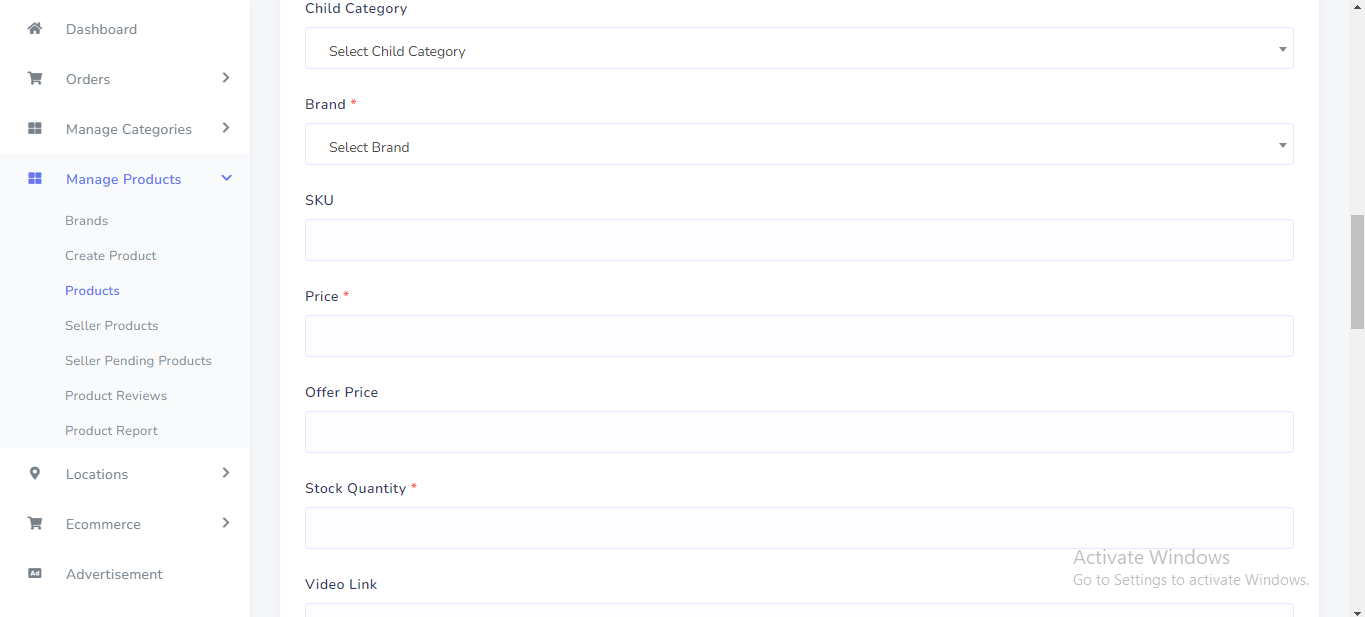
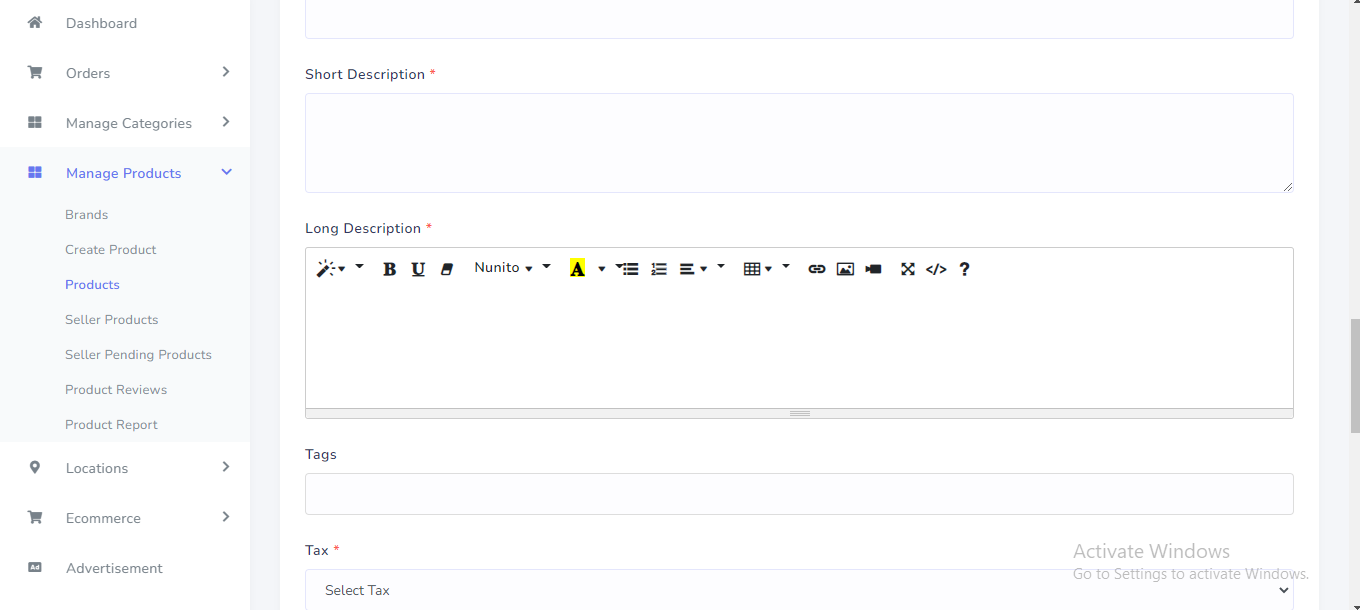
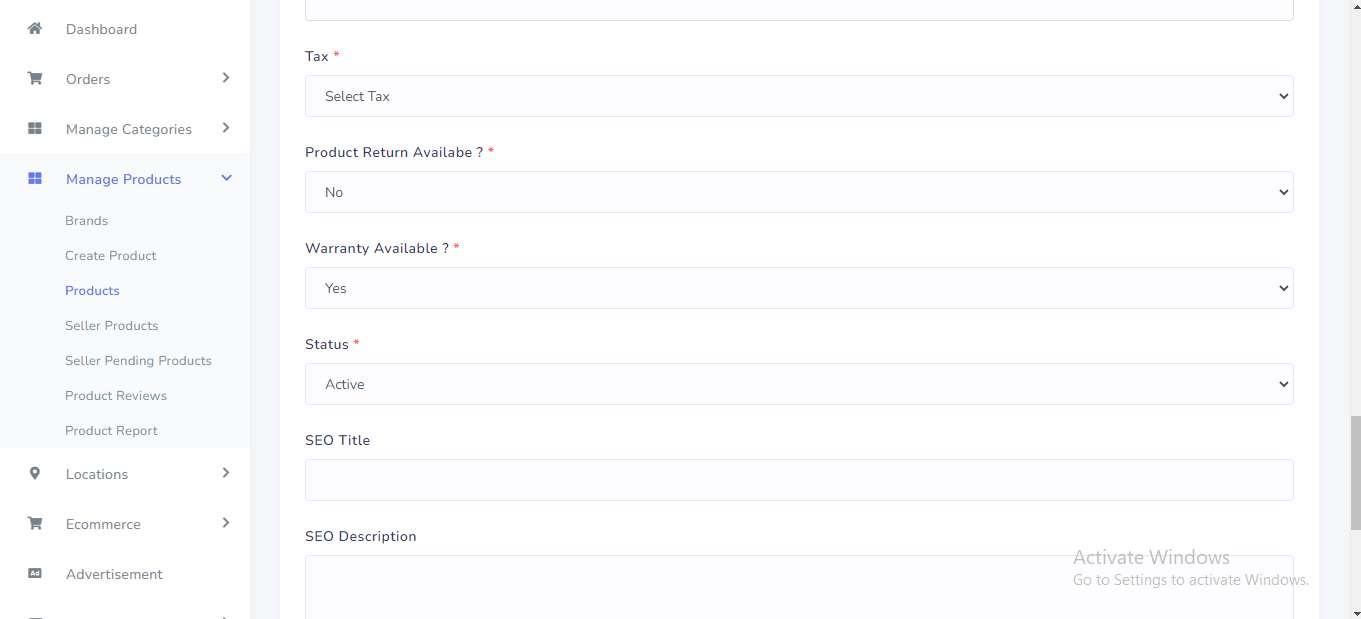
Product Create
Product Create can be manage from the admin panel. Go to "Manage Products >> Create Product". See:

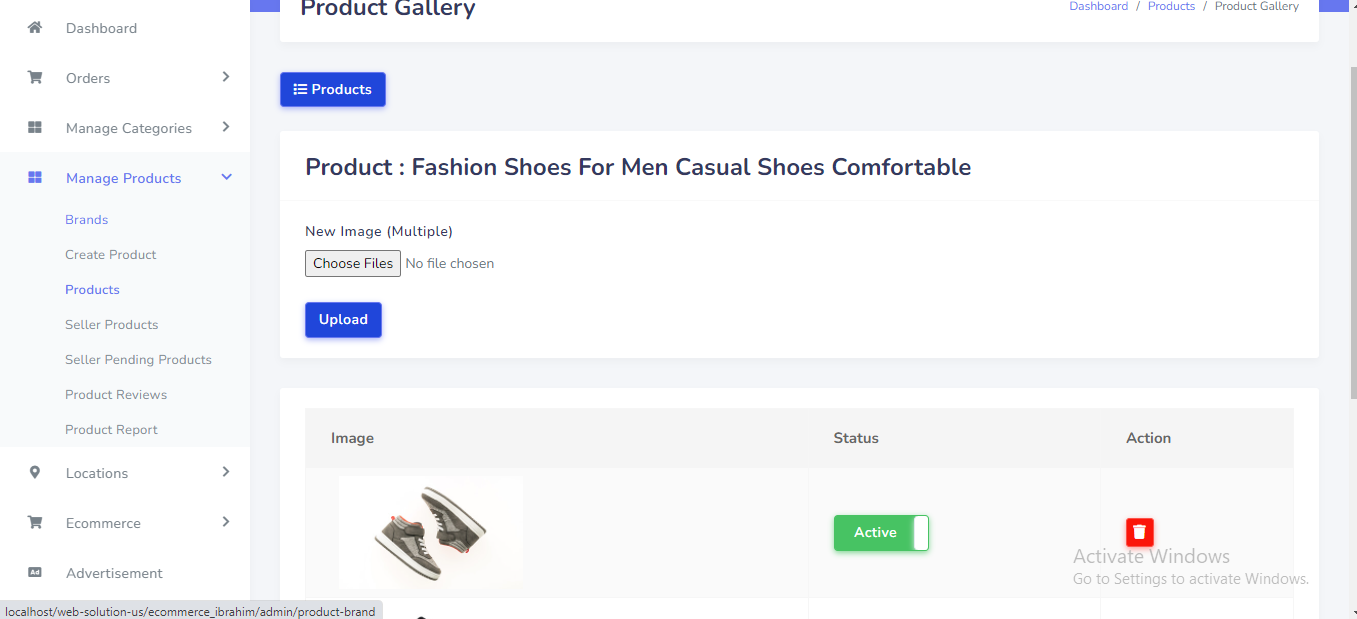
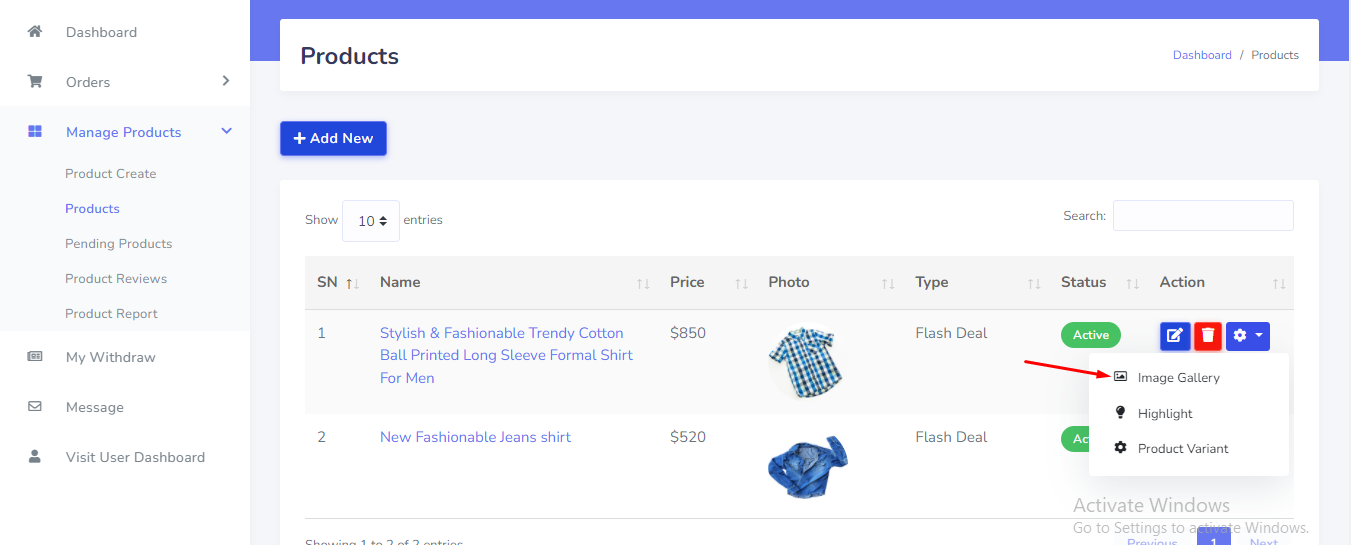
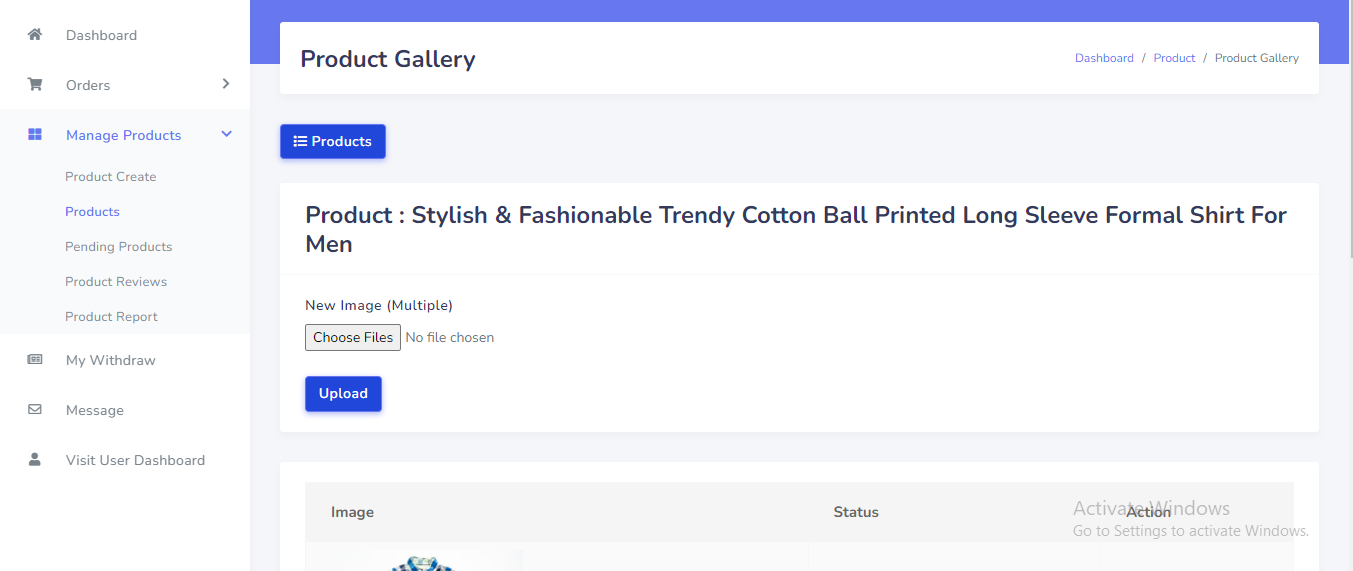
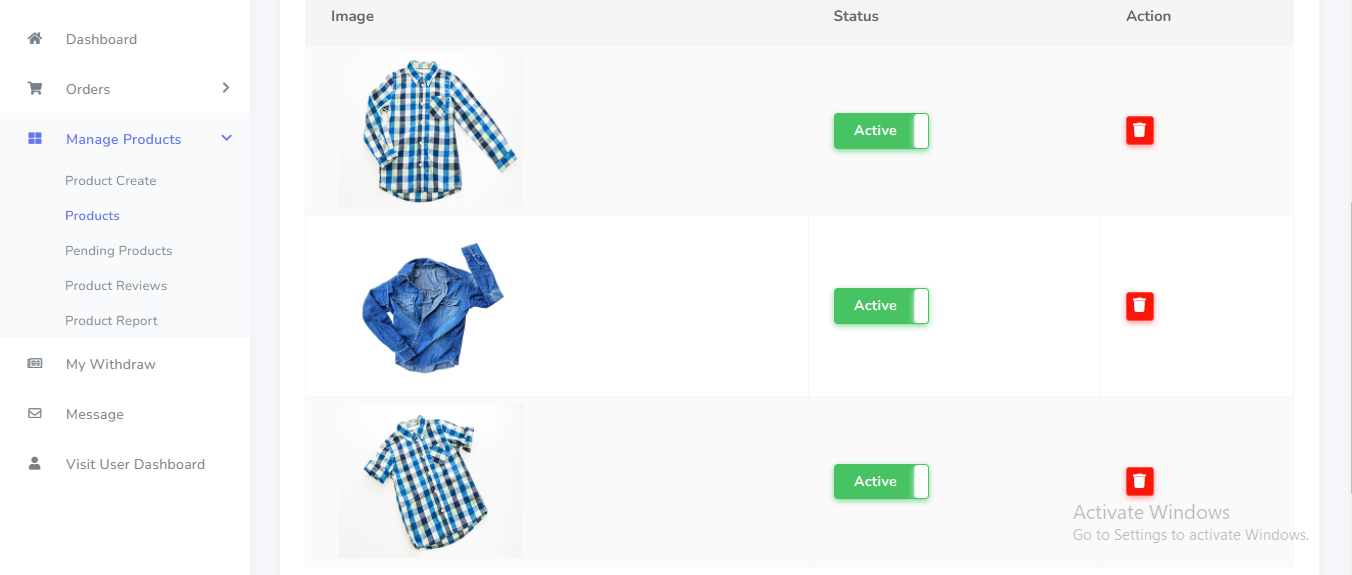
Product Gellary

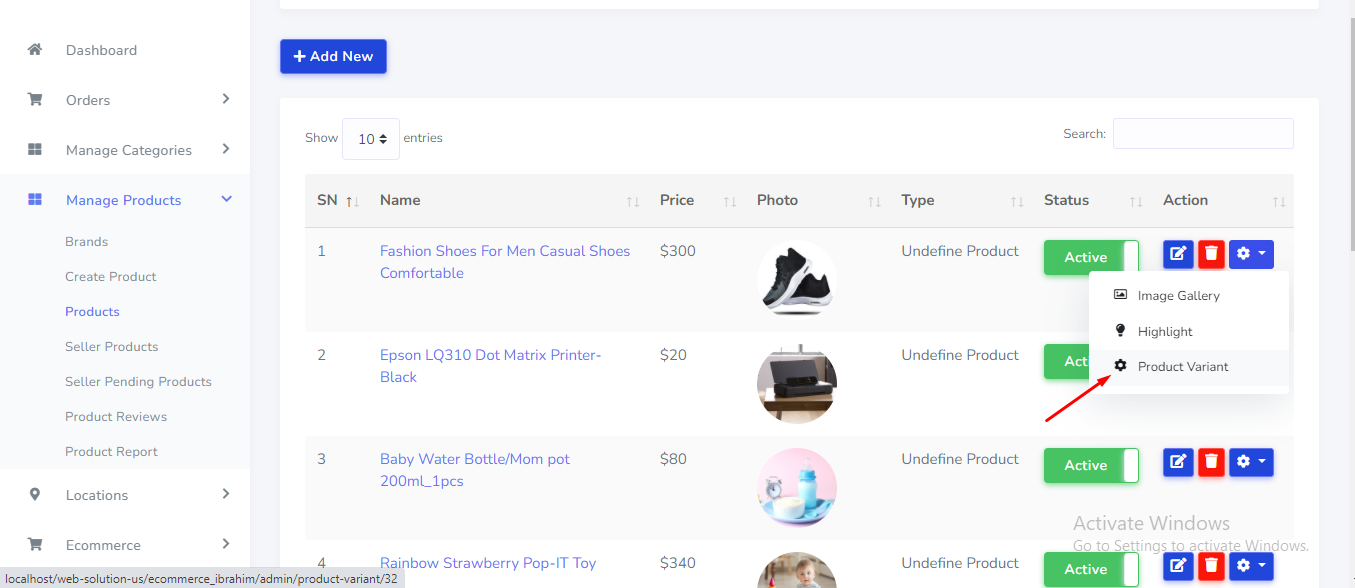
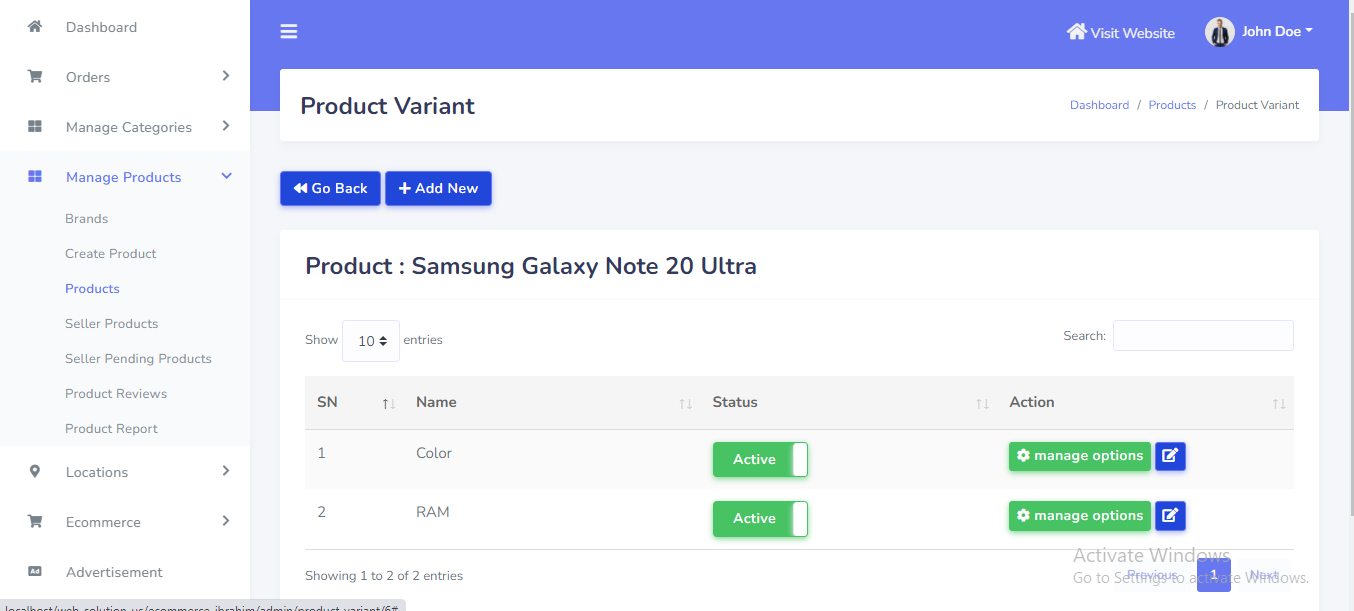
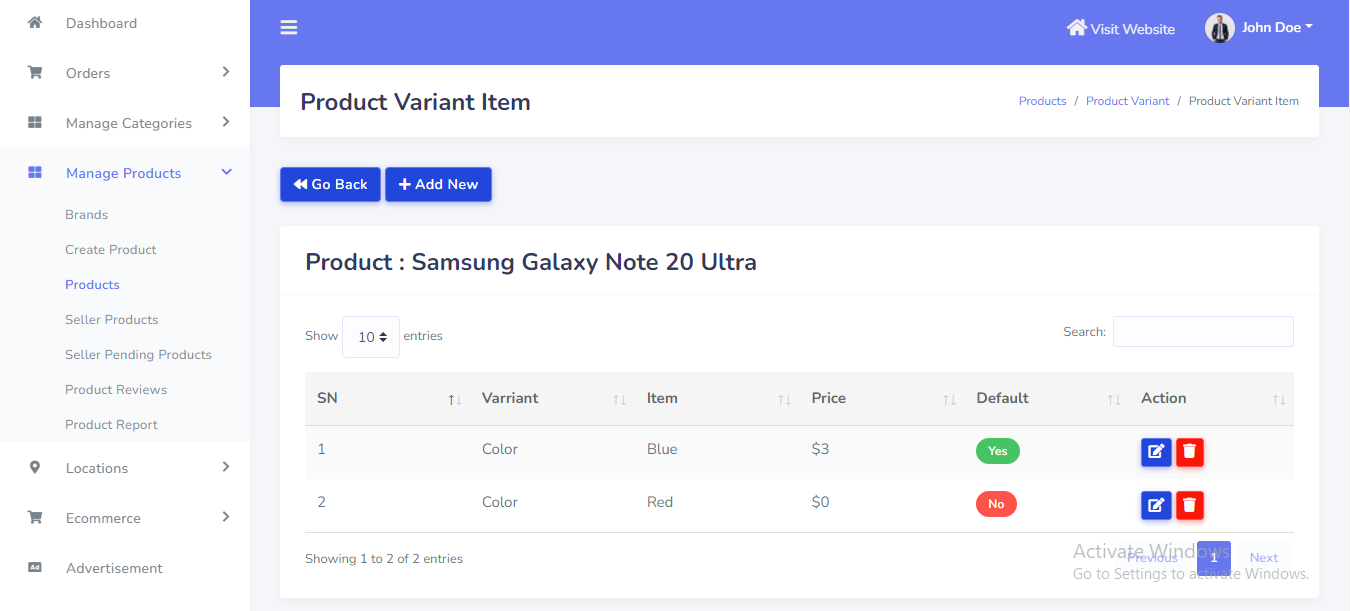
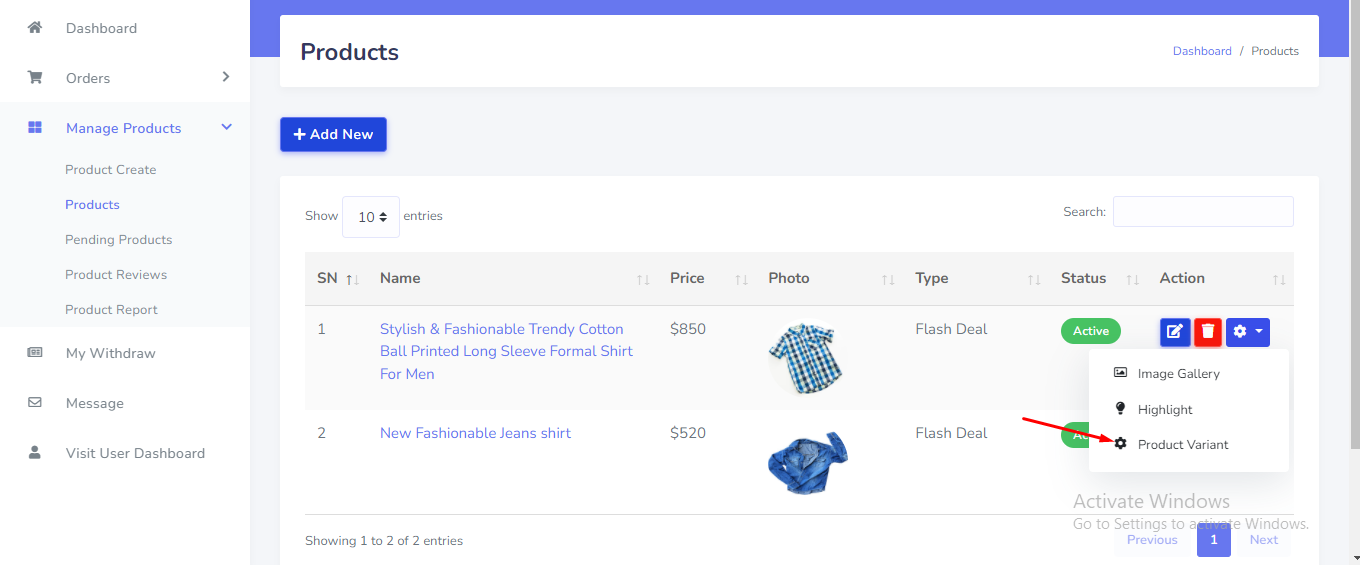
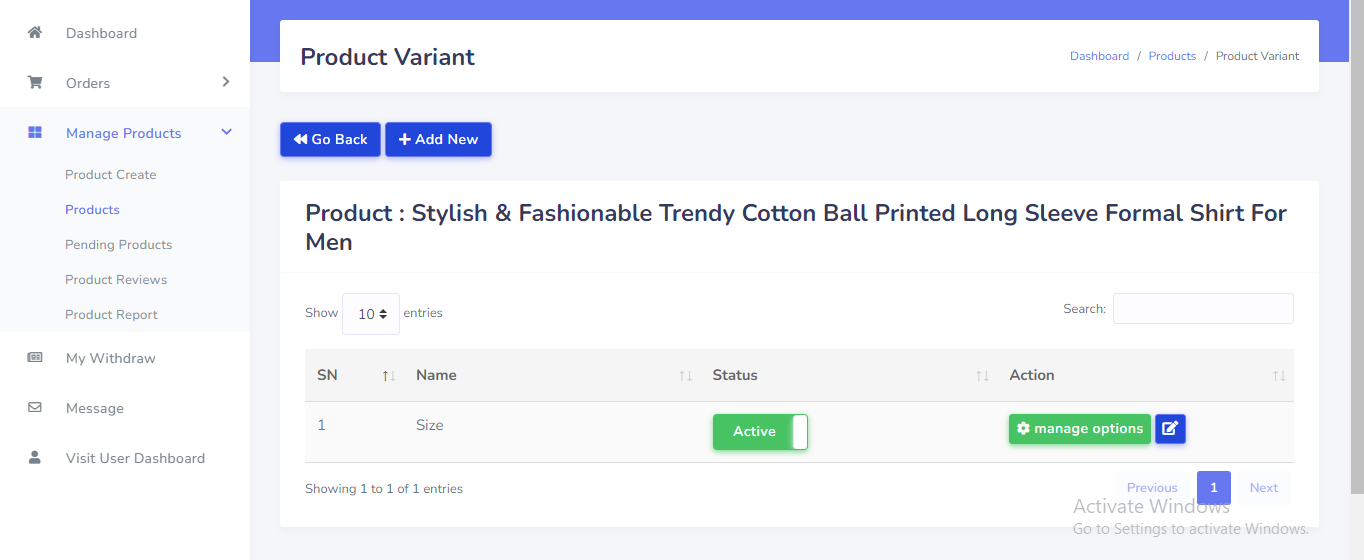
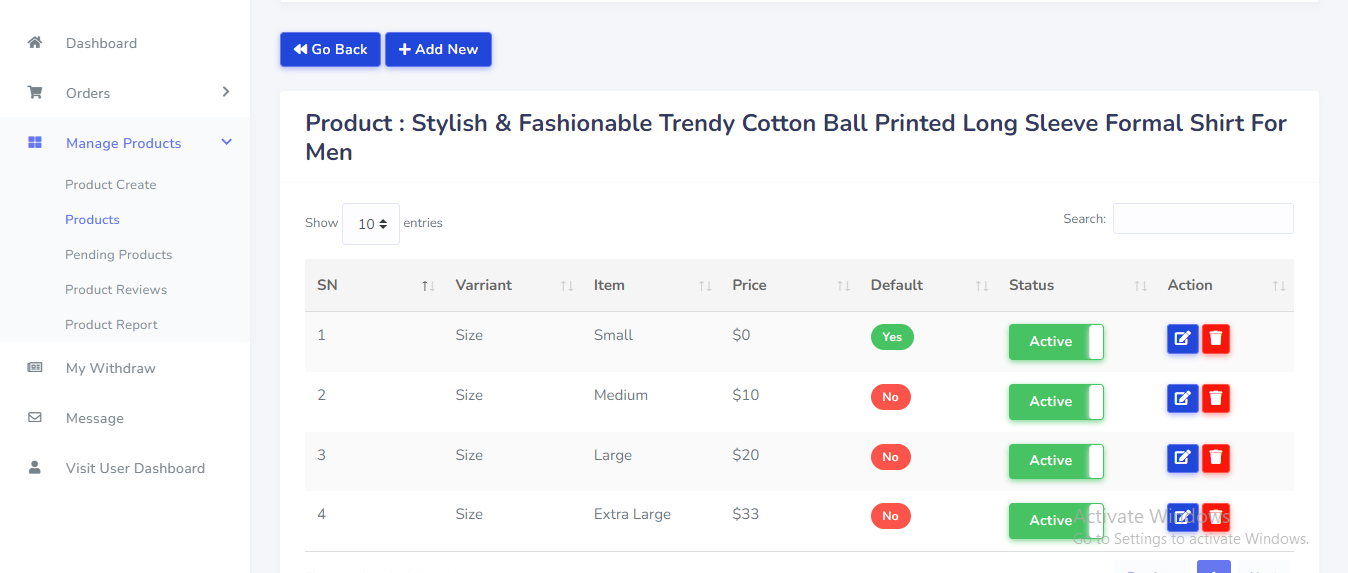
Product Variant
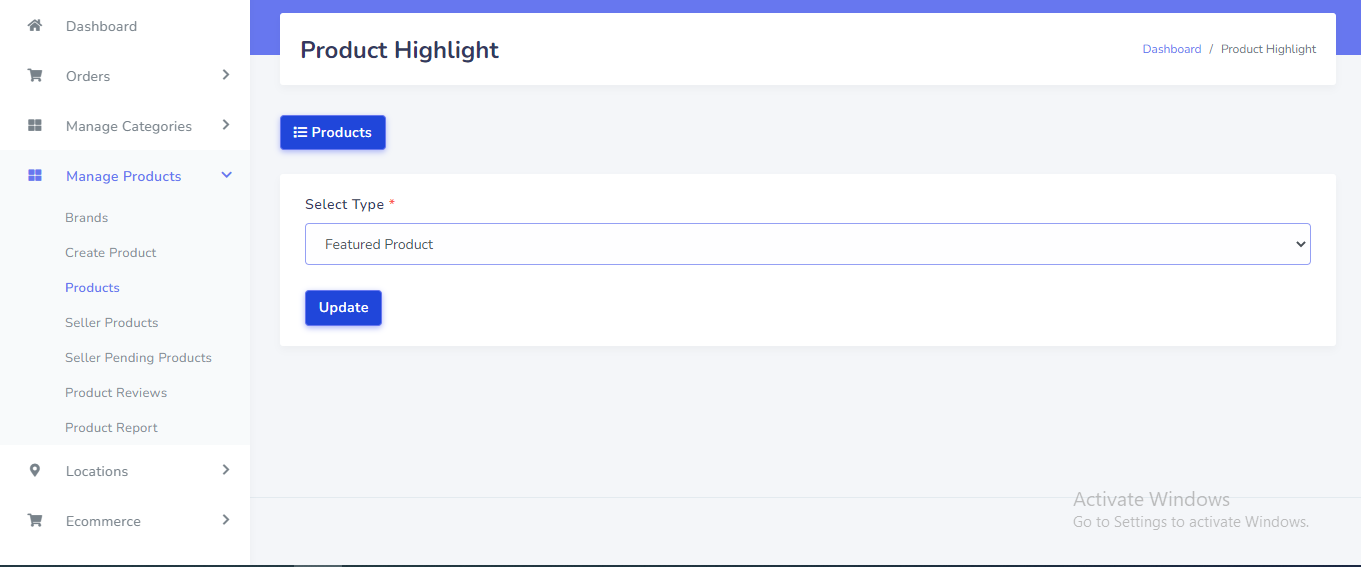
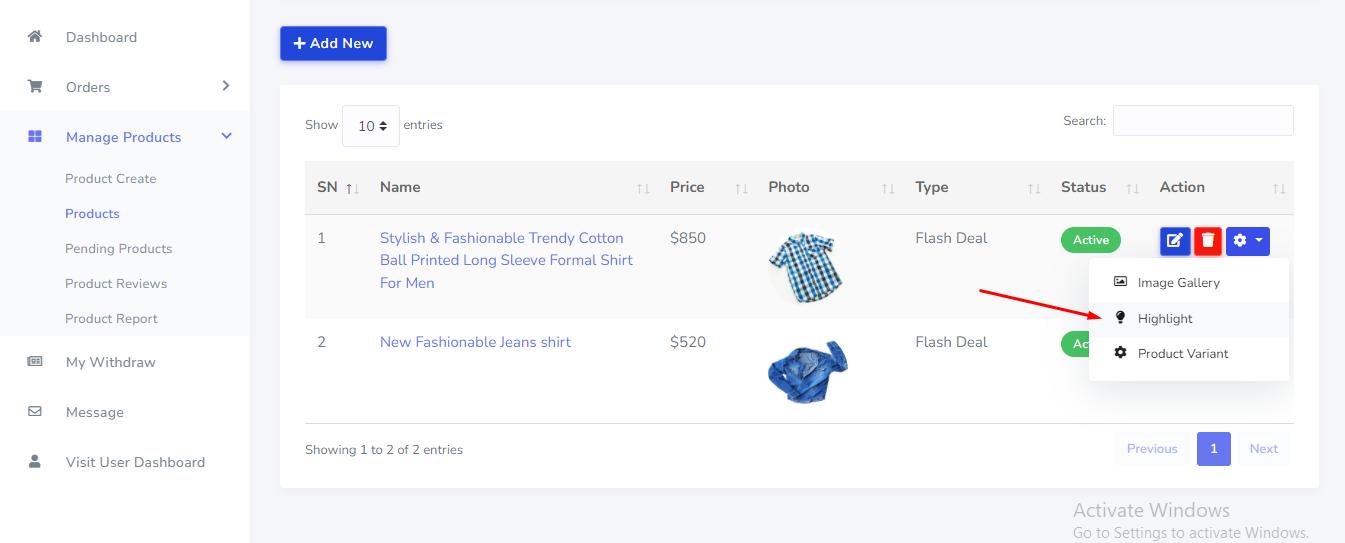
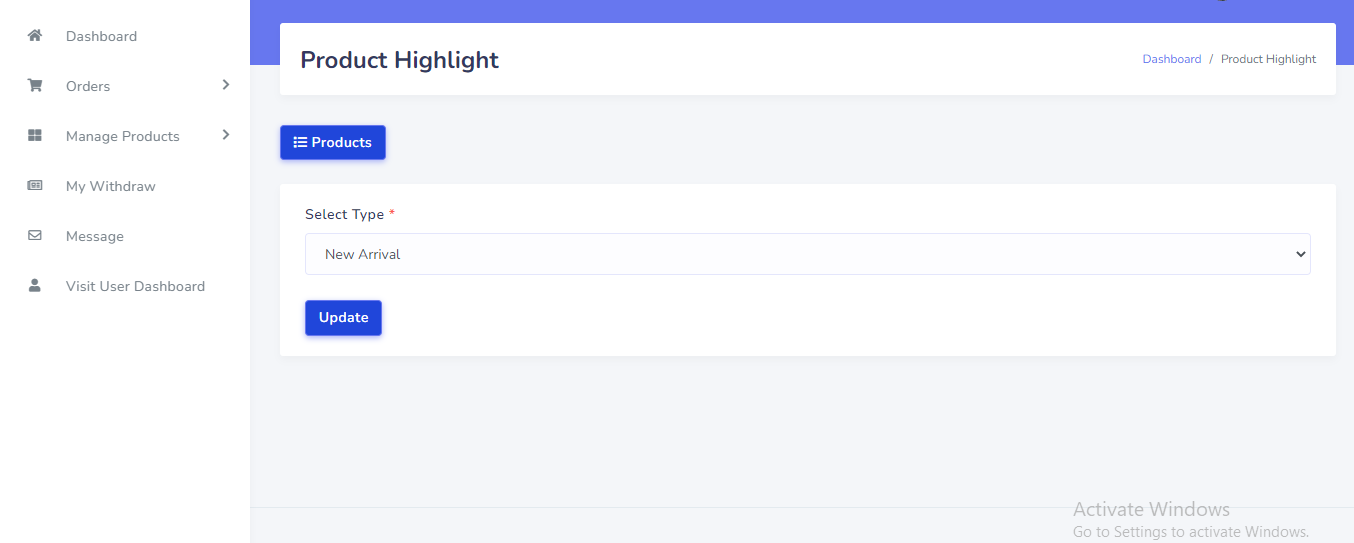
Product Highlight

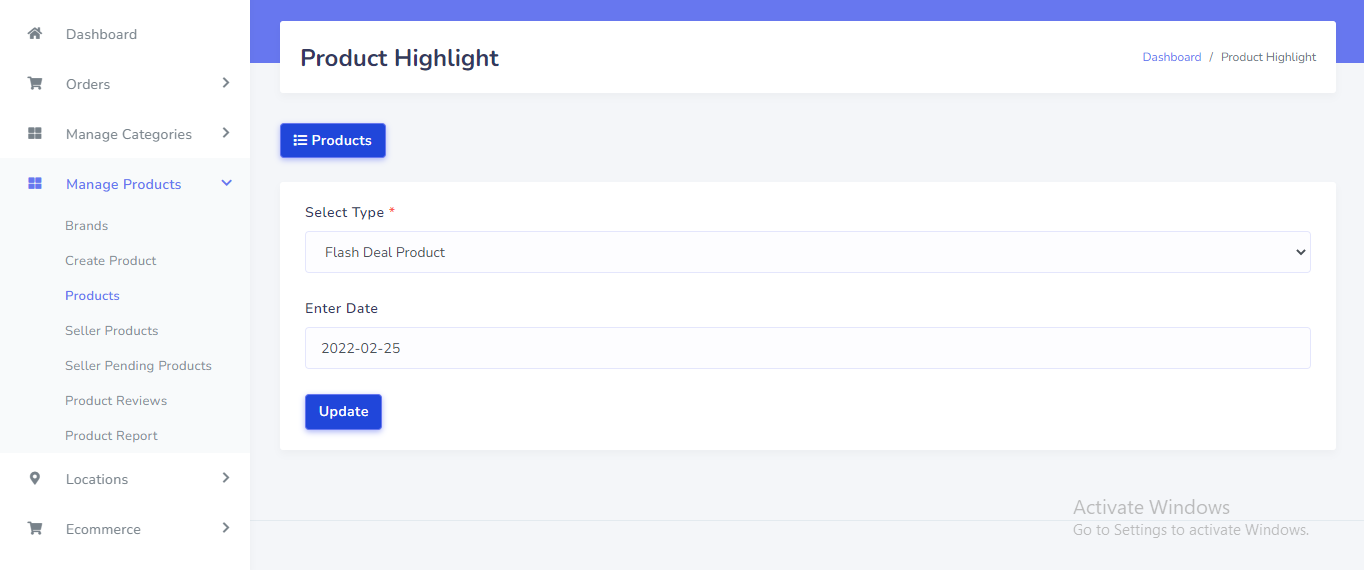
Flash Deal Product
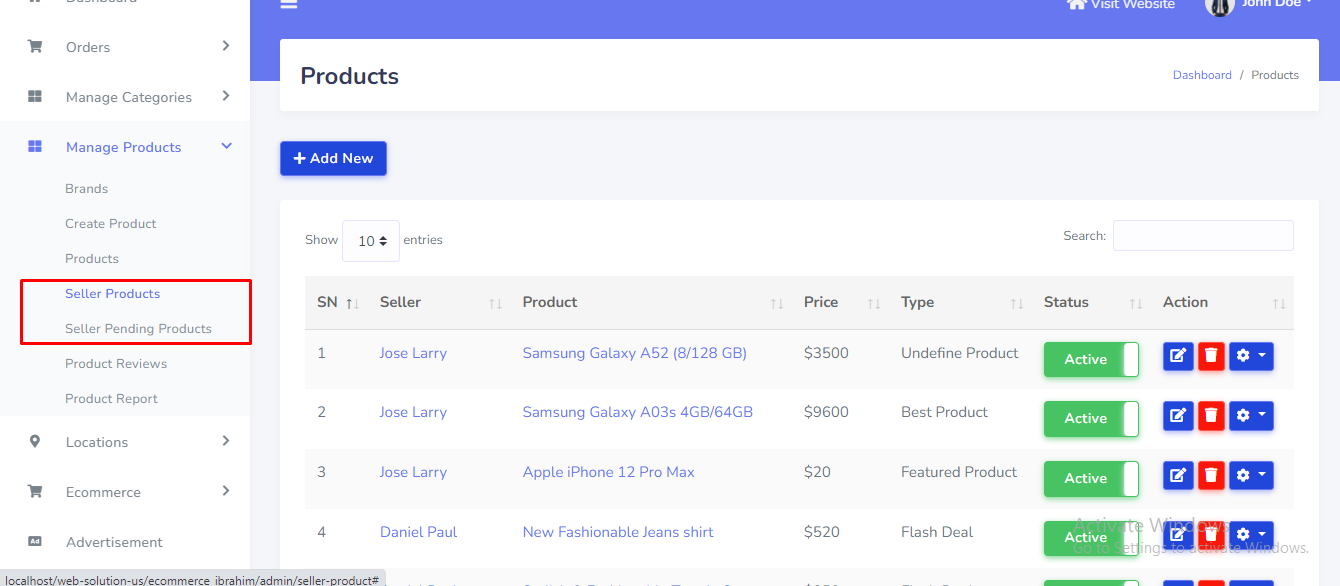
Seller Product
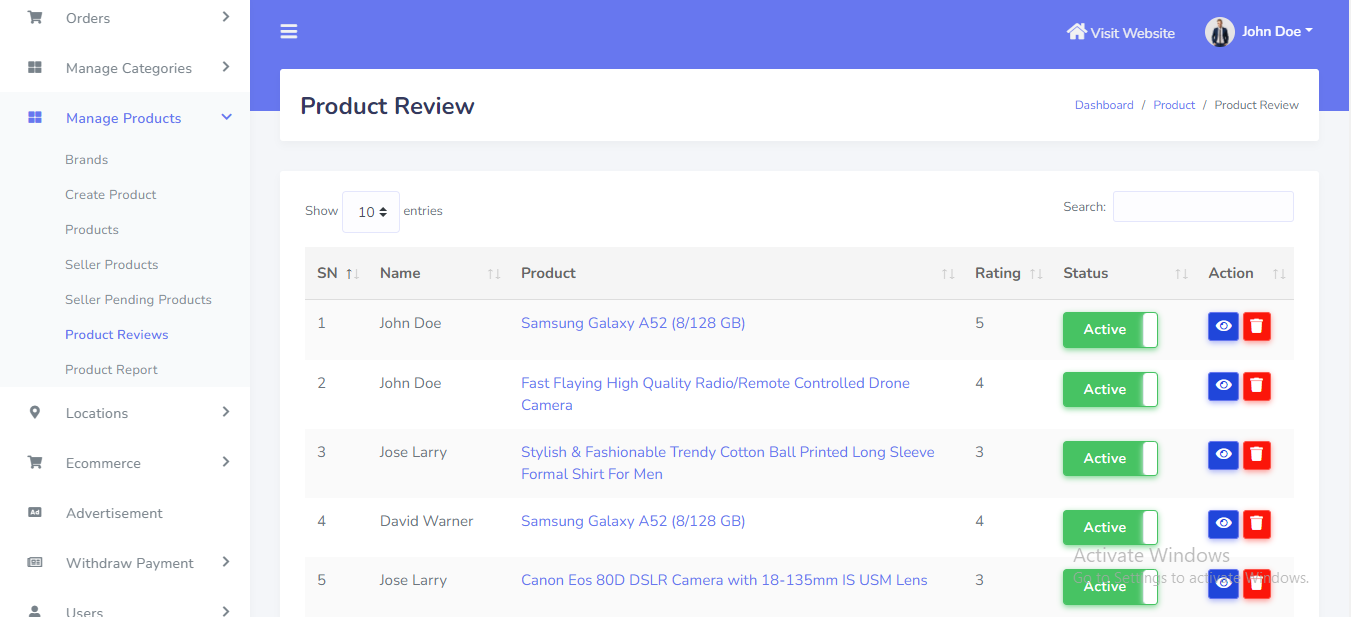
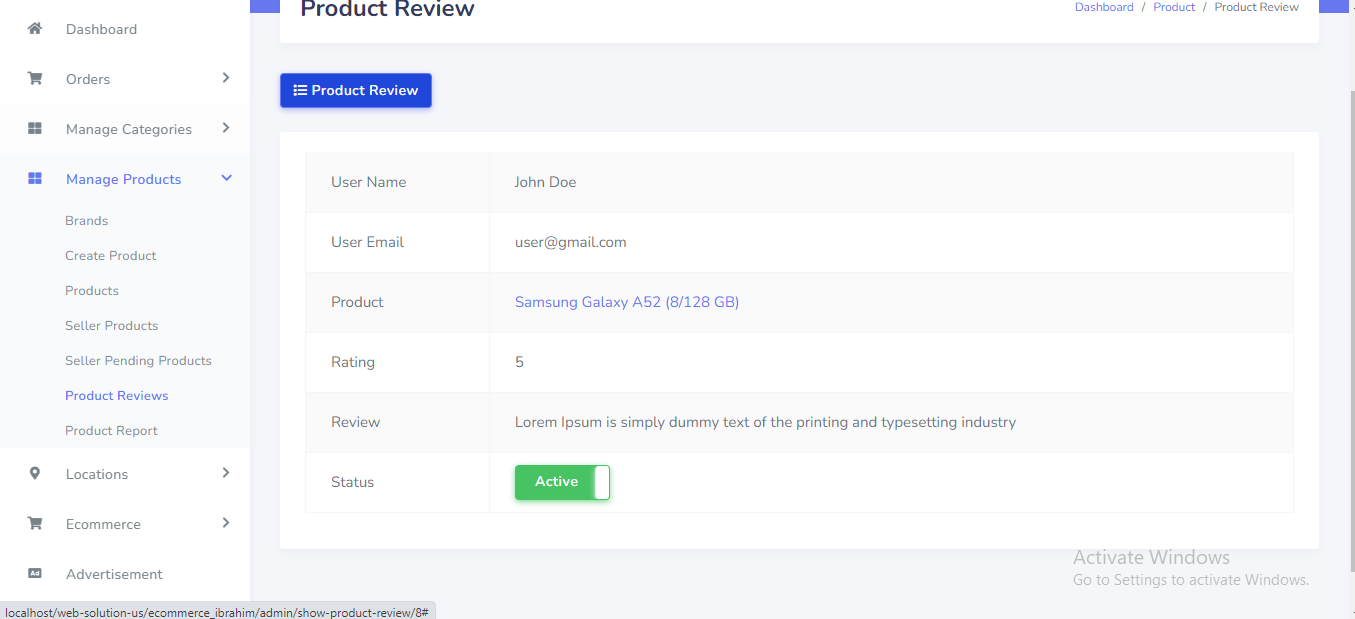
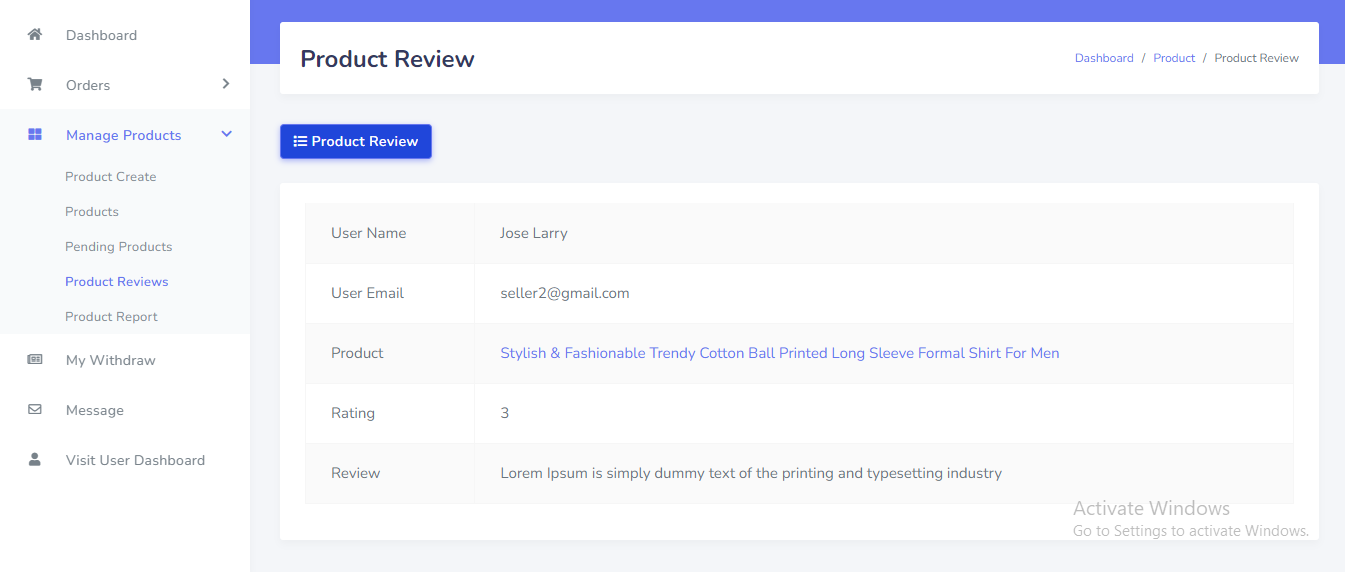
Product Review
Product Review can be manage from the admin panel. Go to "Manage Products >> Product Reviews" from sidebar. See:
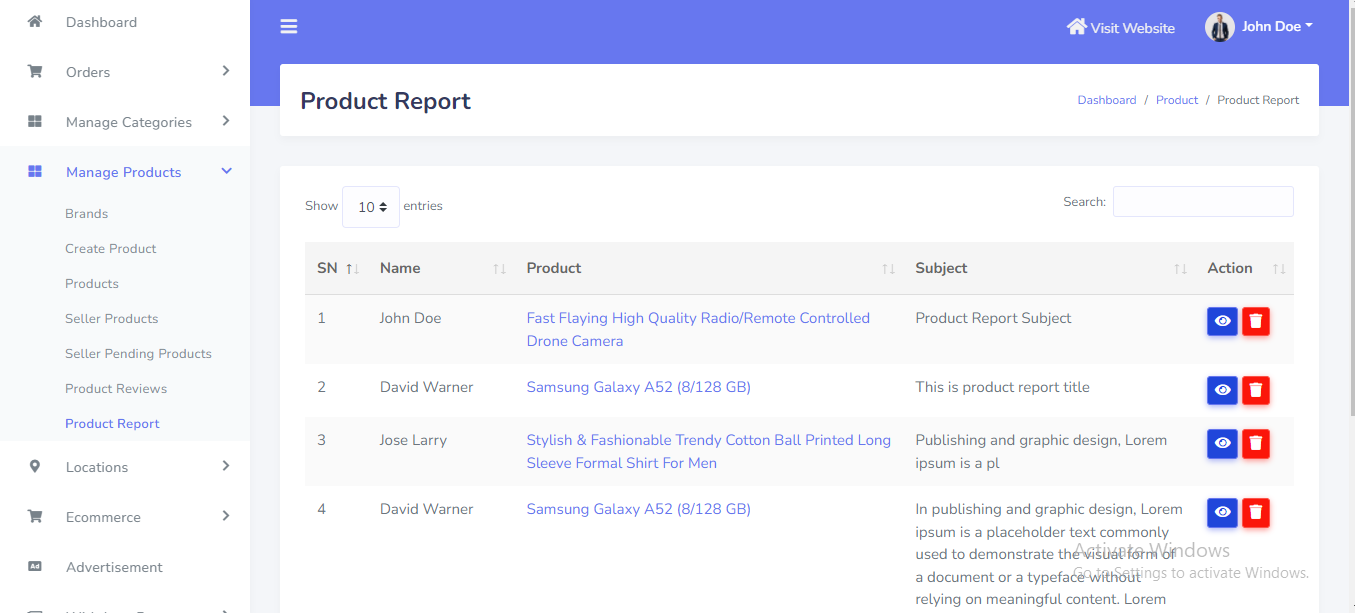
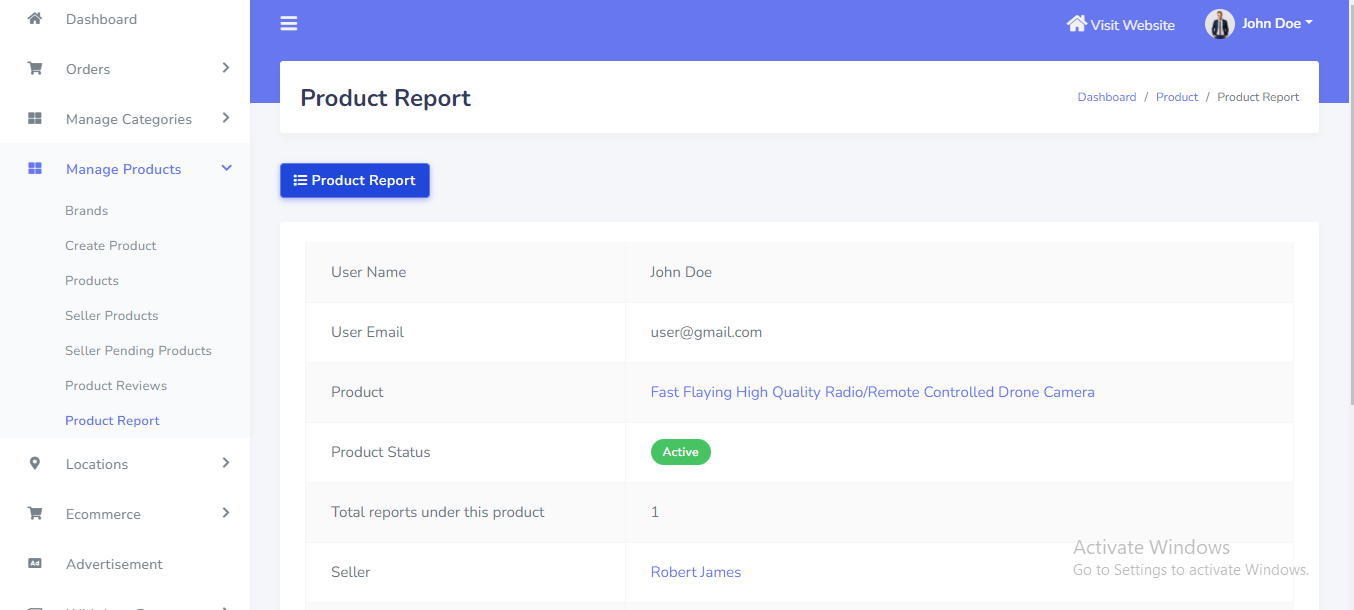
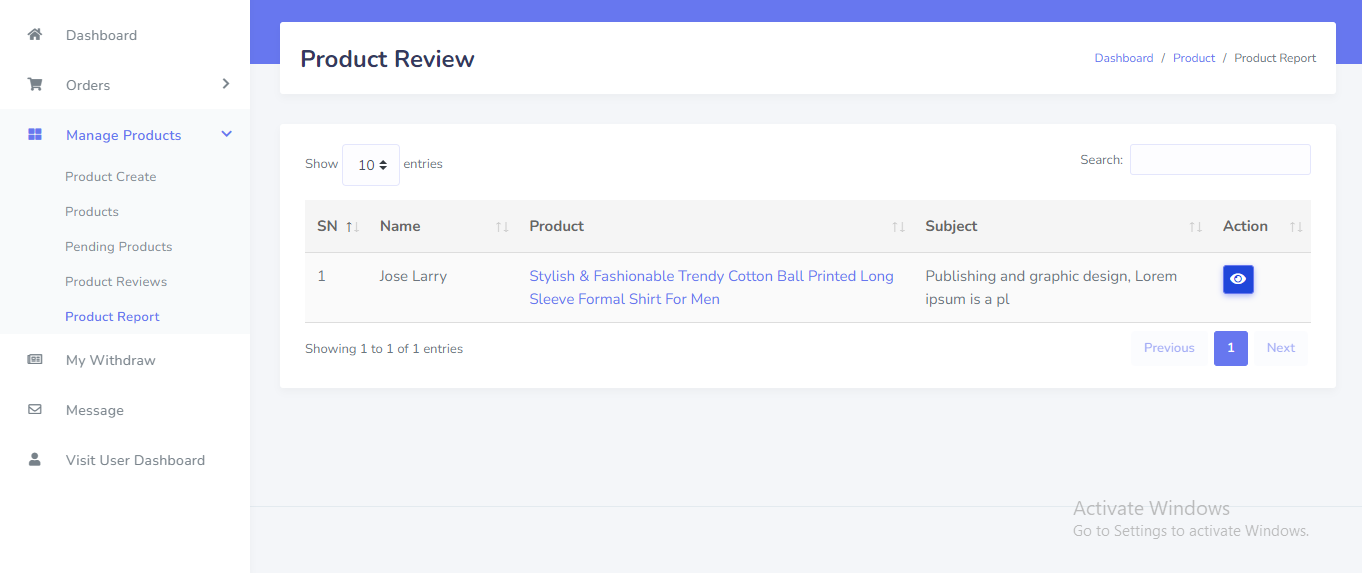
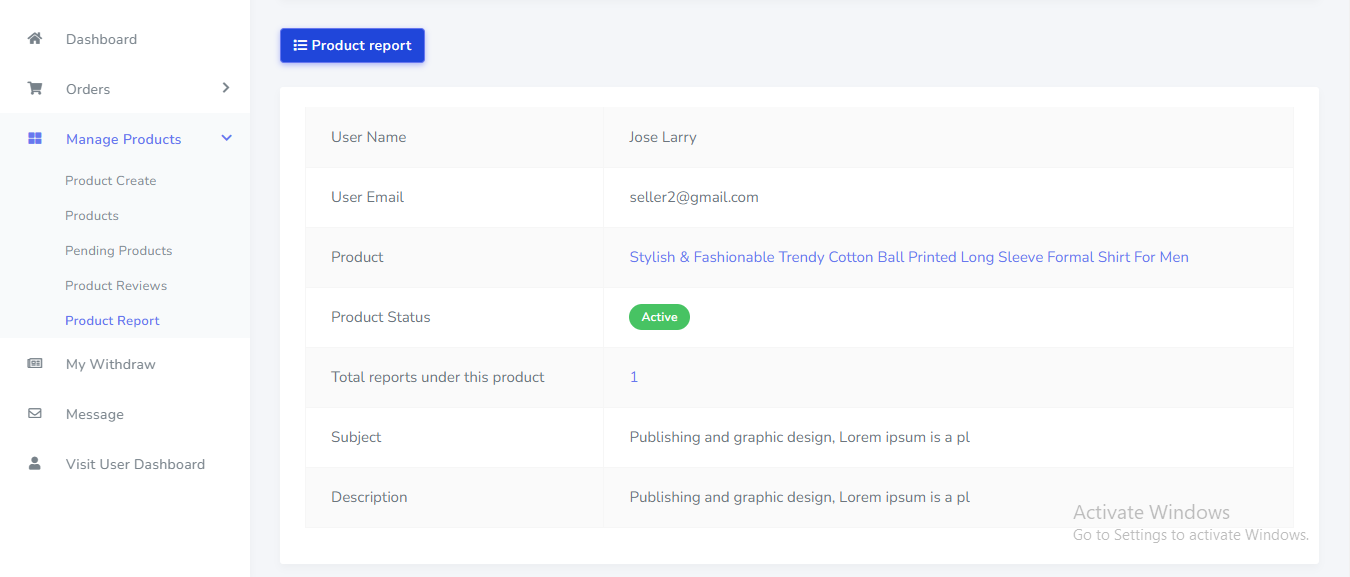
Product Report
Product Report can be manage from the admin panel. Go to "Manage Products >> Product Report" from sidebar. See:
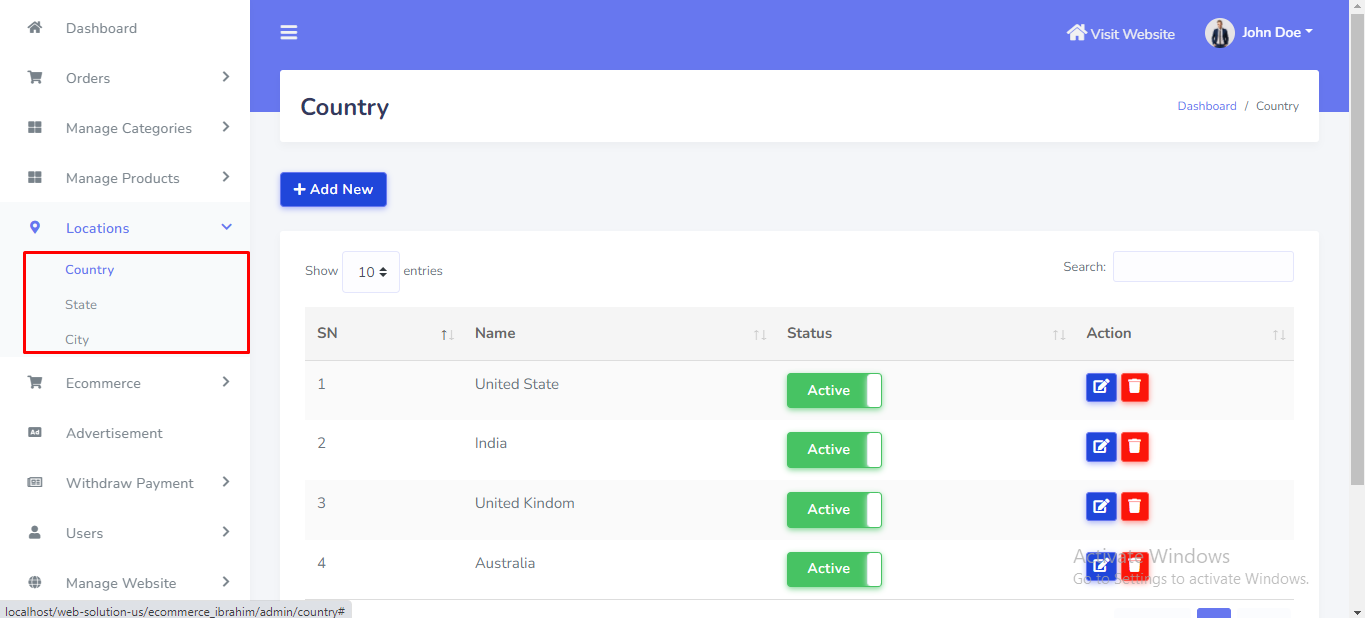
Location
Location can be manage from the admin panel. Go to "Locations >> Country" from sidebar. See:
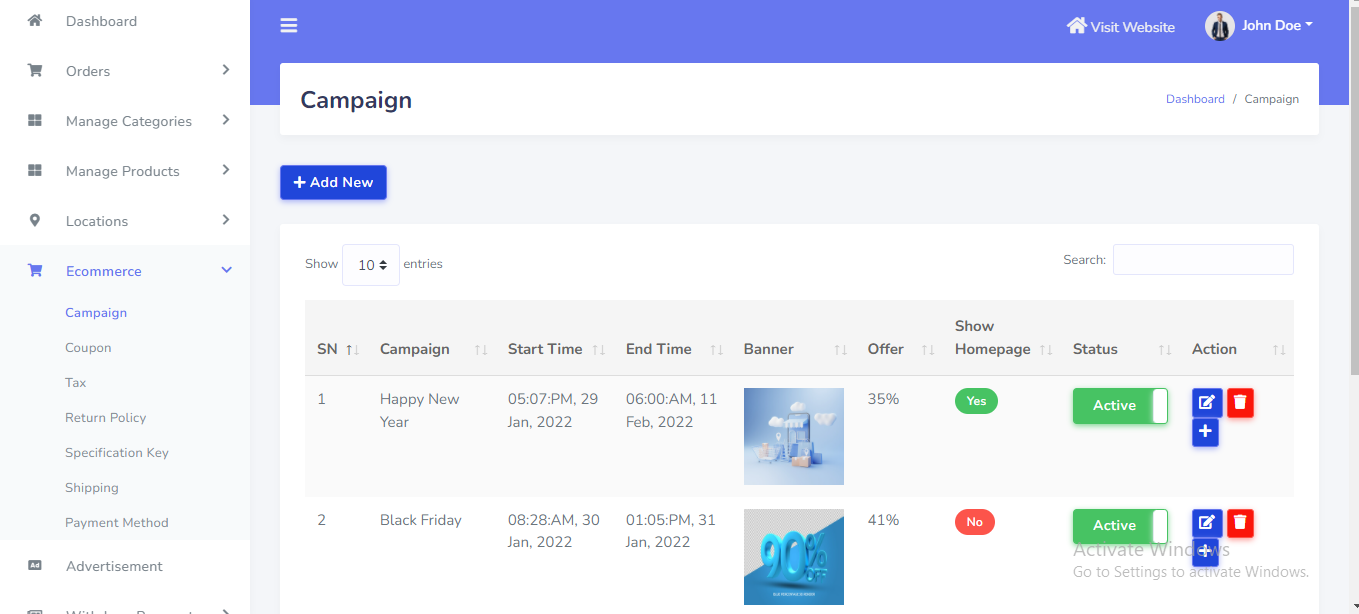
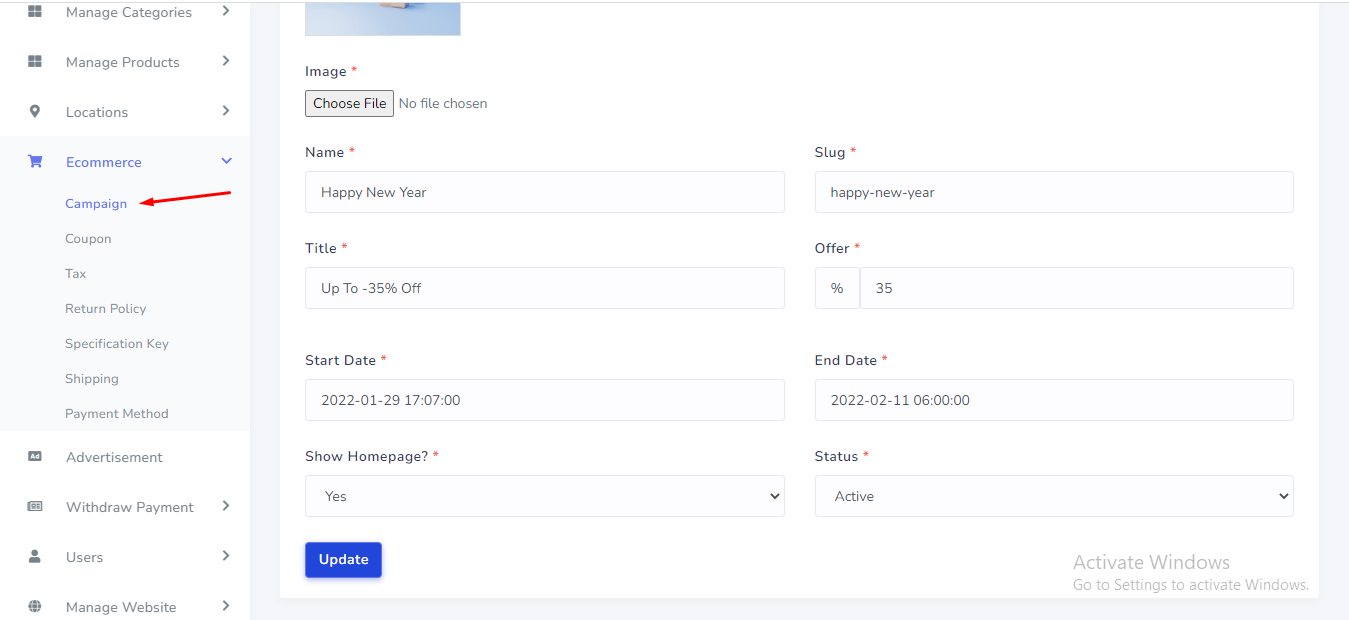
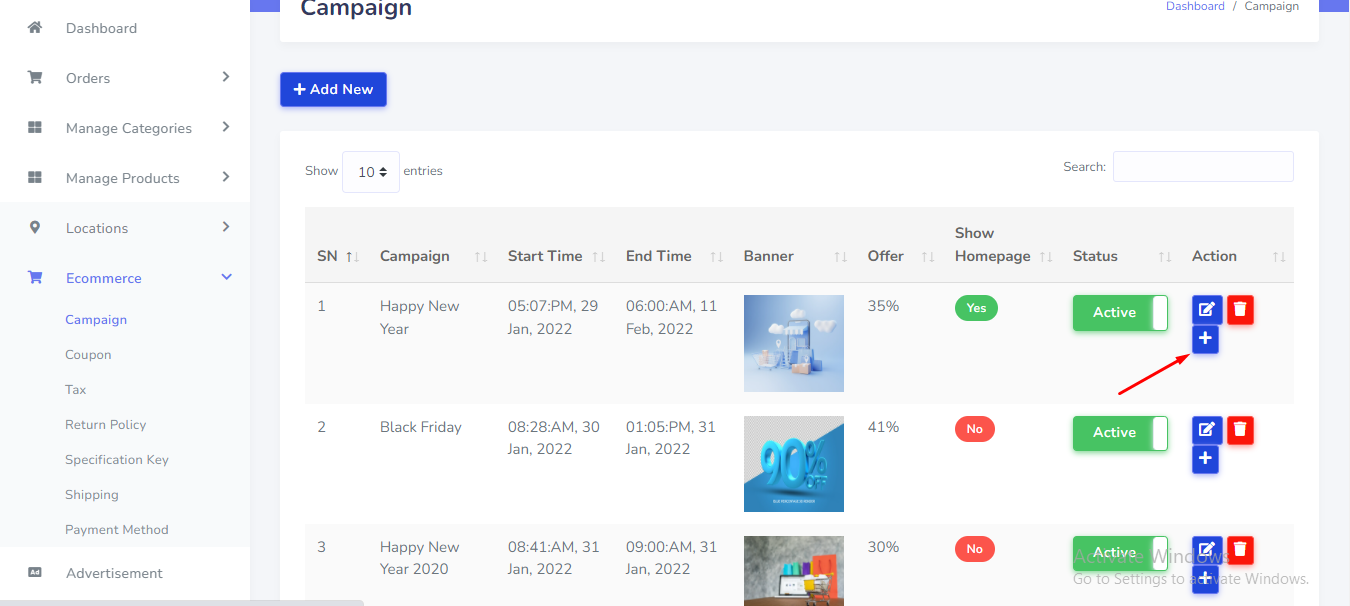
Campaign
Campaign can be setup from the admin panel. Go to "Ecommerce >> Campaign" from sidebar. See:
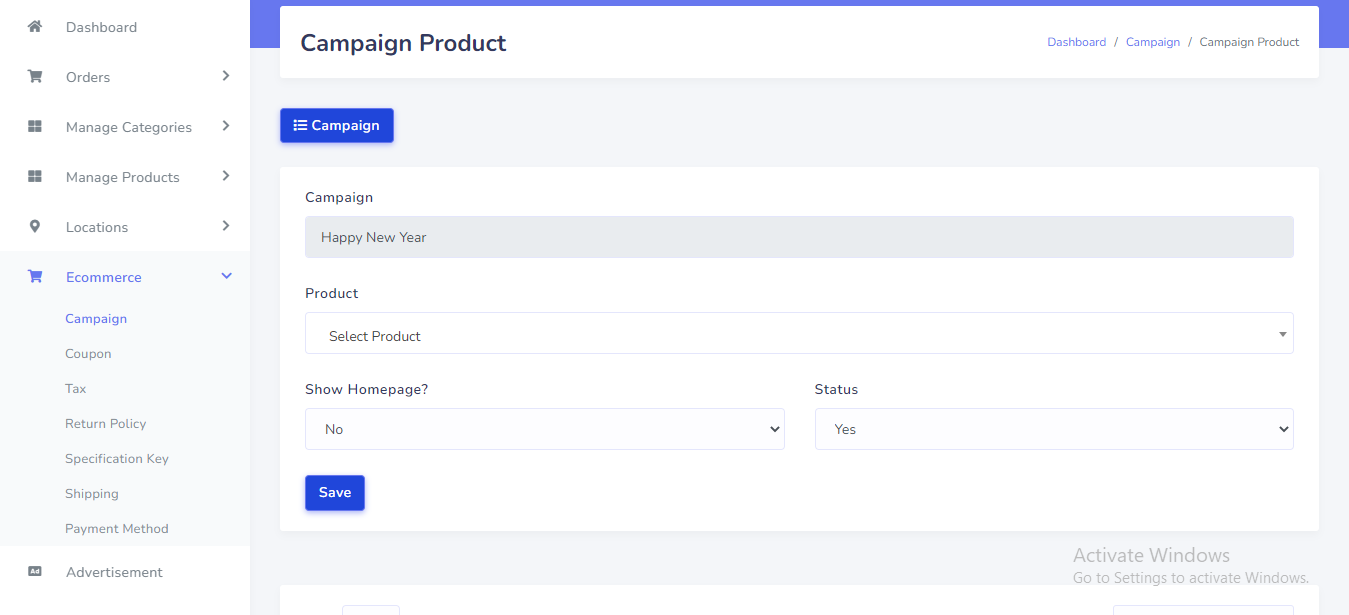
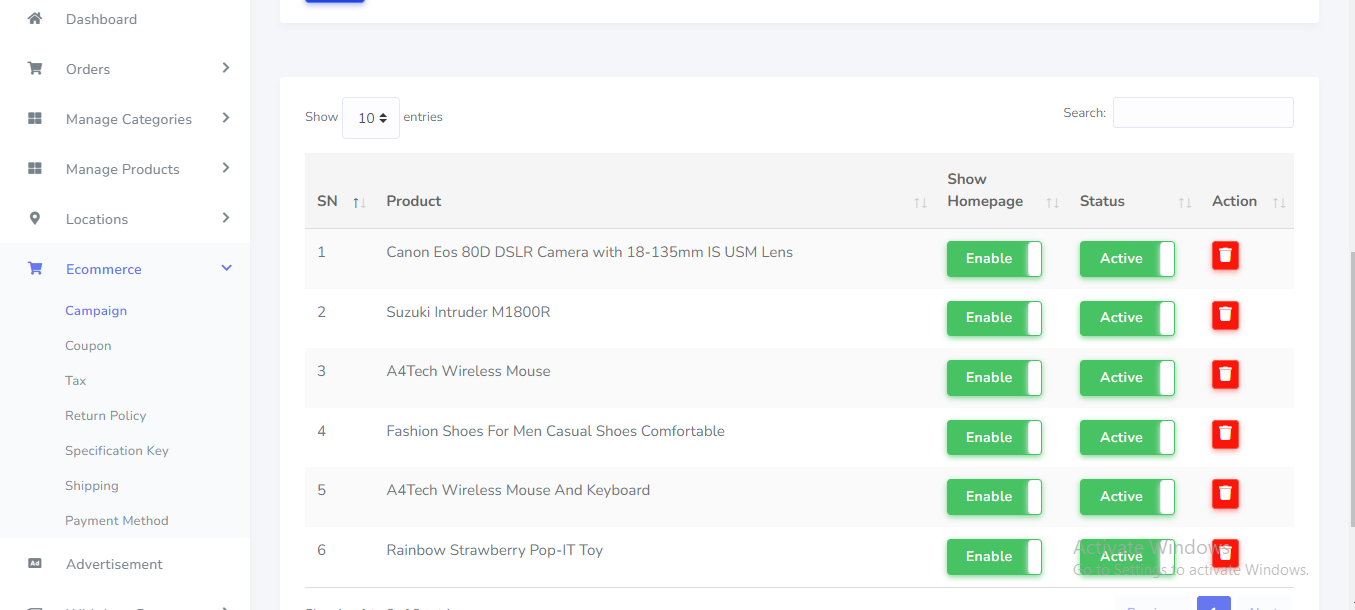
Campaign Product
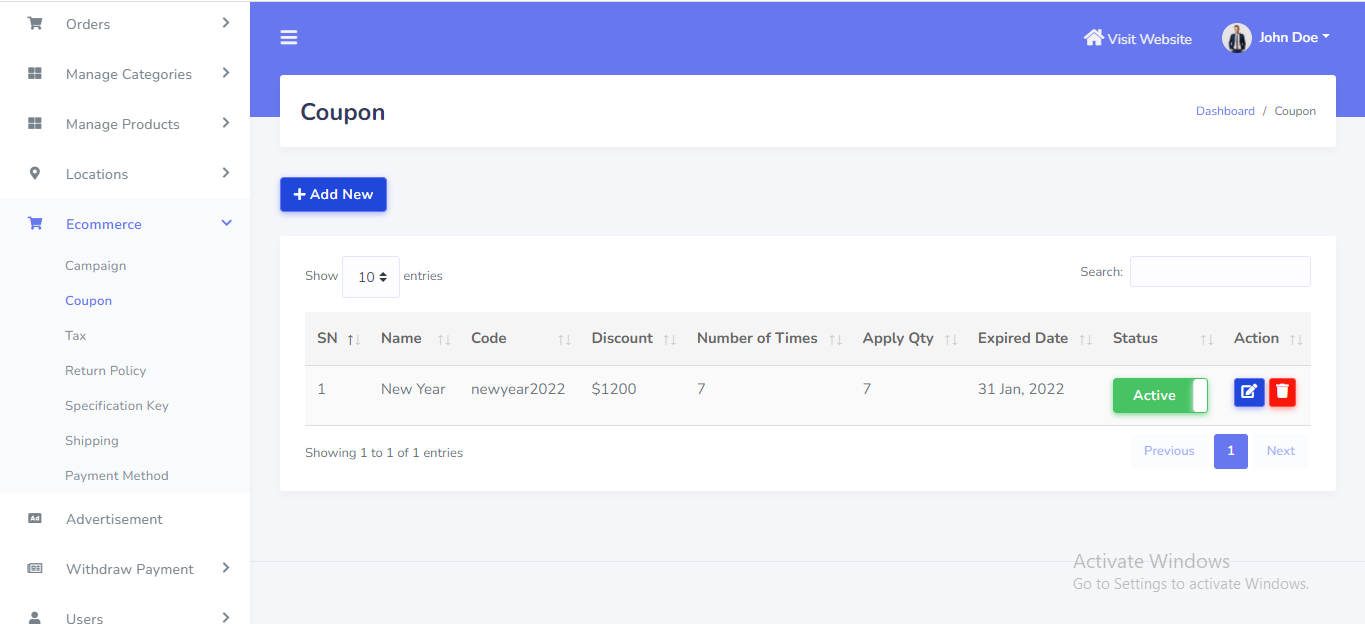
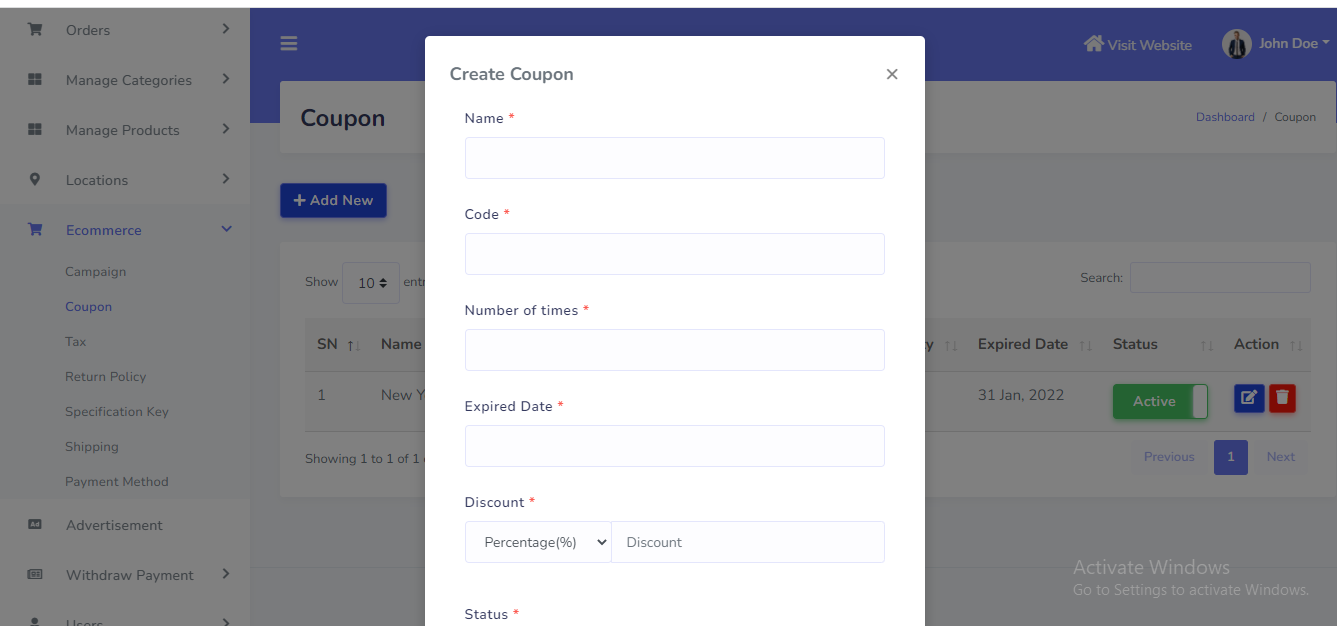
Coupon
Coupon can be setup from the admin panel. Go to "Ecommerce >> Coupon" from sidebar. See:
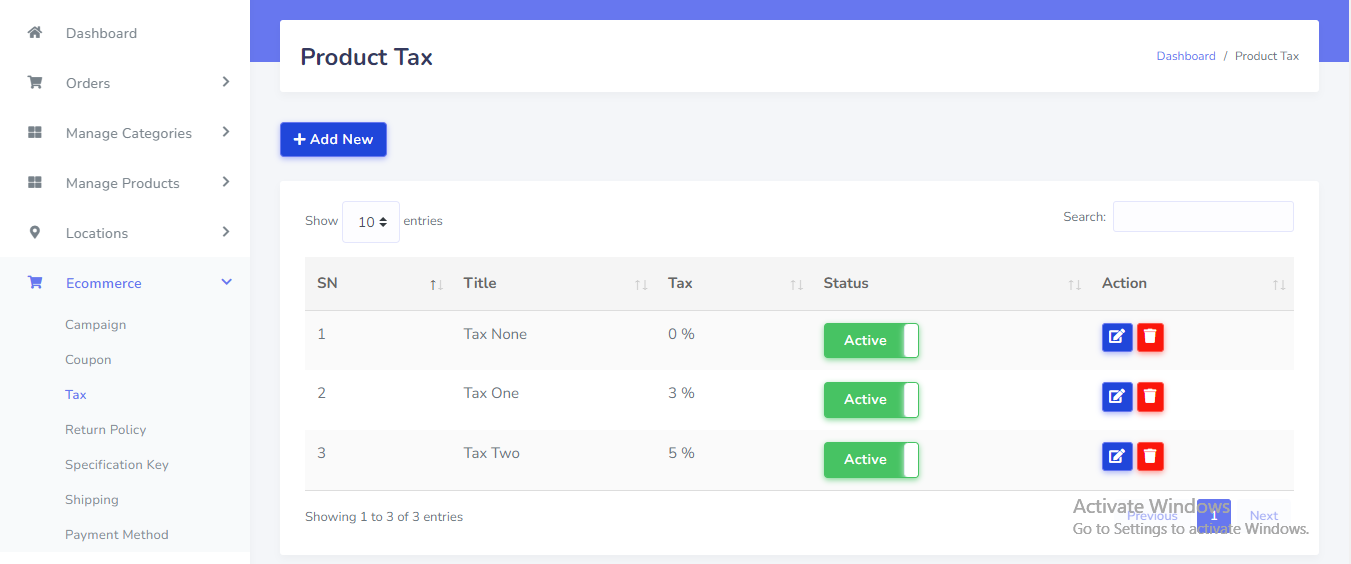
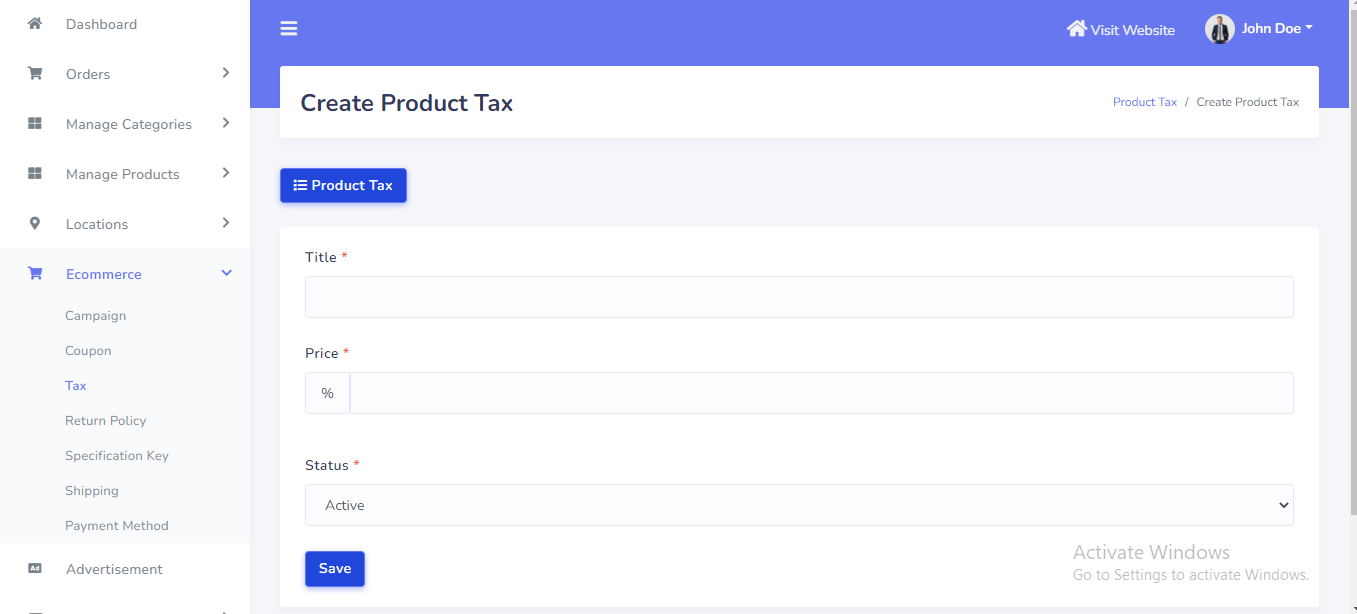
Tax
Tax can be setup from the admin panel. Go to "Ecommerce >> Tax" from sidebar. See:
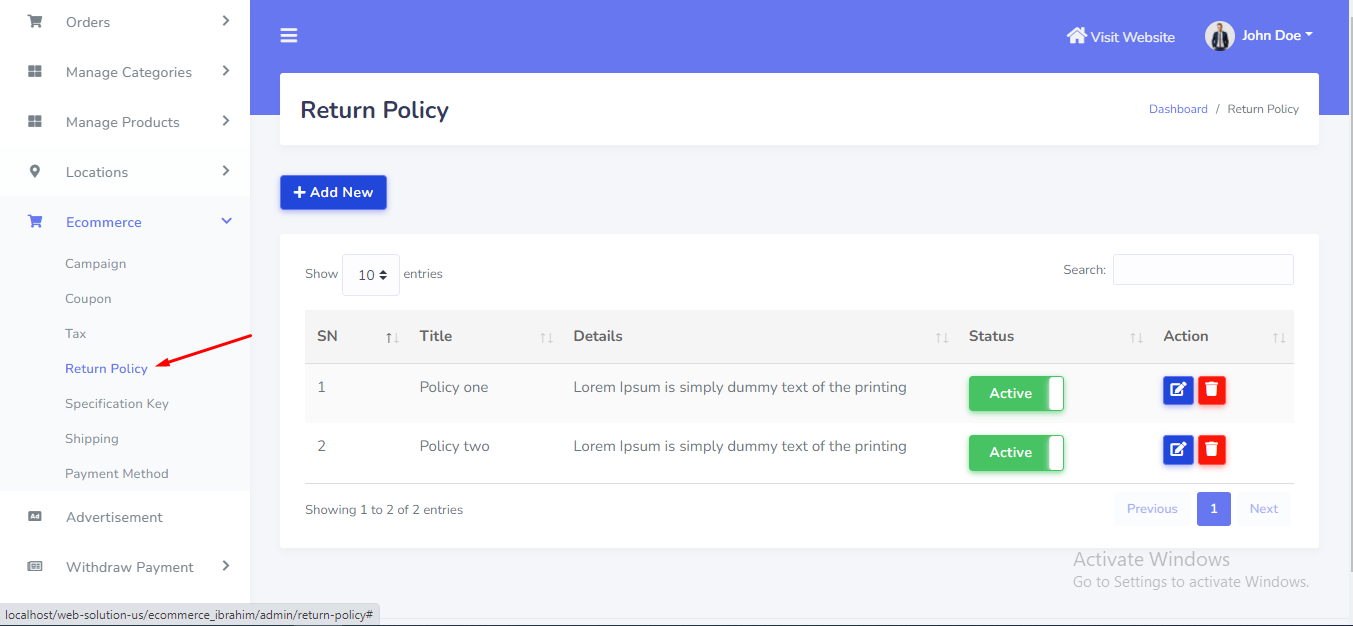
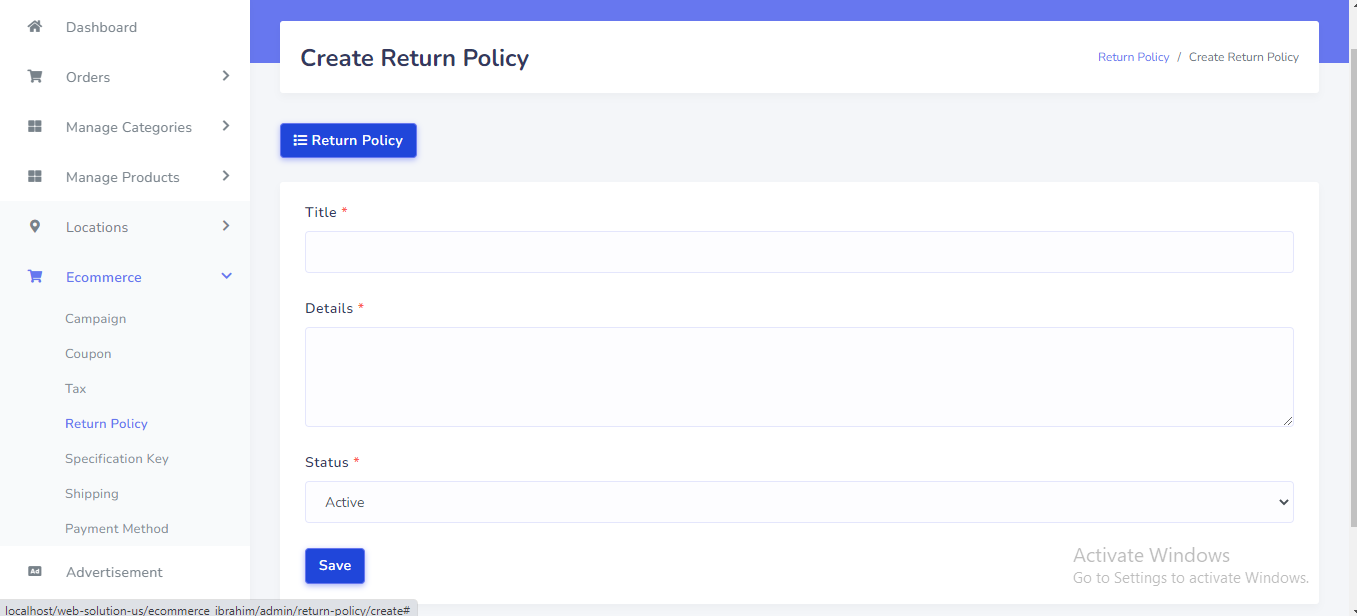
Return Policy
Return Policy can be setup from the admin panel. Go to "Ecommerce >> Return Policy" from sidebar. See:
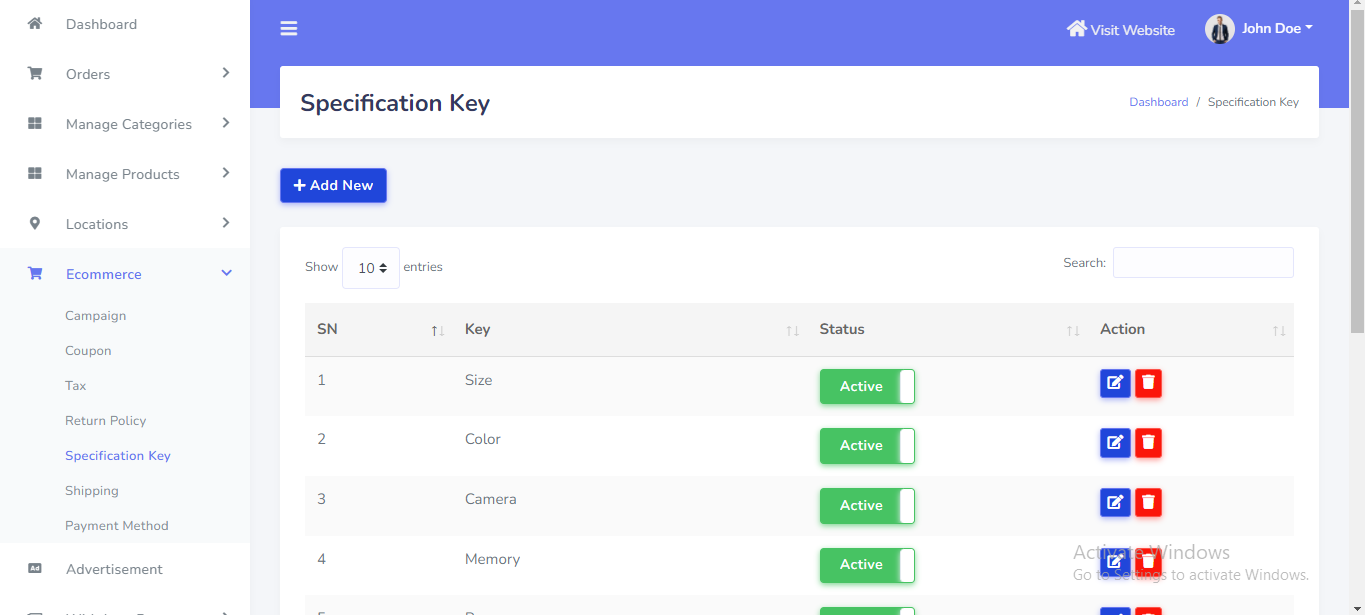
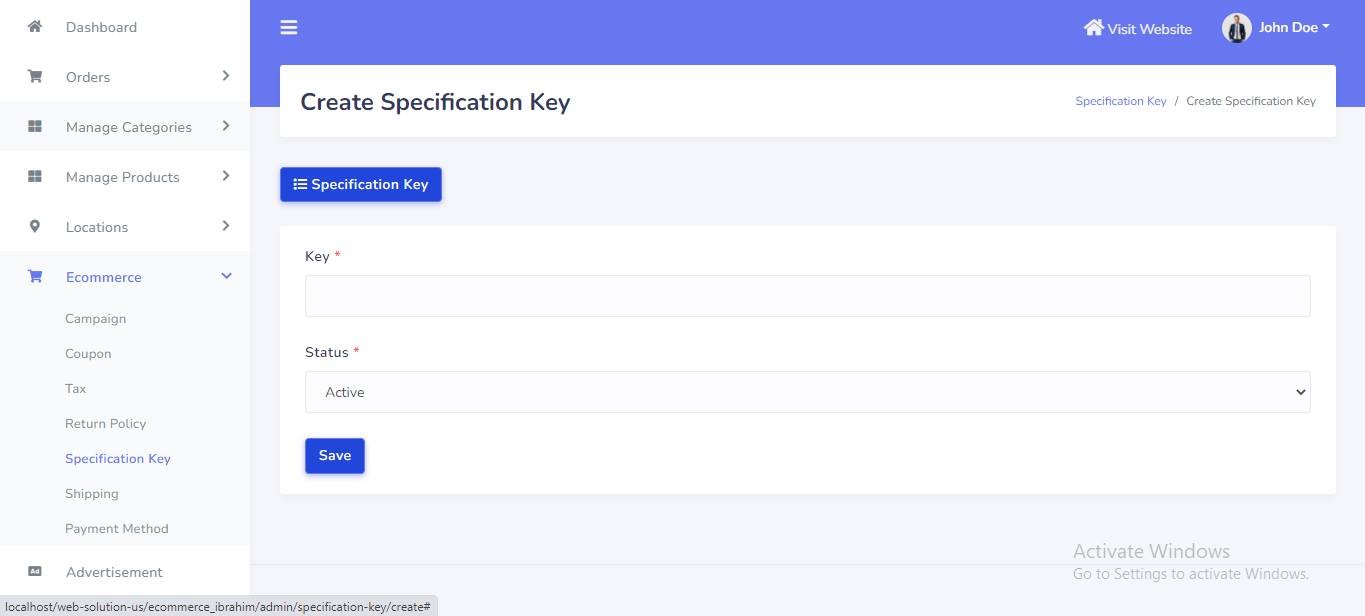
Specification key
Specification key can be setup from the admin panel. Go to "Ecommerce >> Specification key" from sidebar. See:
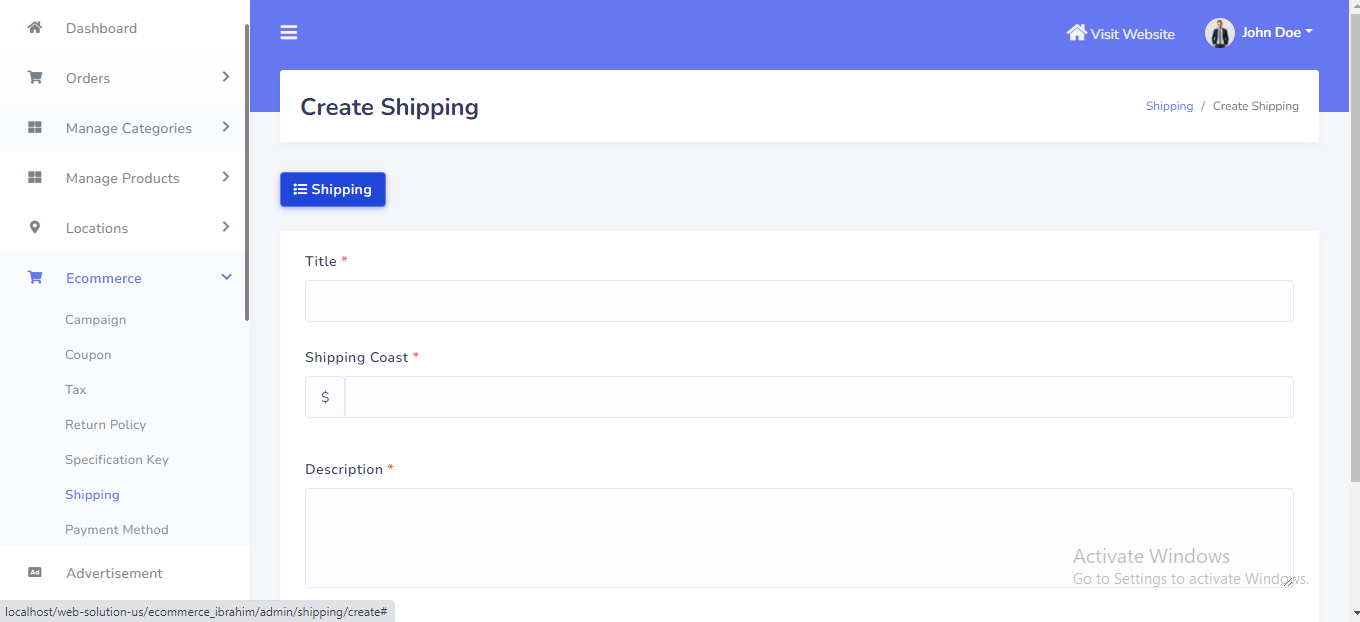
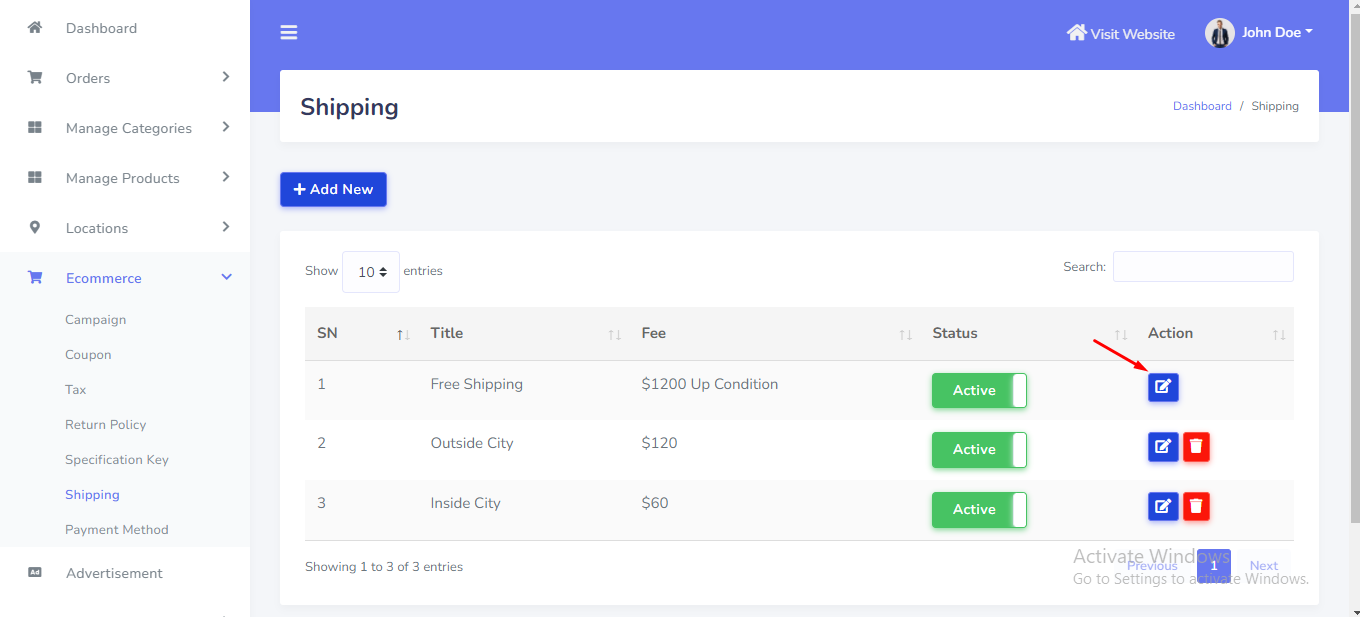
Shipping Method
Shipping Method can be setup from the admin panel. Go to "Ecommerce >> Shipping" from sidebar. See:
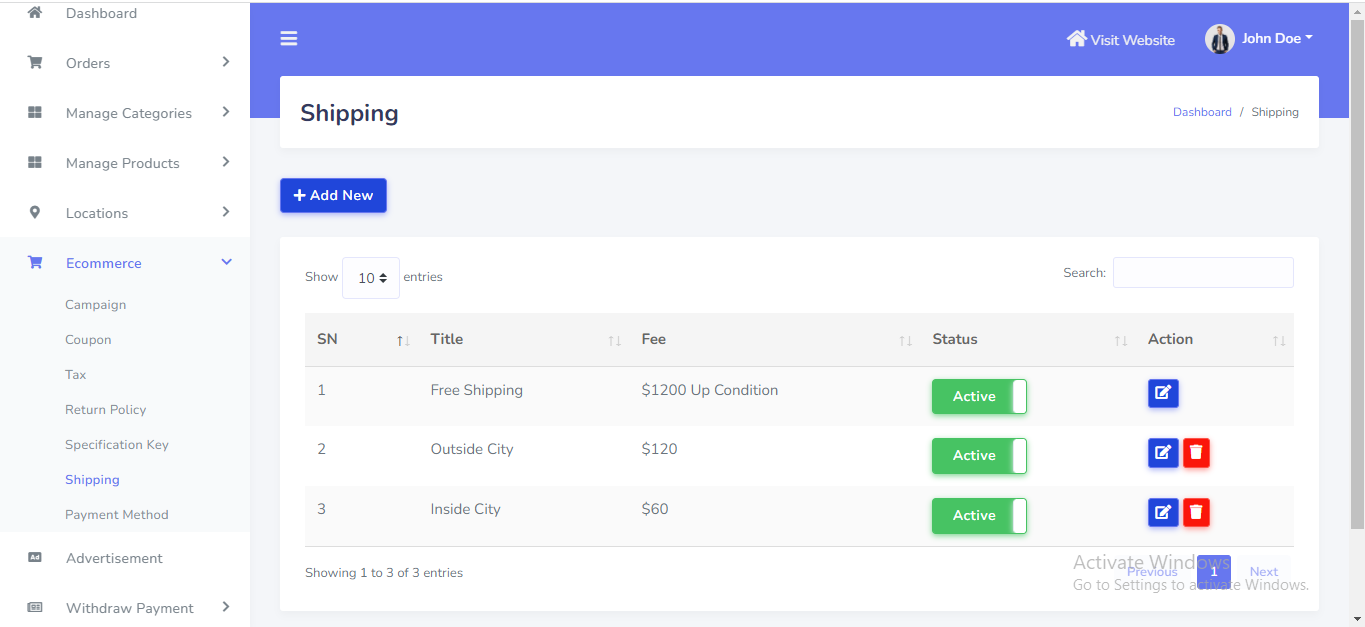
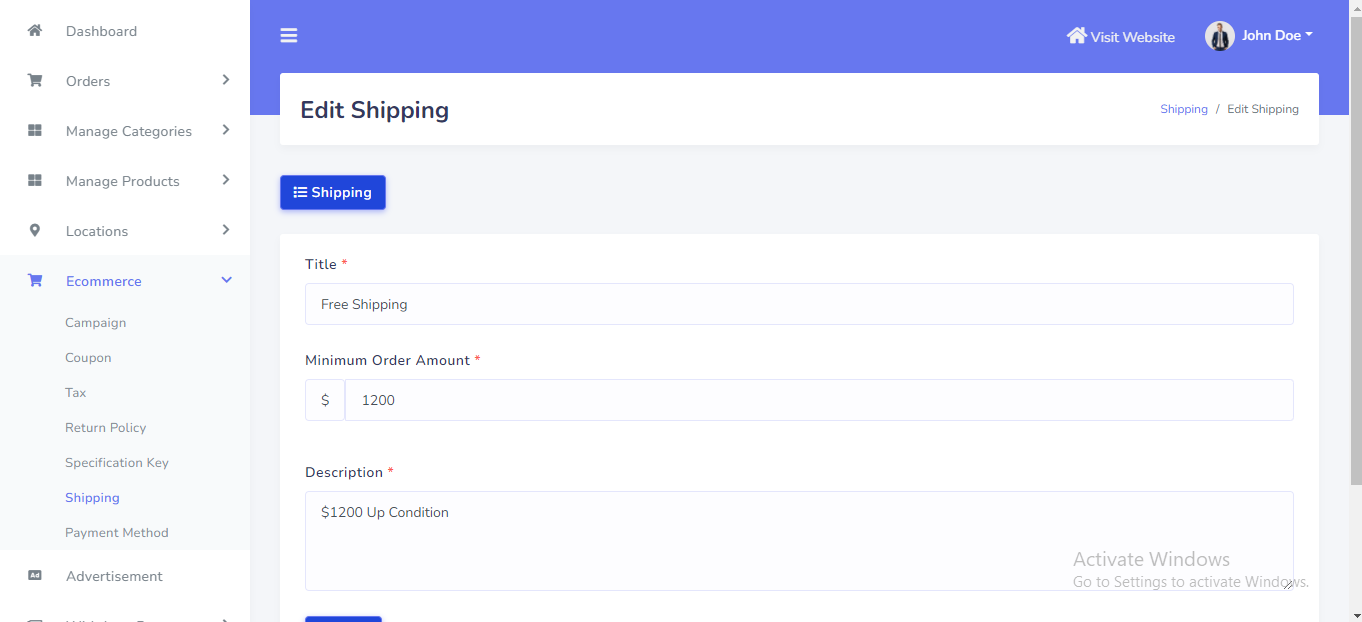
Free Shipping
Free Shipping can be setup from the admin panel. Go to "Ecommerce >> Shipping" from sidebar. See:
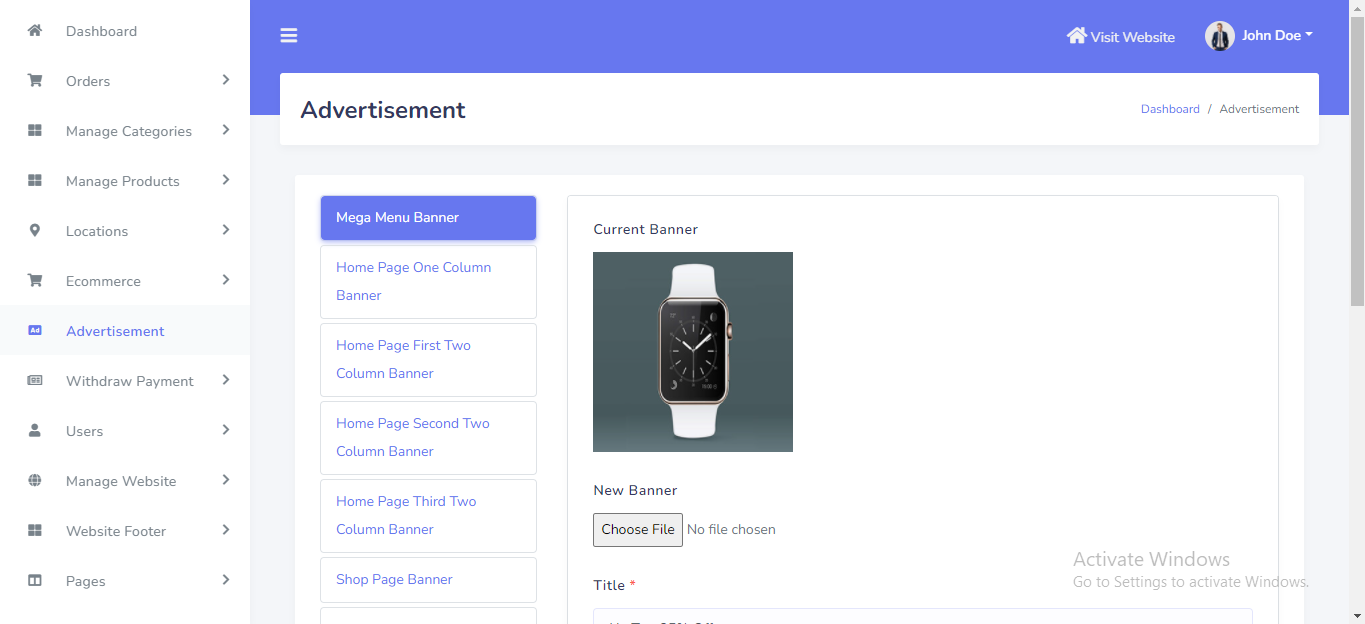
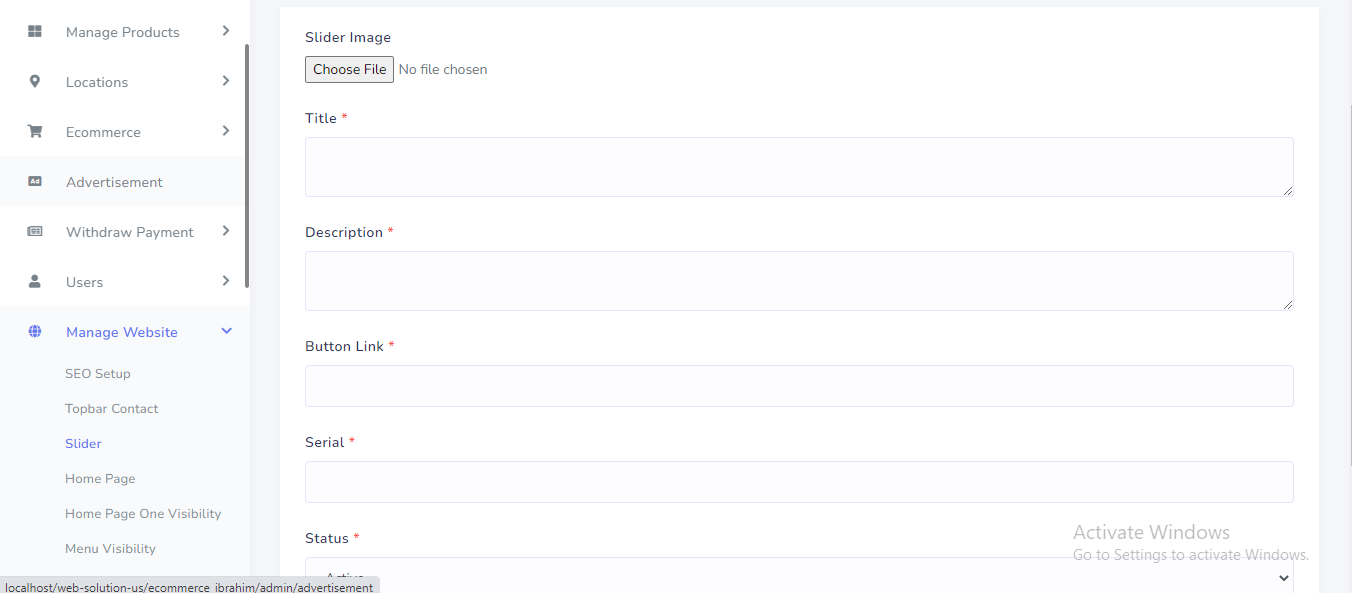
Advertisement banner
Advertisement banner can be setup from the admin panel. Go to "Advatisement" from sidebar. See:
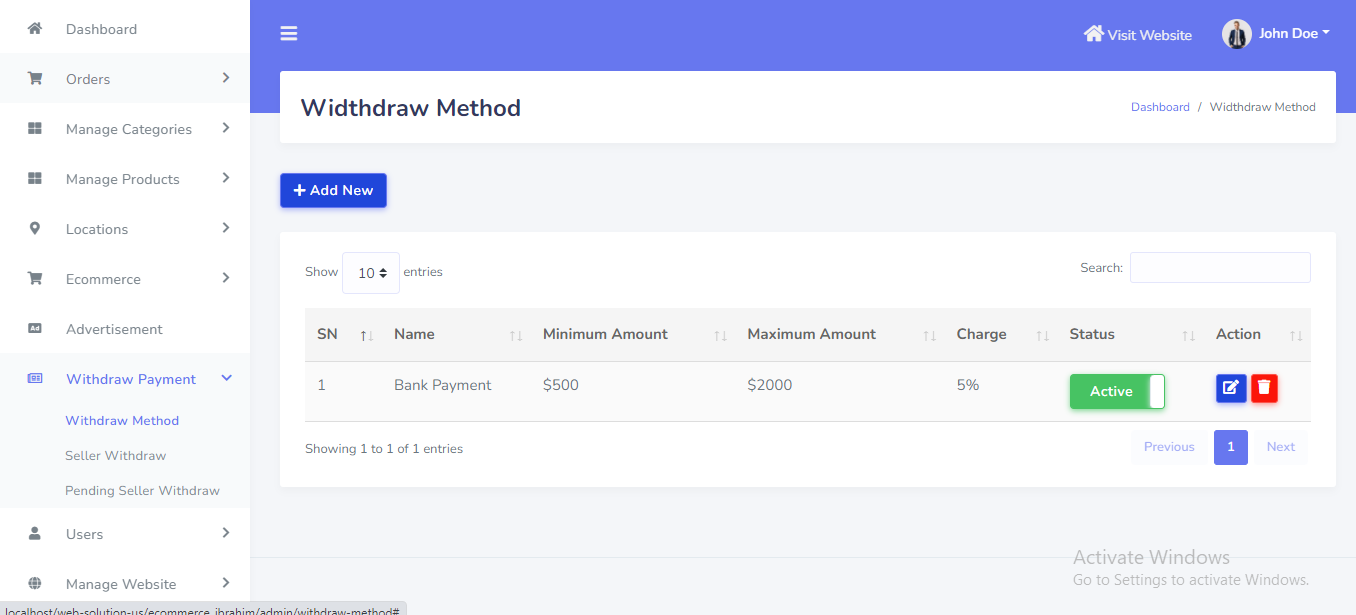
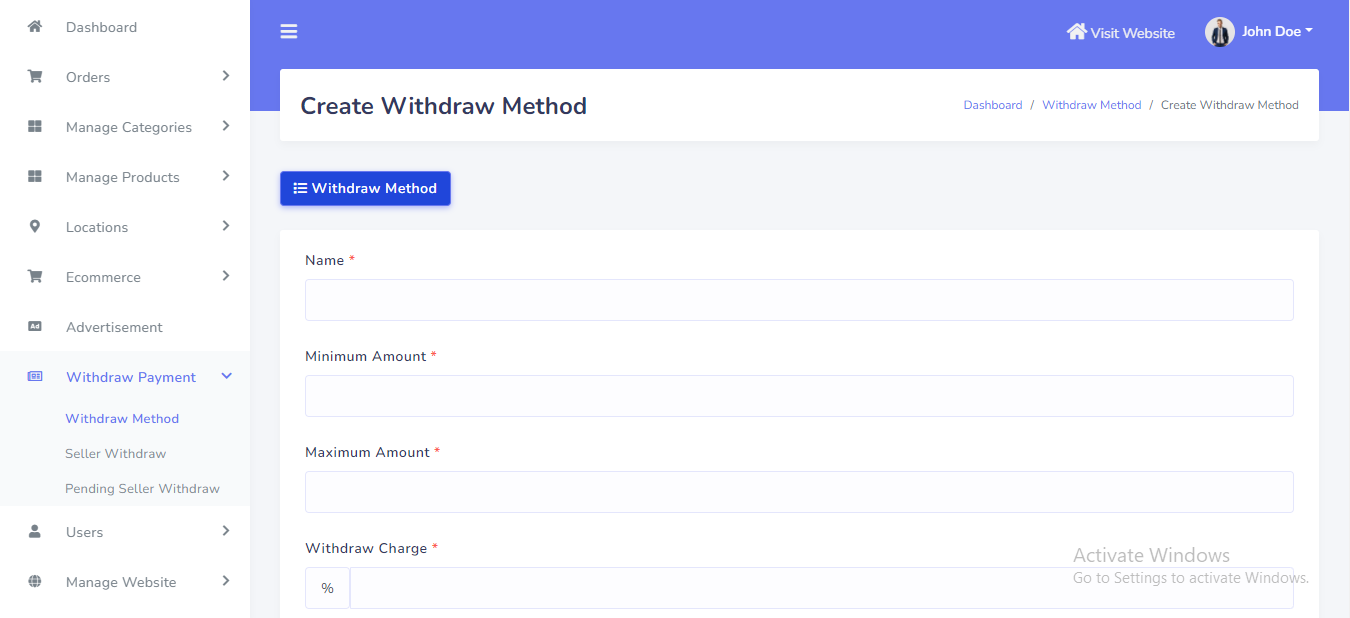
Withdraw Method
Withdraw Method can be setup from the admin panel. Go to "Withdraw Payment >> Withdraw method" from sidebar. See:
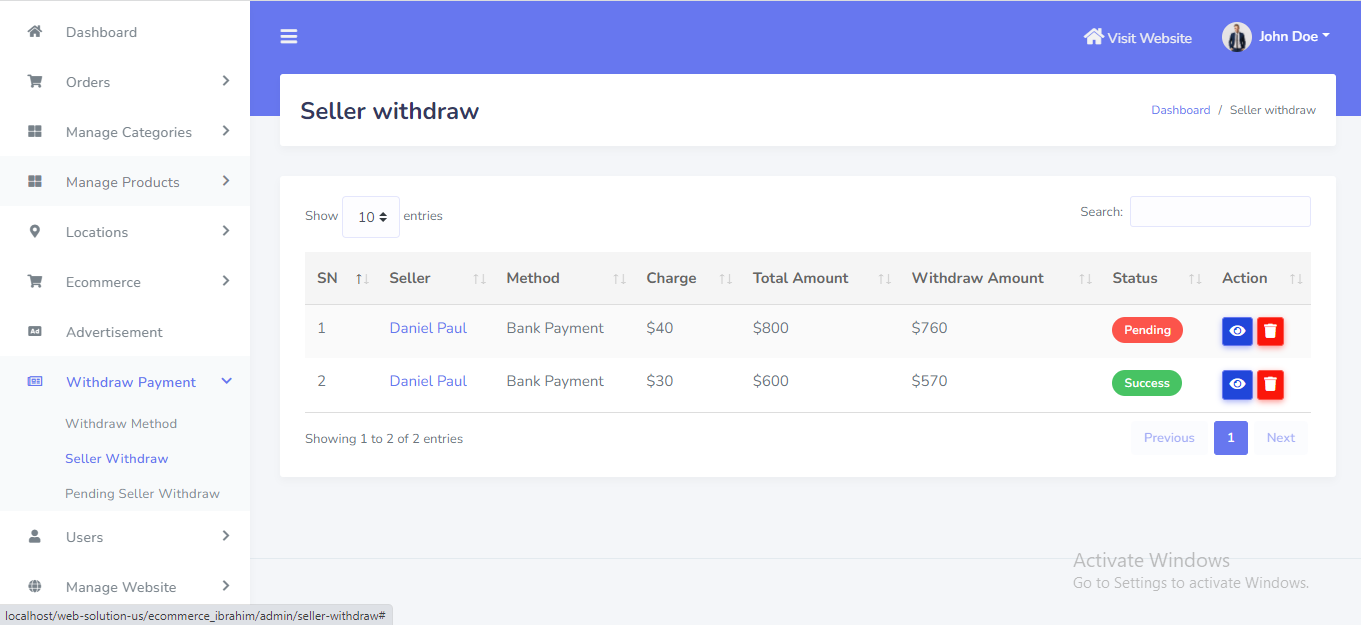
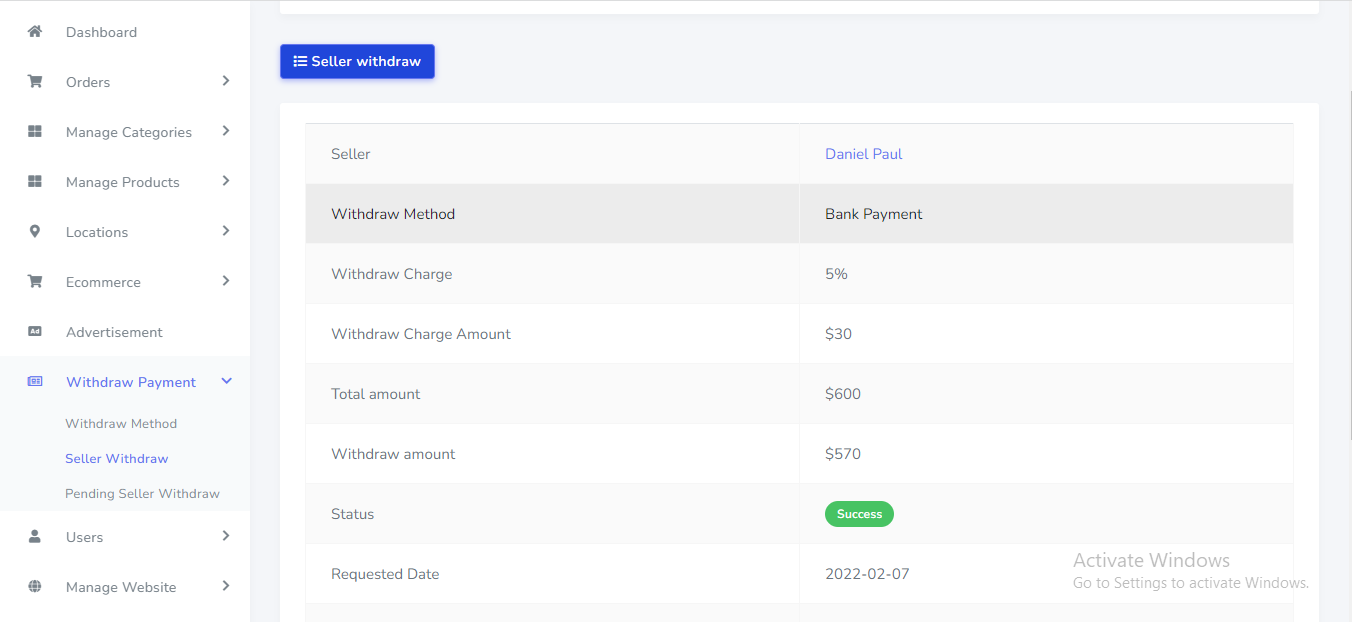
Seller withdraw
Seller withdraw can be manage from the admin panel. Go to "Withdraw Payment >> Seller withdraw" from sidebar. See:
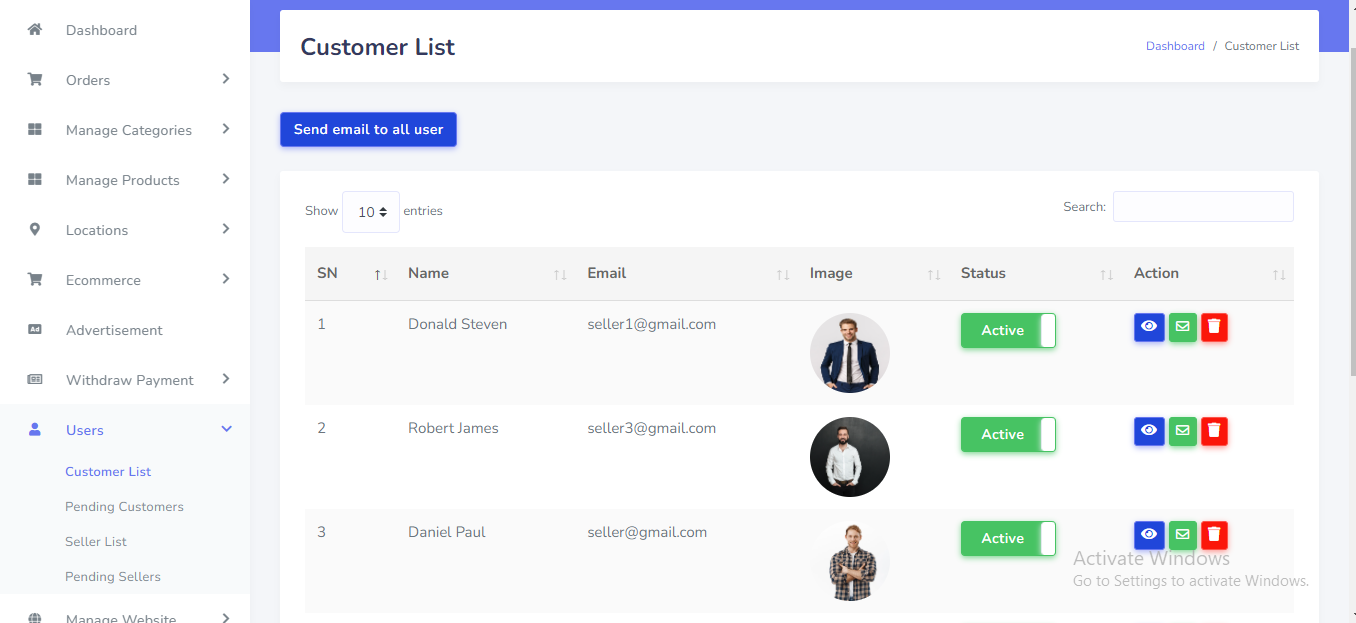
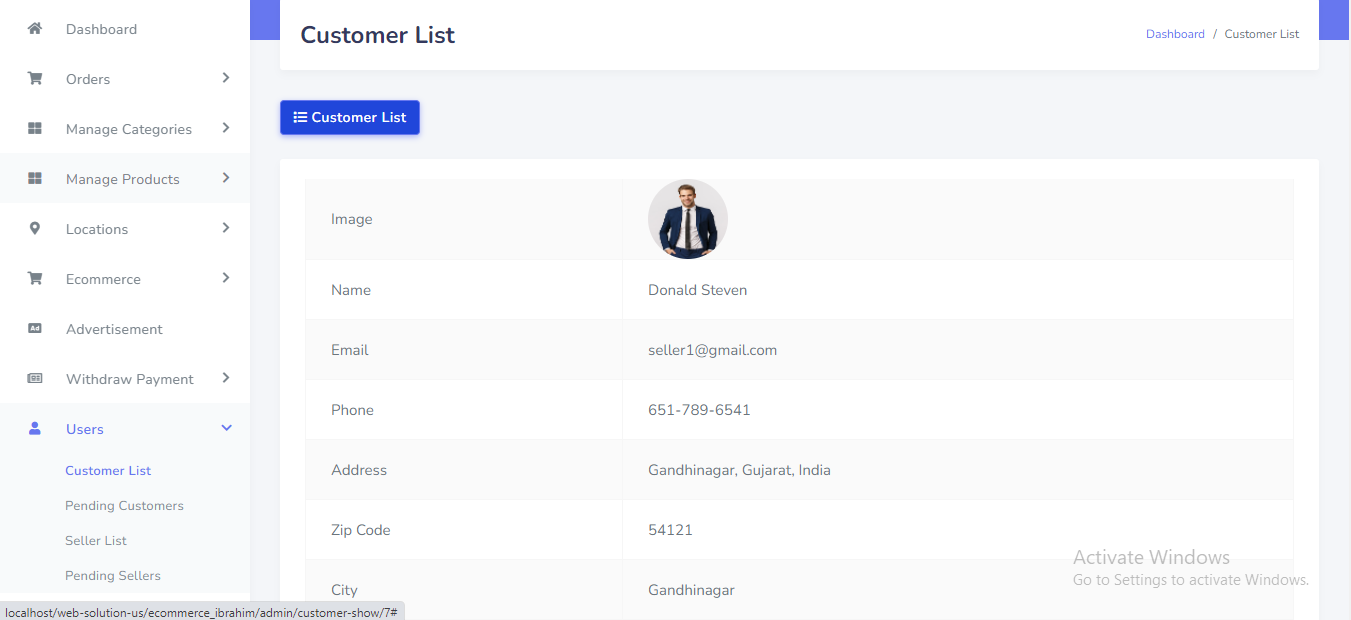
Customer
Customer can be manage from the admin panel. Go to "Users >> Customer List" from sidebar. See:
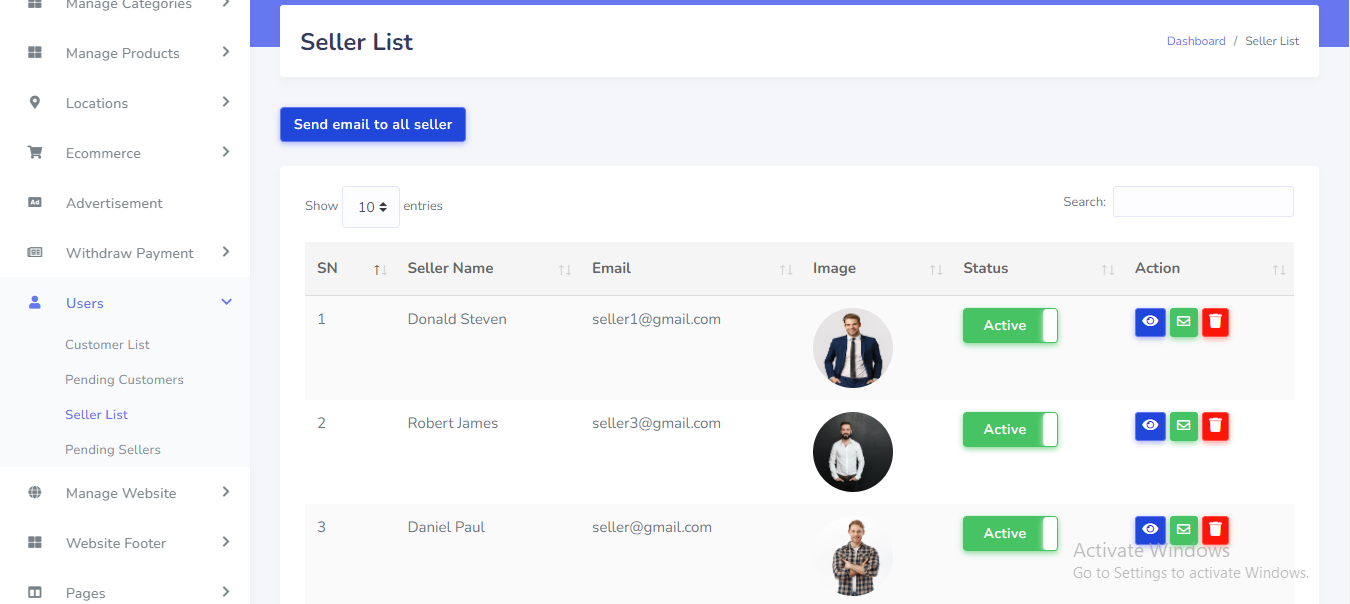
Seller
Seller can be manage from the admin panel. Go to "Users >> Seller List" from sidebar. See:

Topbar Contact
Topbar Contact can be manage from the admin panel. Go to "Manage website >> Topbar Contact" from sidebar. See:

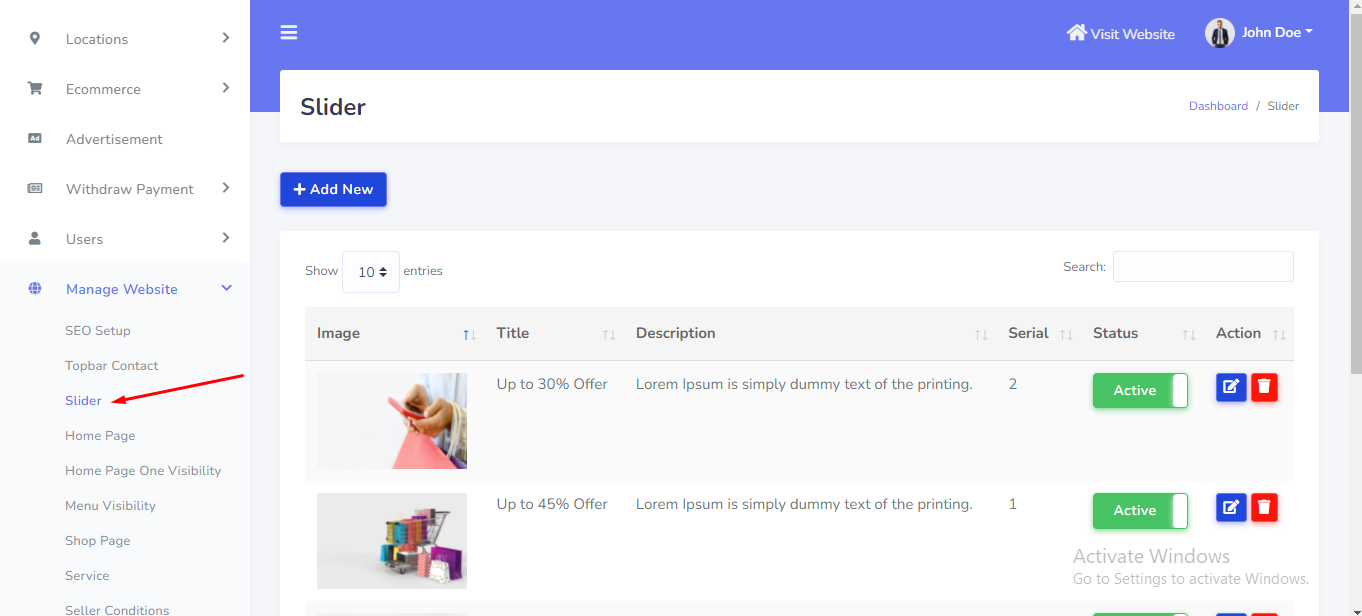
Slider
Slider can be manage from the admin panel. Go to "Manage website >> Slider" from sidebar. See:
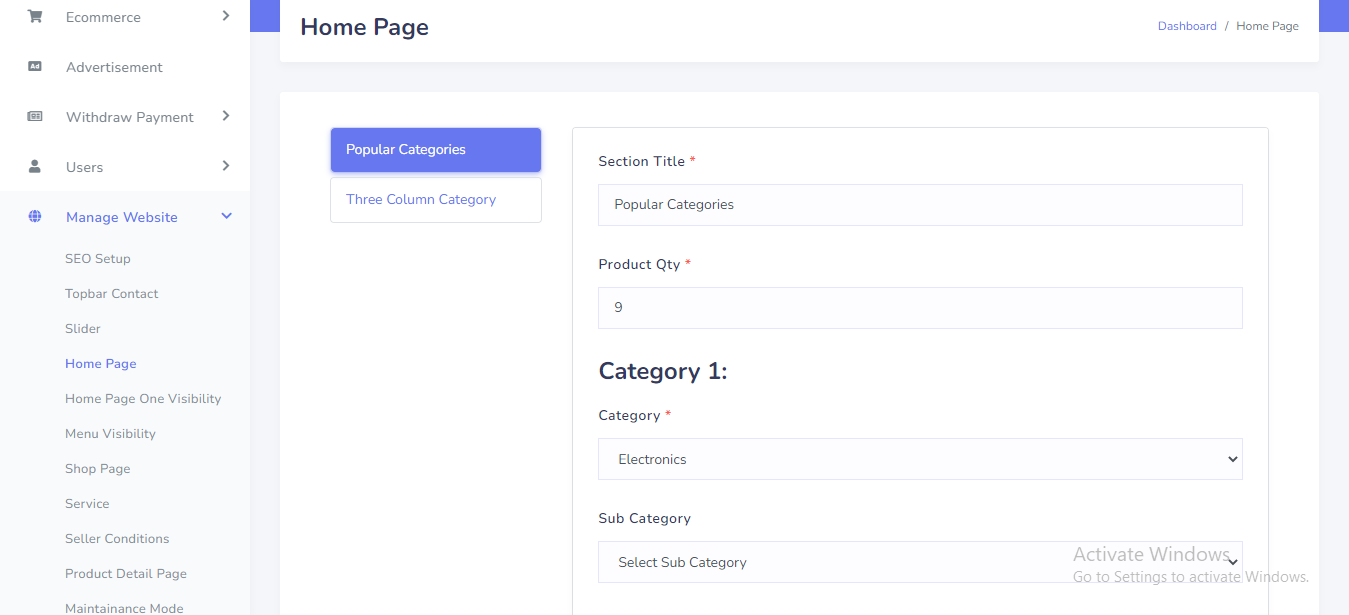
Home page popular category
Home page popular category can be manage from the admin panel. Go to "Manage website >> Home page" from sidebar. See:
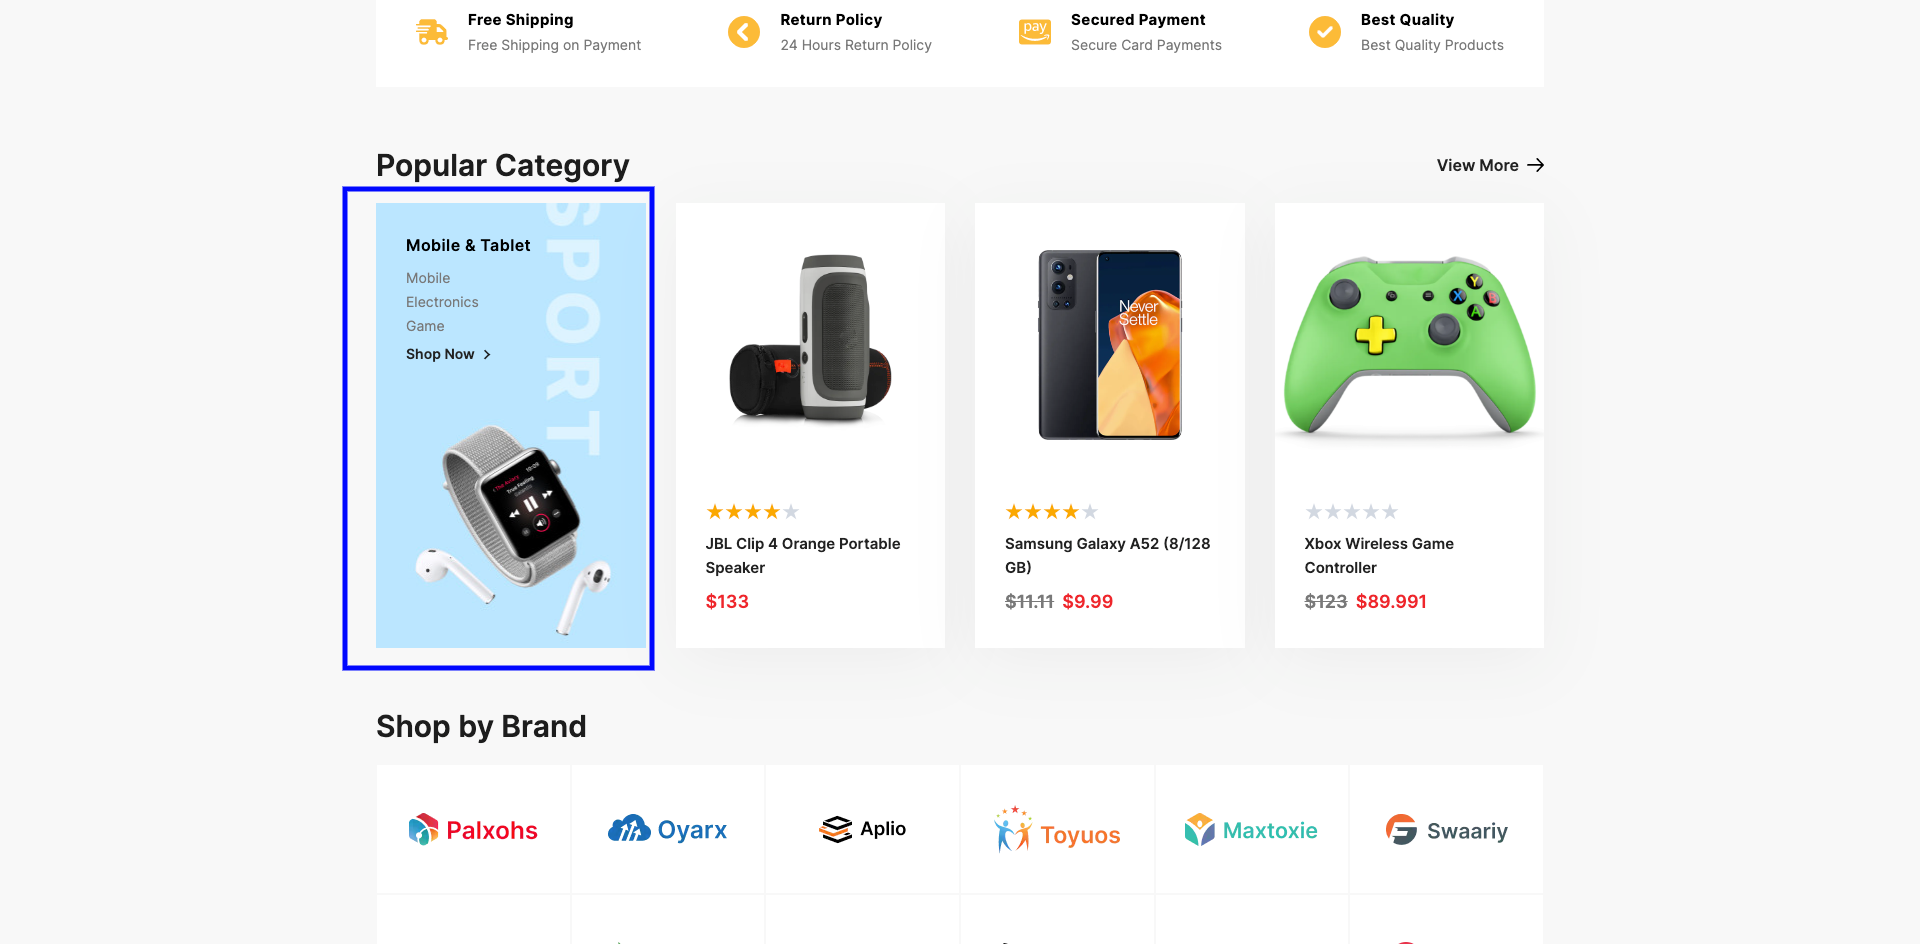
In the front end, the categories will be shown like this. See:
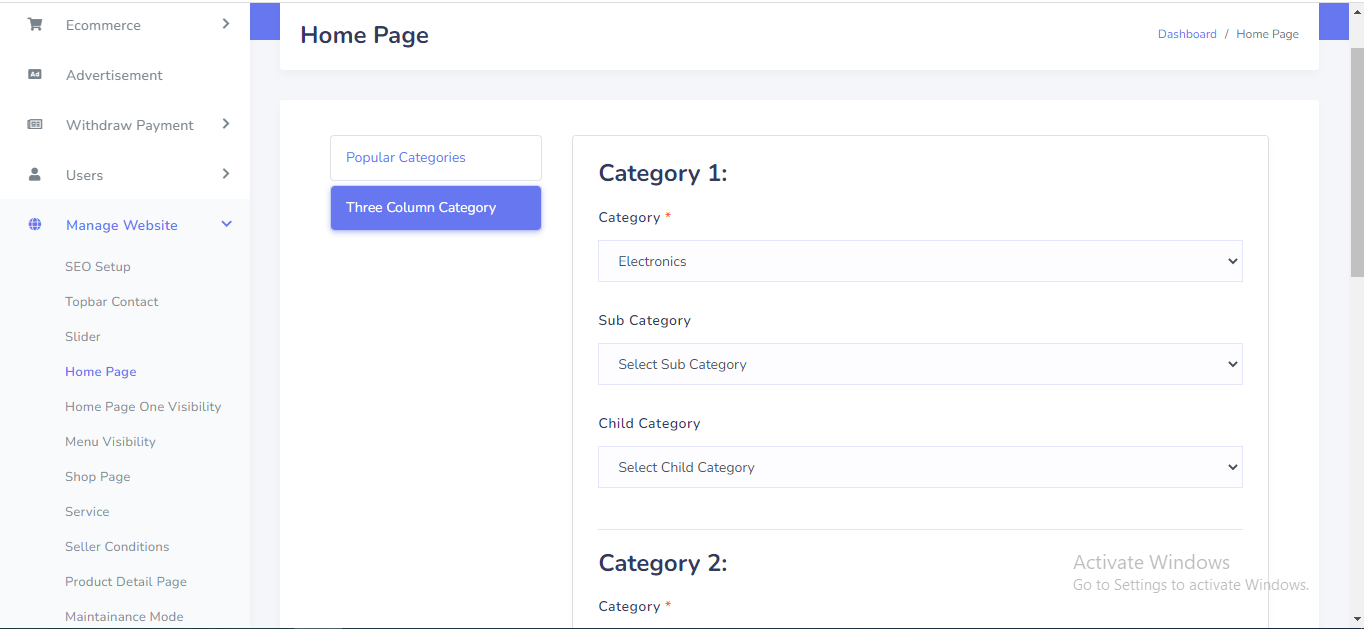
Home page three column category
Home page three column category can be manage from the admin panel. Go to "Manage website >> Home page" from sidebar. See:
In the front end, the categories will be shown like this. See:
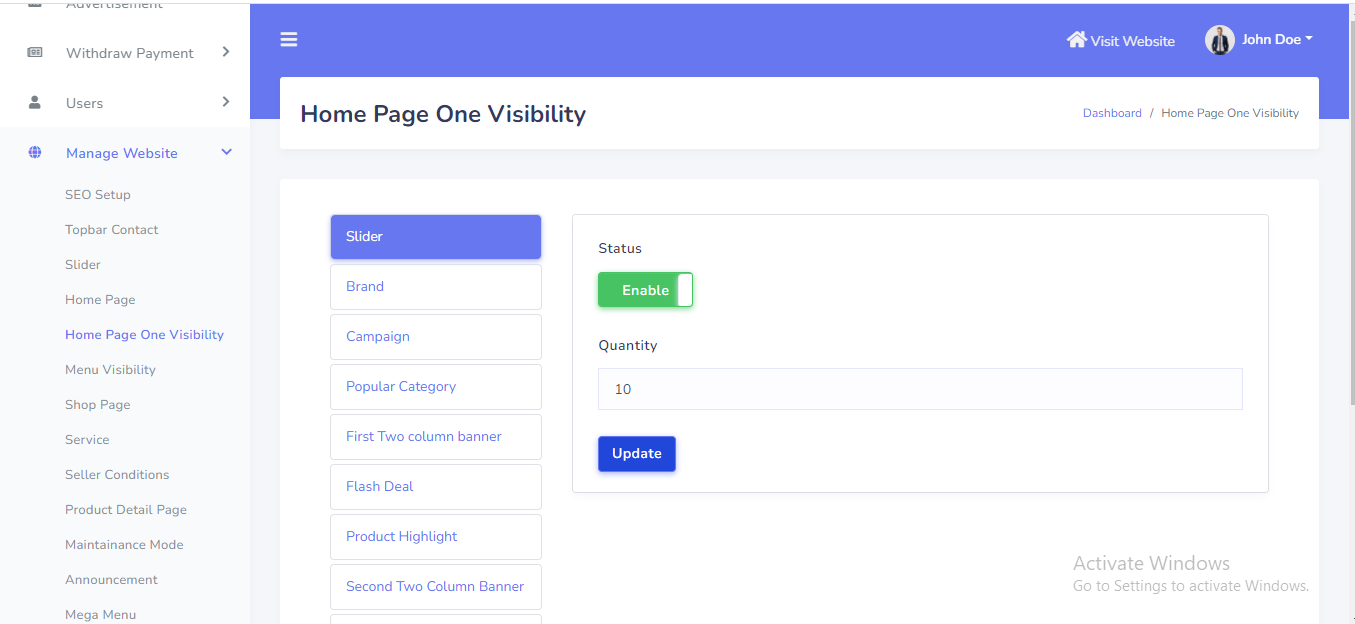
Home page Visibility
Home page each section visibility can be manage from the admin panel. Go to "Manage website >> Home page One Visibility" from sidebar. See:
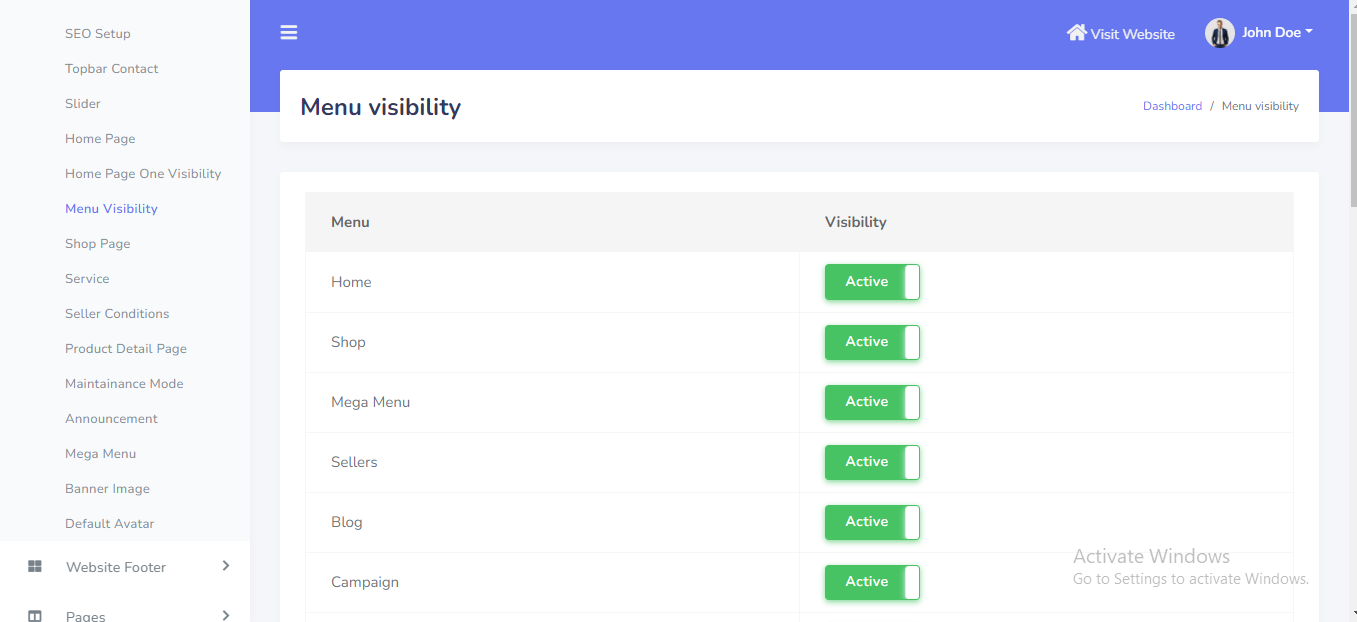
Menu Visibility
Each menu visibility can be manage from the admin panel. Go to "Manage website >> Menu Visibility" from sidebar. See:
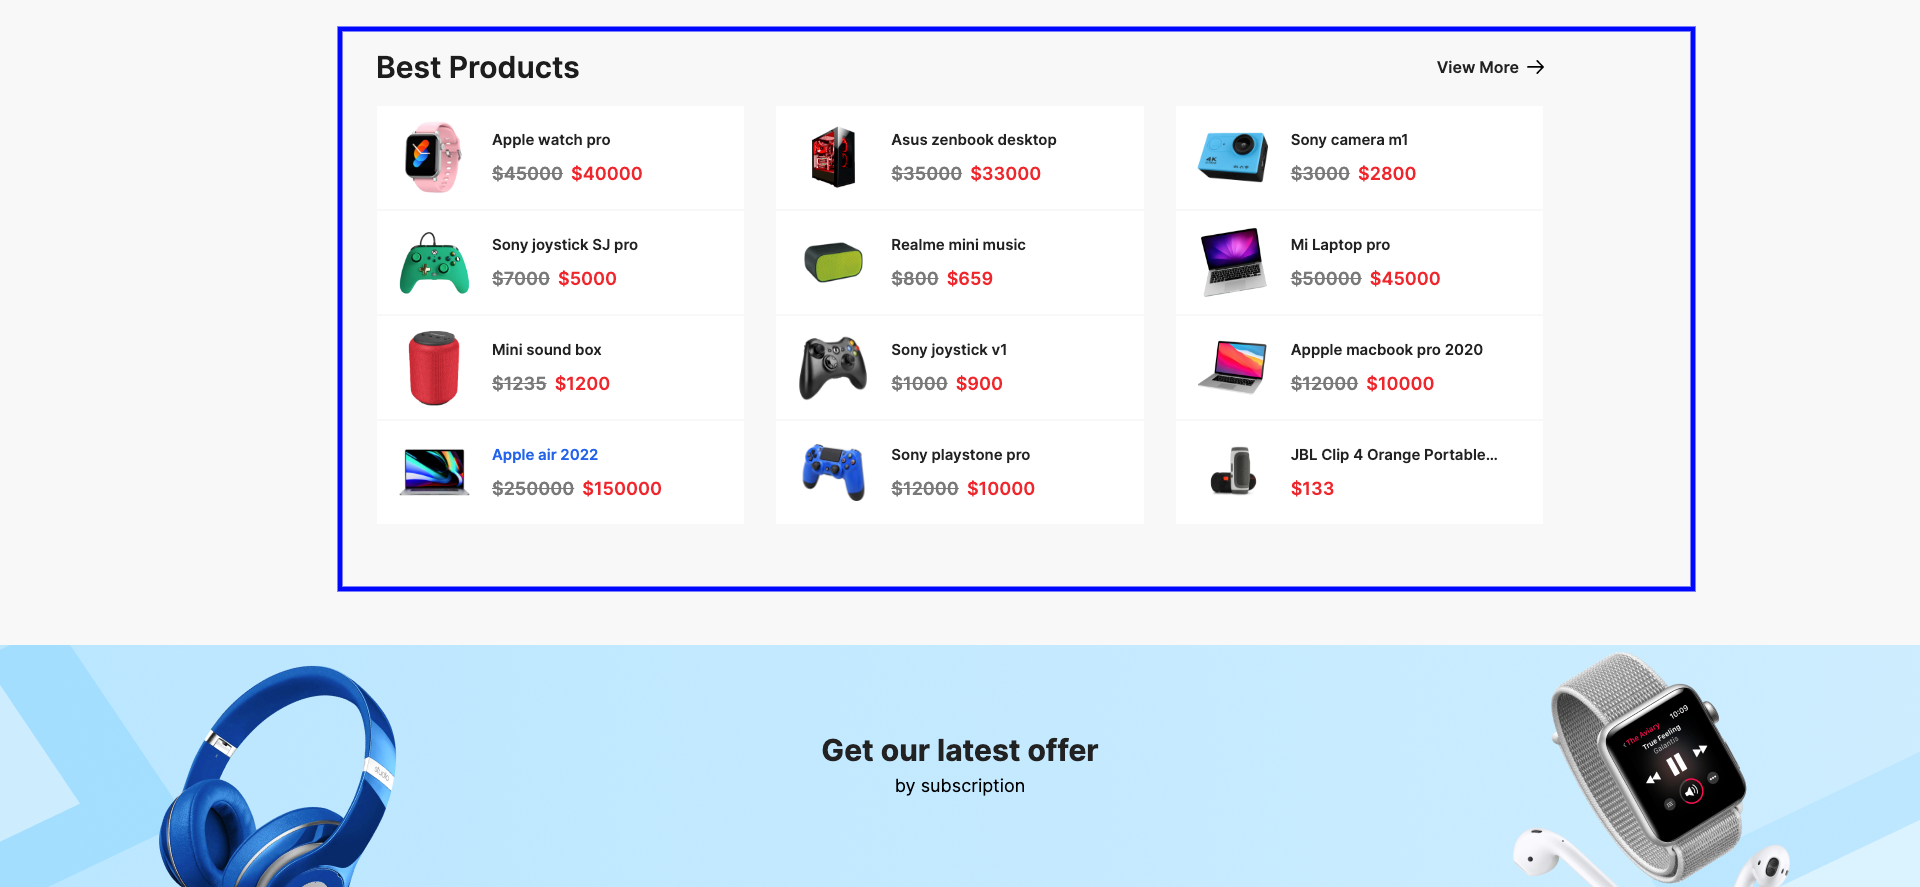
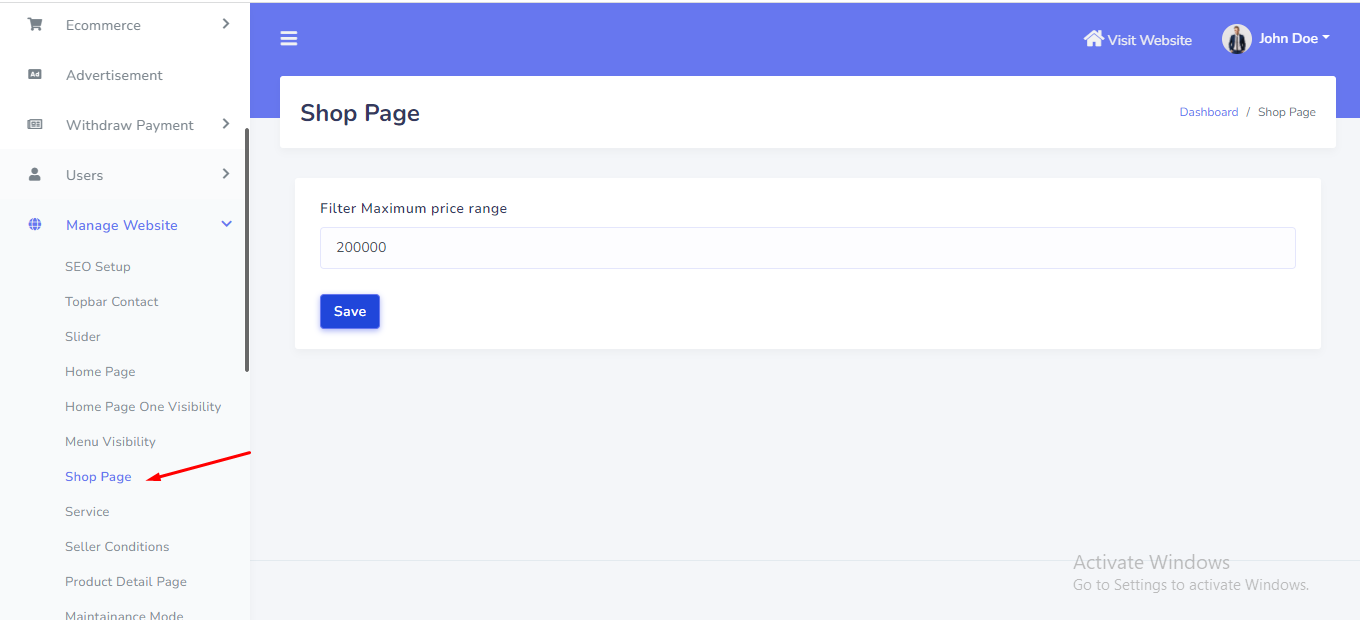
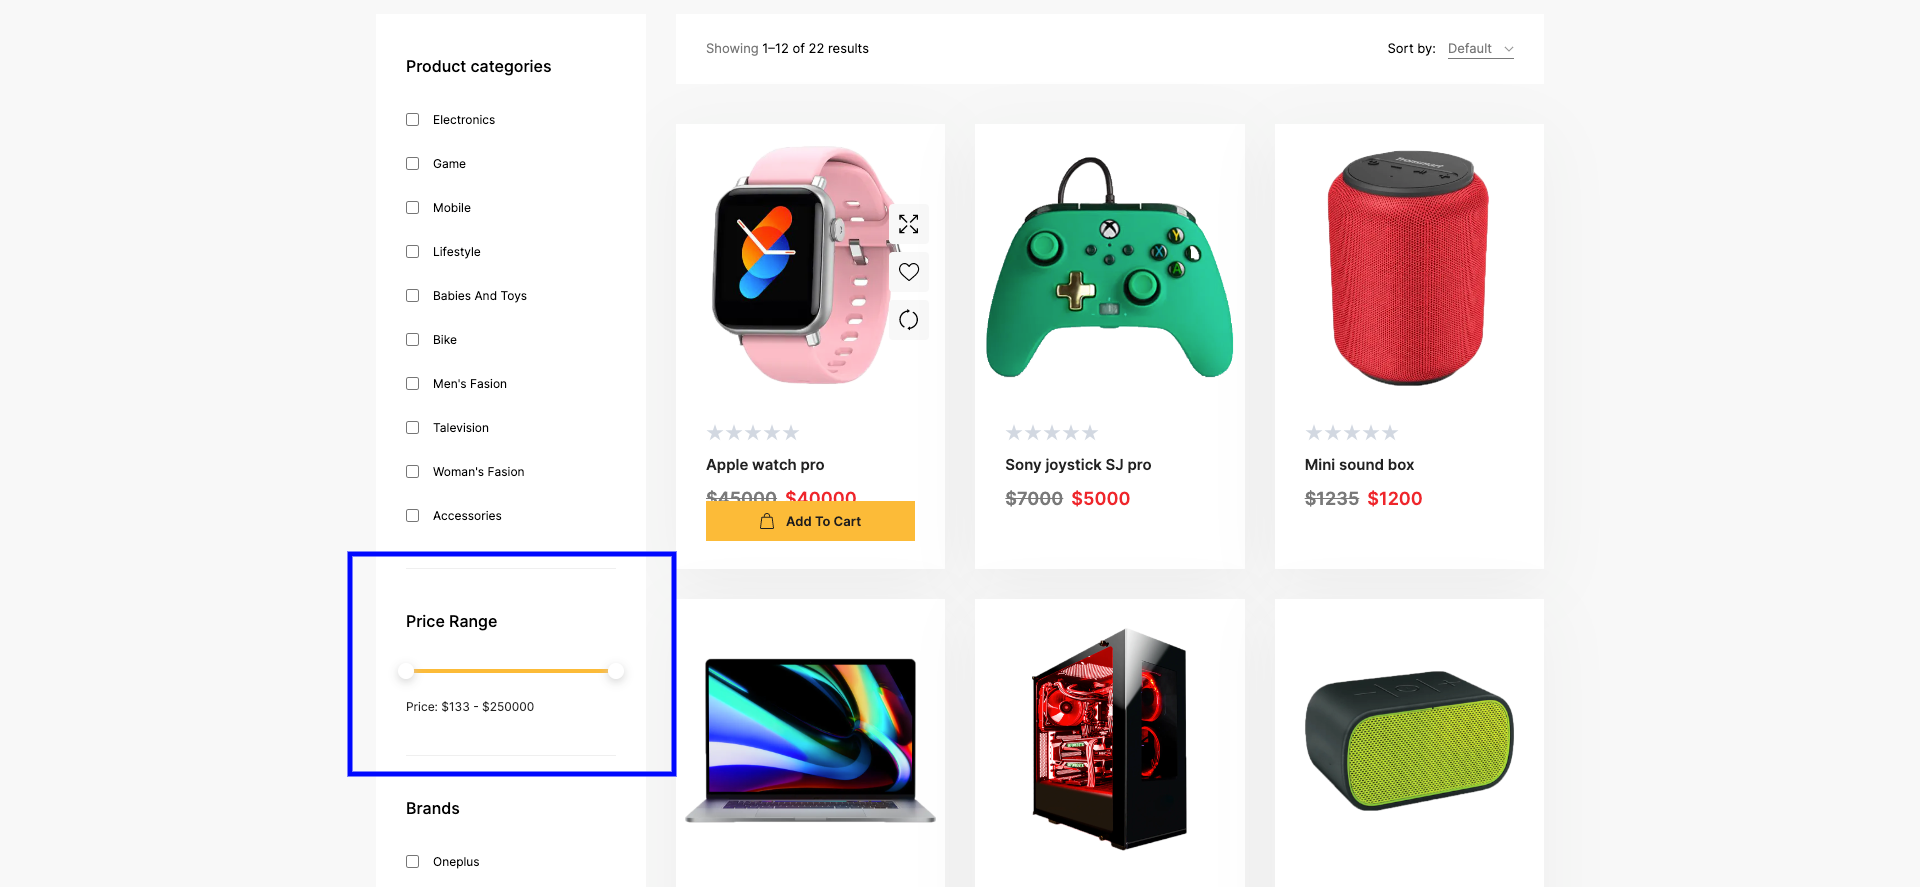
Shop page filter price
Shop page filter price can be manage from the admin panel. Go to "Manage website >> Shop page" from sidebar. See:
In the front end, the data will be shown like this. See:
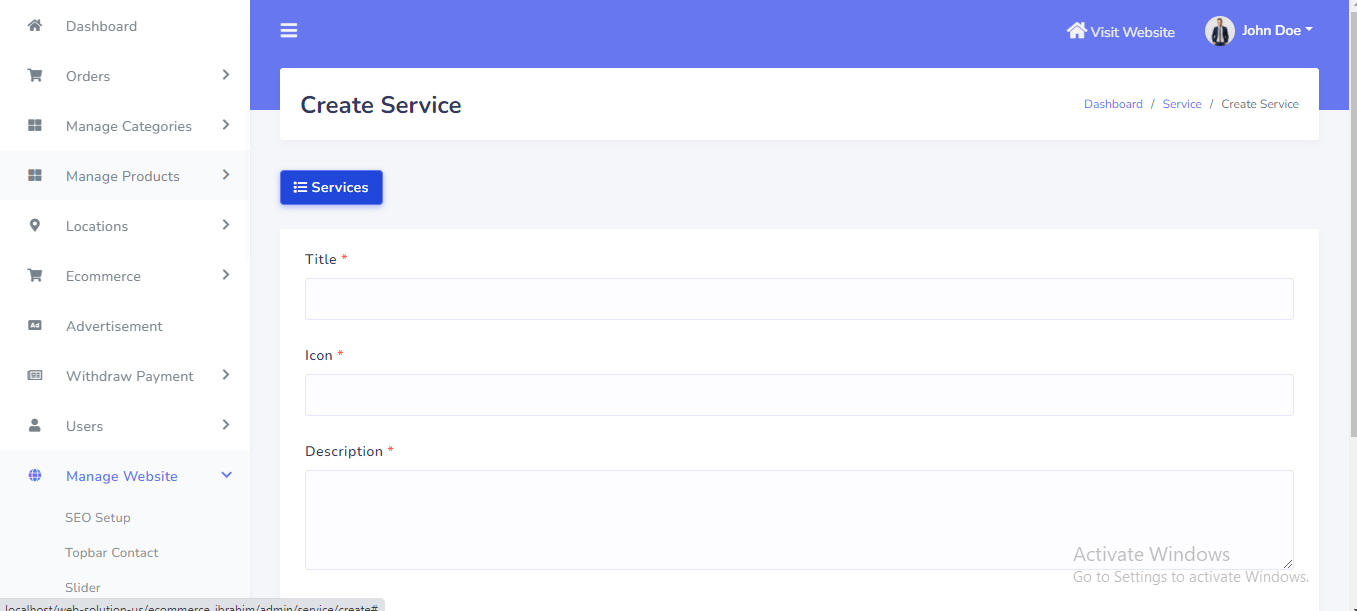
Service
Service can be manage from the admin panel. Go to "Manage website >> Service" from sidebar. See:

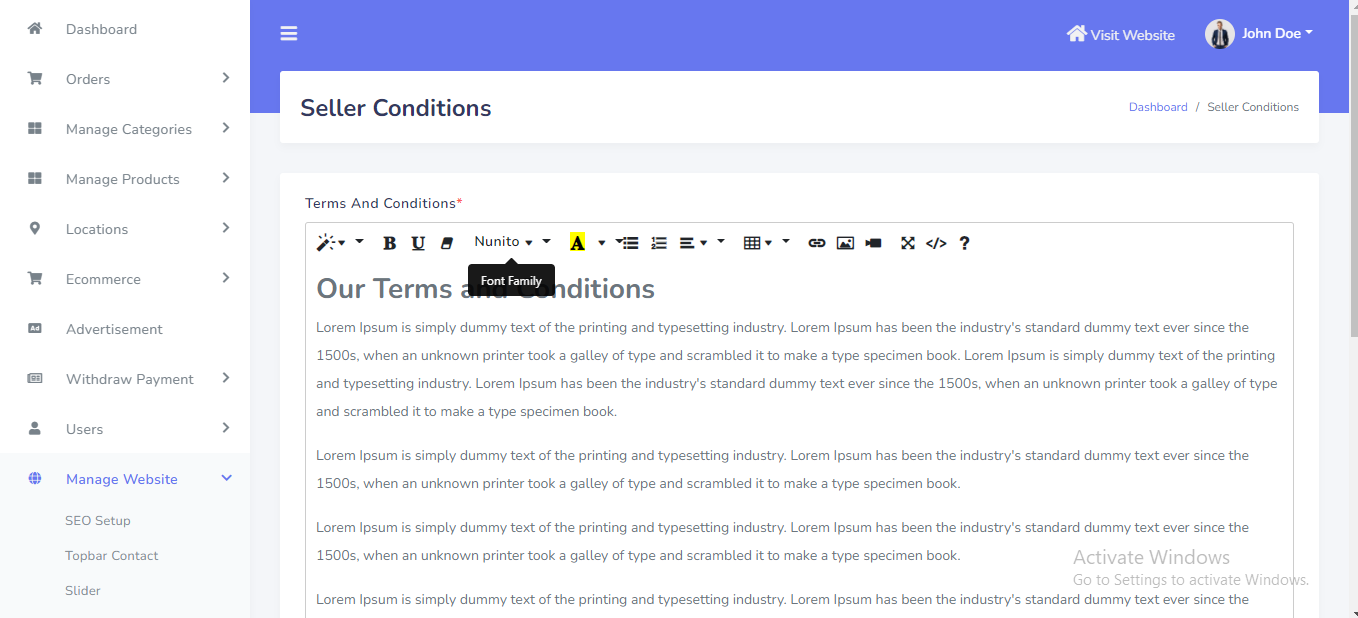
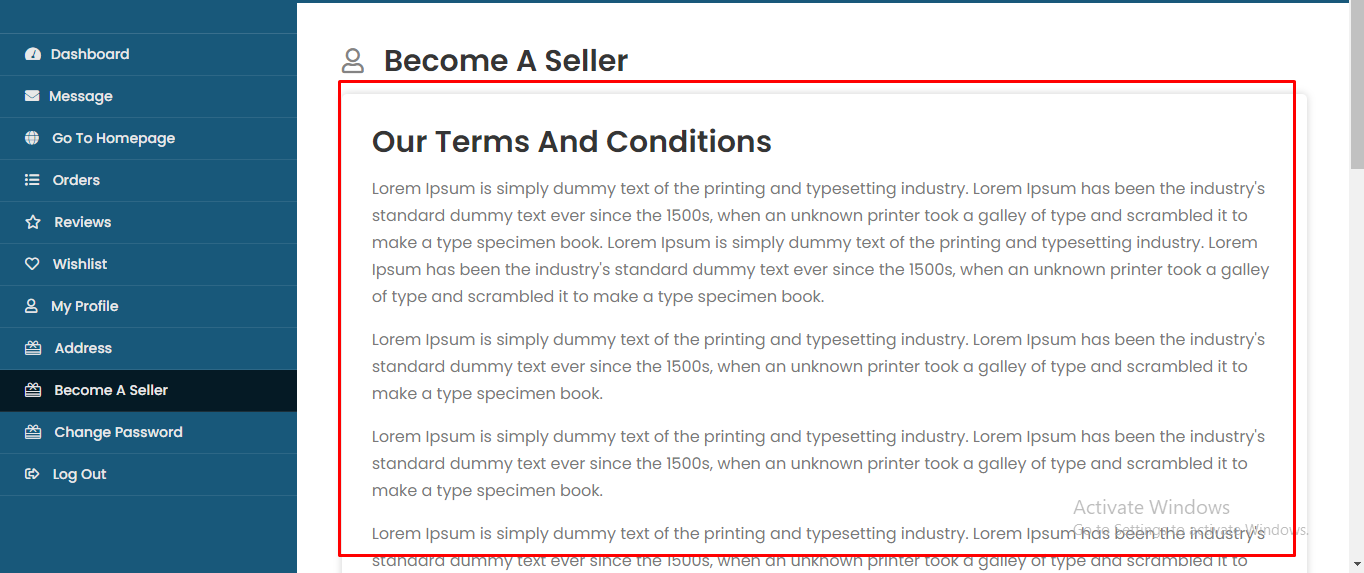
Seller Terms and conditions
Seller Terms and conditions can be manage from the admin panel. Go to "Manage website >> Seller Condition" from sidebar. See:
In the front end, the data will be shown like this. See:
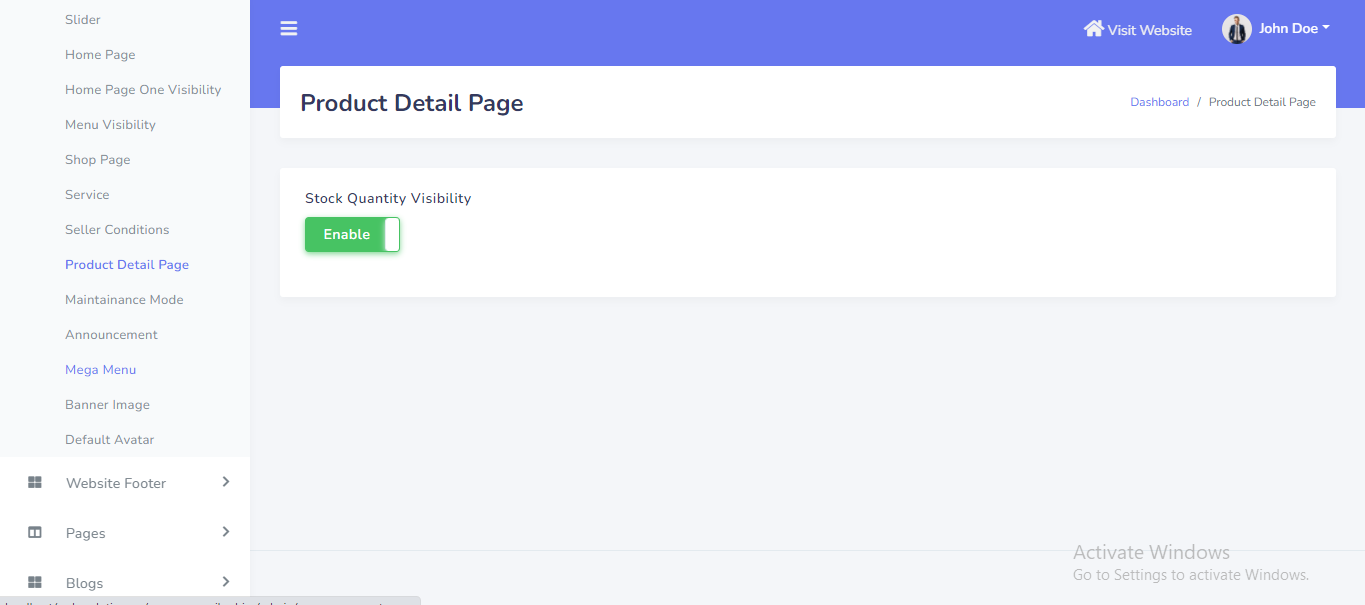
Product Detail Page Stock Quantity
Product stock quantity visibility can be manage from the admin panel. If you want to show stock quantity in product detail page, please enable this button. Go to "Manage website >> Product Detail Page" from sidebar. See:
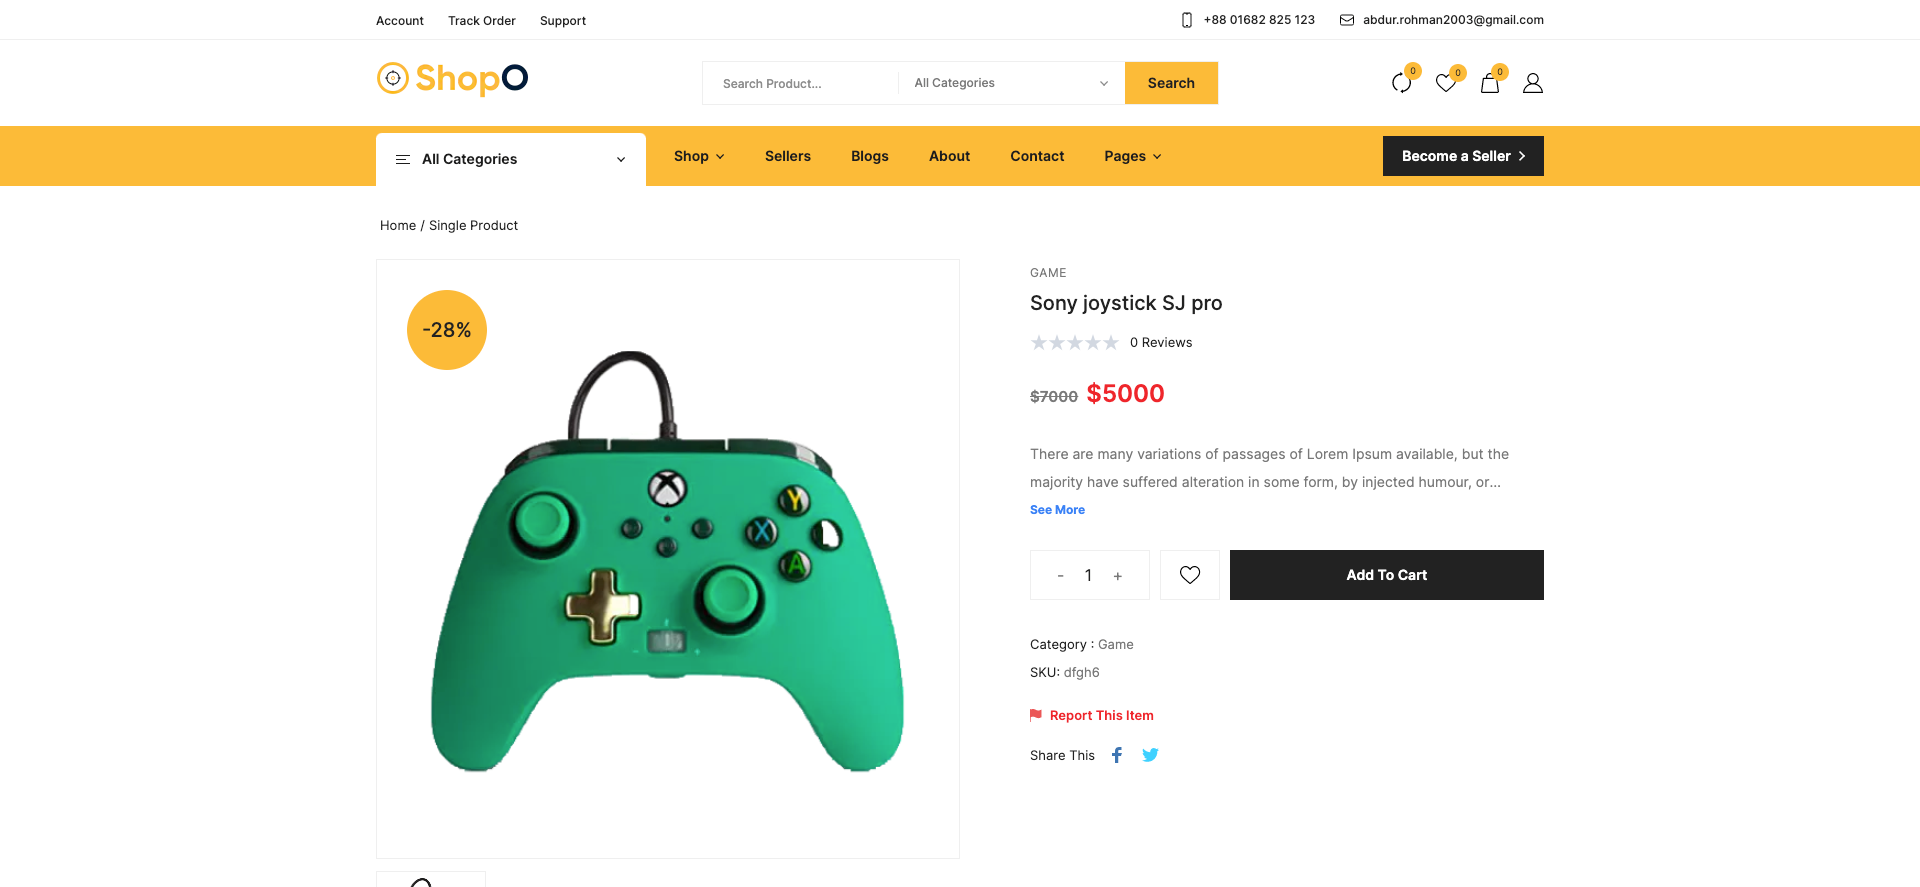
In the front end, the quantity will be shown like this. See:
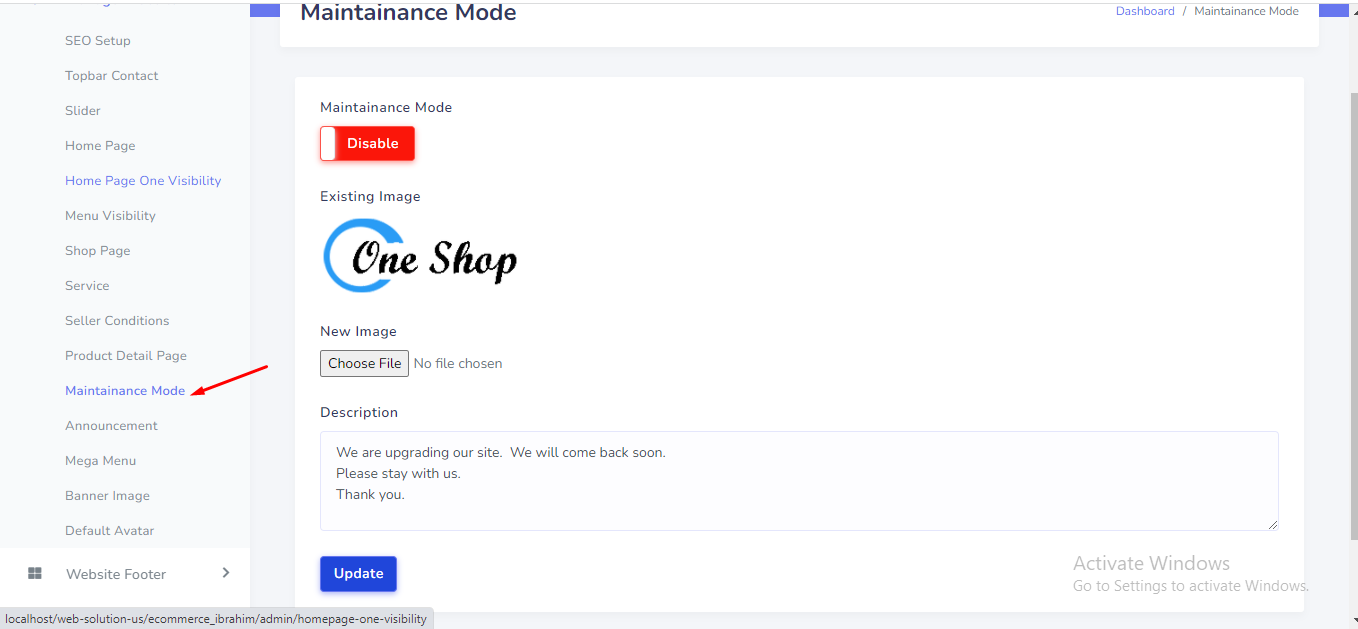
Website maintainance mode
Website maintainance mode can be manage from the admin panel. Go to "Manage website >> Maintainace mode" from sidebar. See:
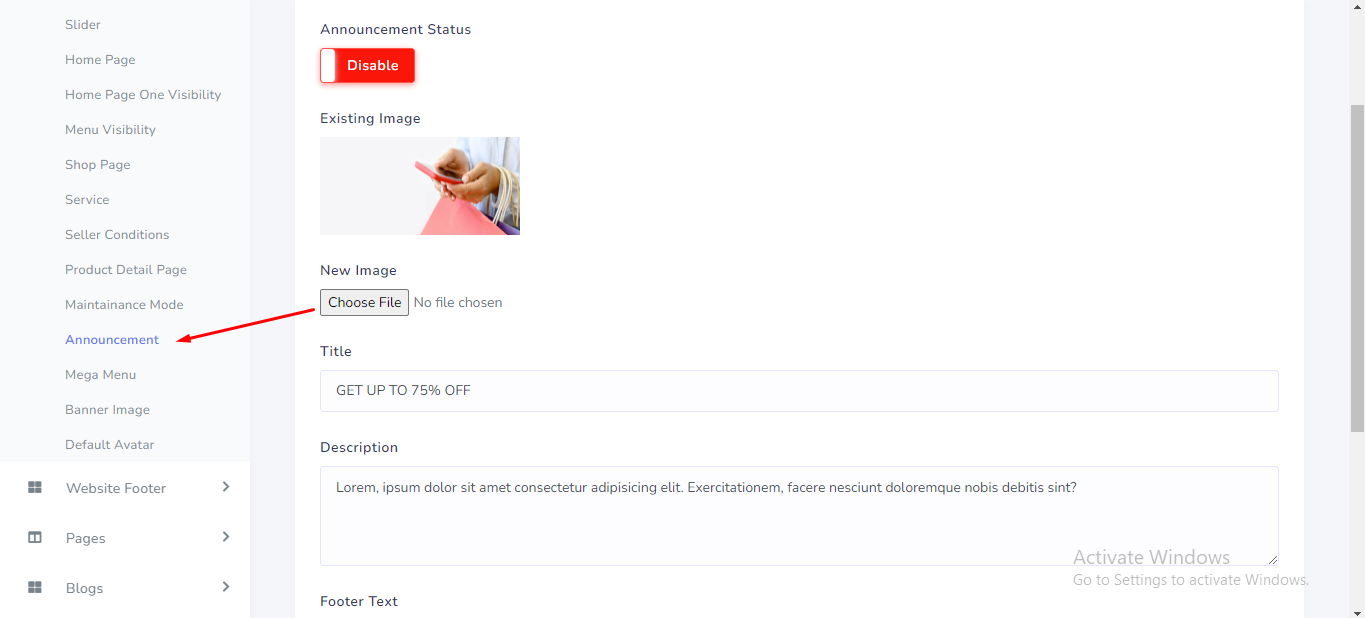
Announcement modal
Announcement modal can be manage from the admin panel. Go to "Manage website >> Announcement" from sidebar. See:
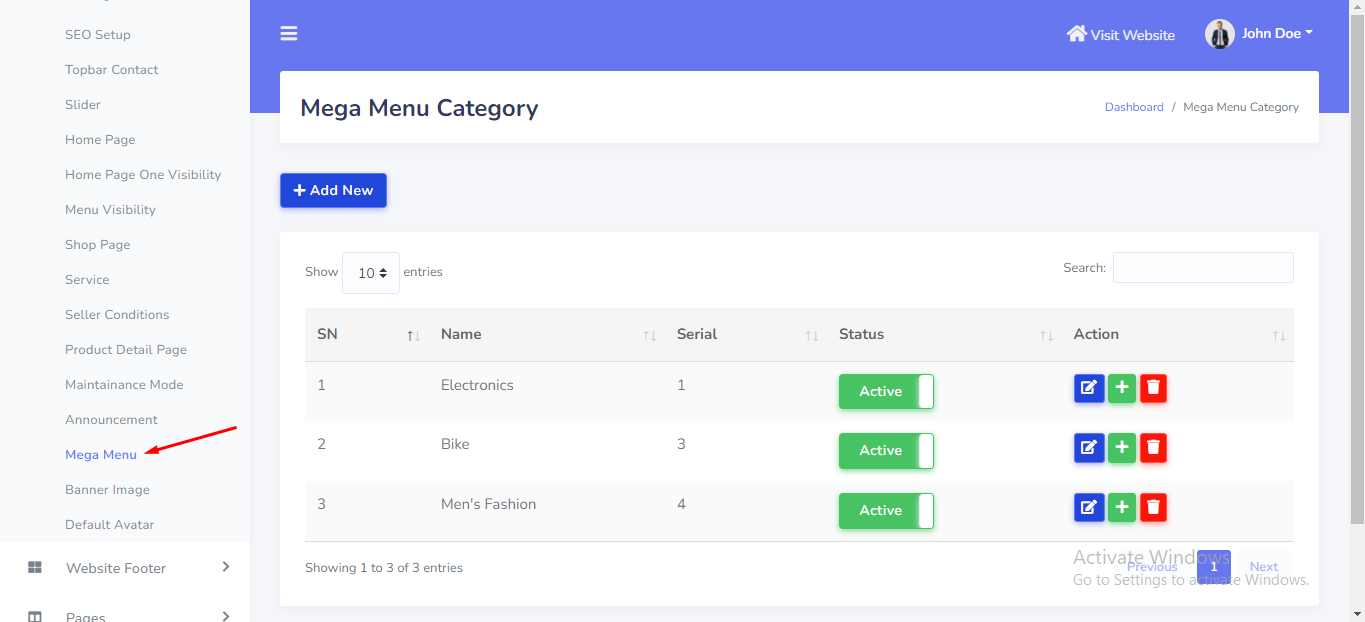
Mega menu category
Mega menu category can be manage from the admin panel. Go to "Manage website >> Mega menu" from sidebar. See:
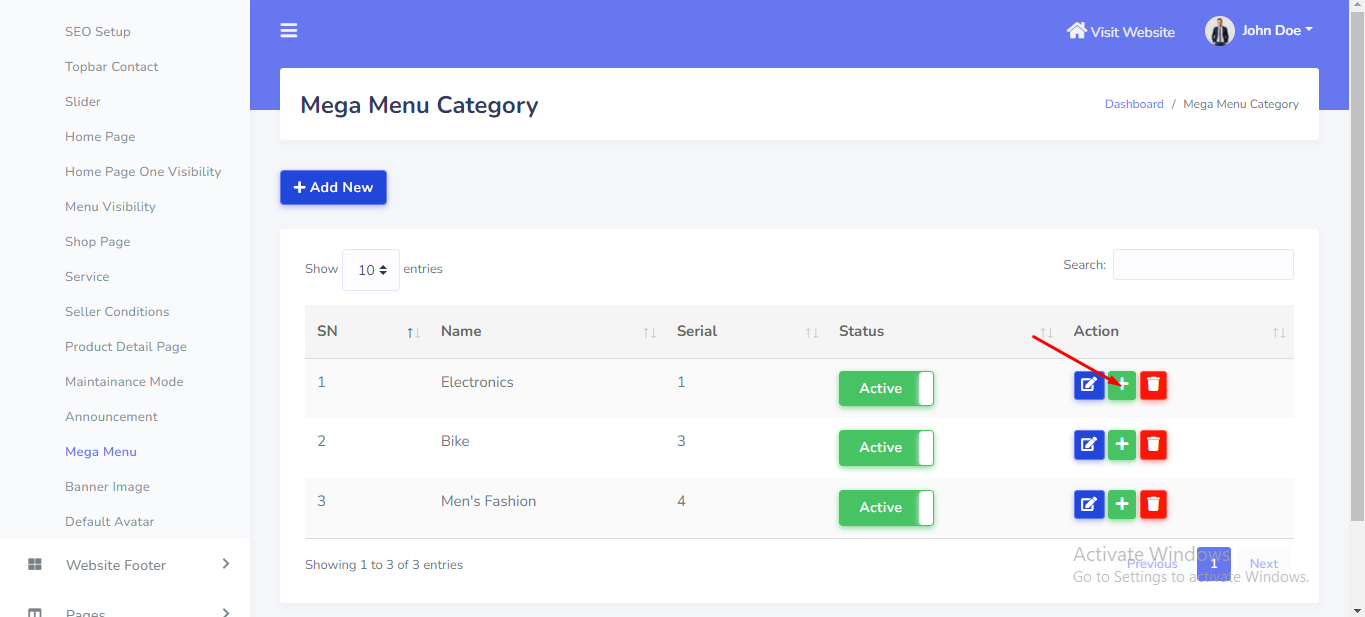
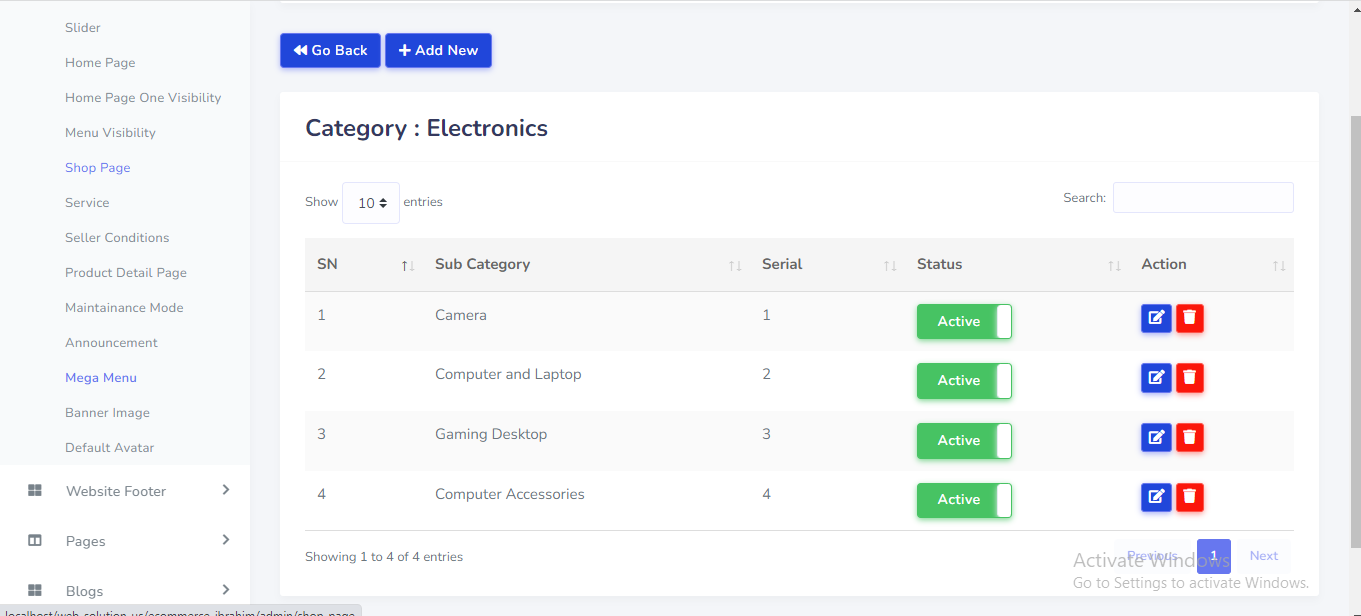
Mega menu sub category
Mega menu sub category can be manage from the admin panel. Go to "Manage website >> Mega menu" from sidebar. See:
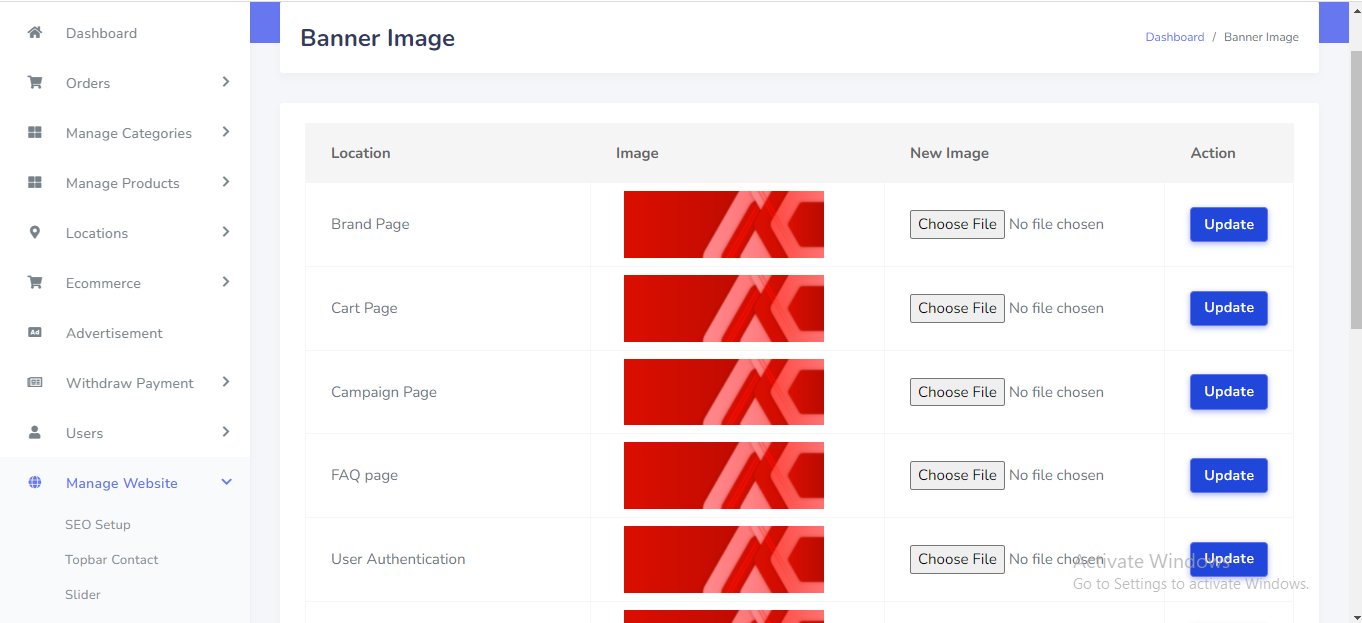
Breadcrumb banner image
Breadcrumb banner image can be manage from the admin panel. Go to "Manage website >> Banner Image" from sidebar. See:
Default avatar
Default avatar can be manage from the admin panel. Go to "Manage website >> Default avatar" from sidebar. See:
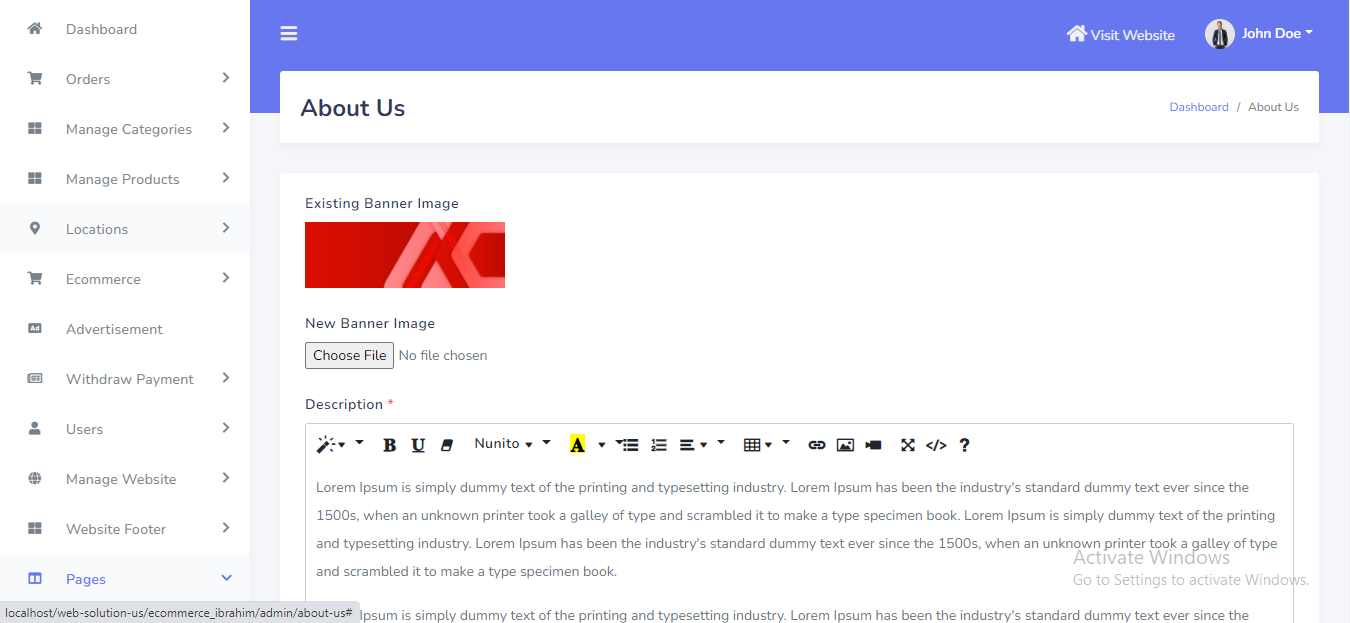
About Us page
About Us page can be manage from the admin panel. Go to "Pages >> About us" from sidebar. See:
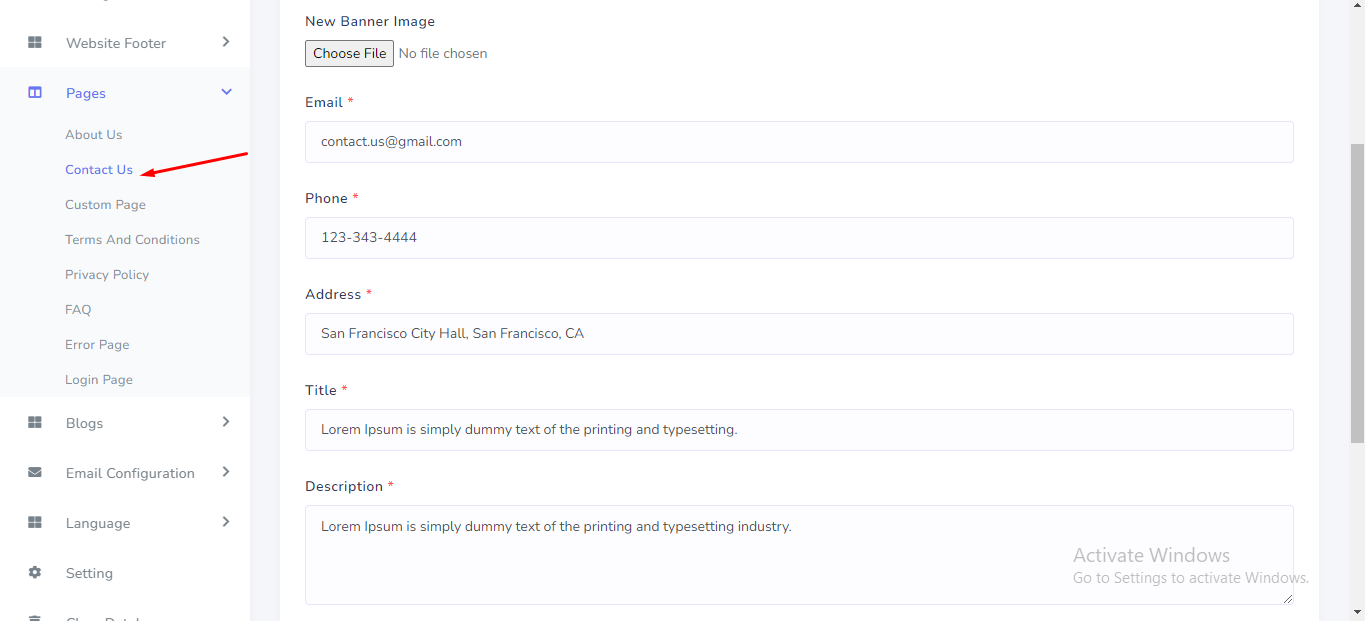
Contact Us
Contact Us page can be manage from the admin panel. Go to "Pages >> Contact Us" from sidebar. See:
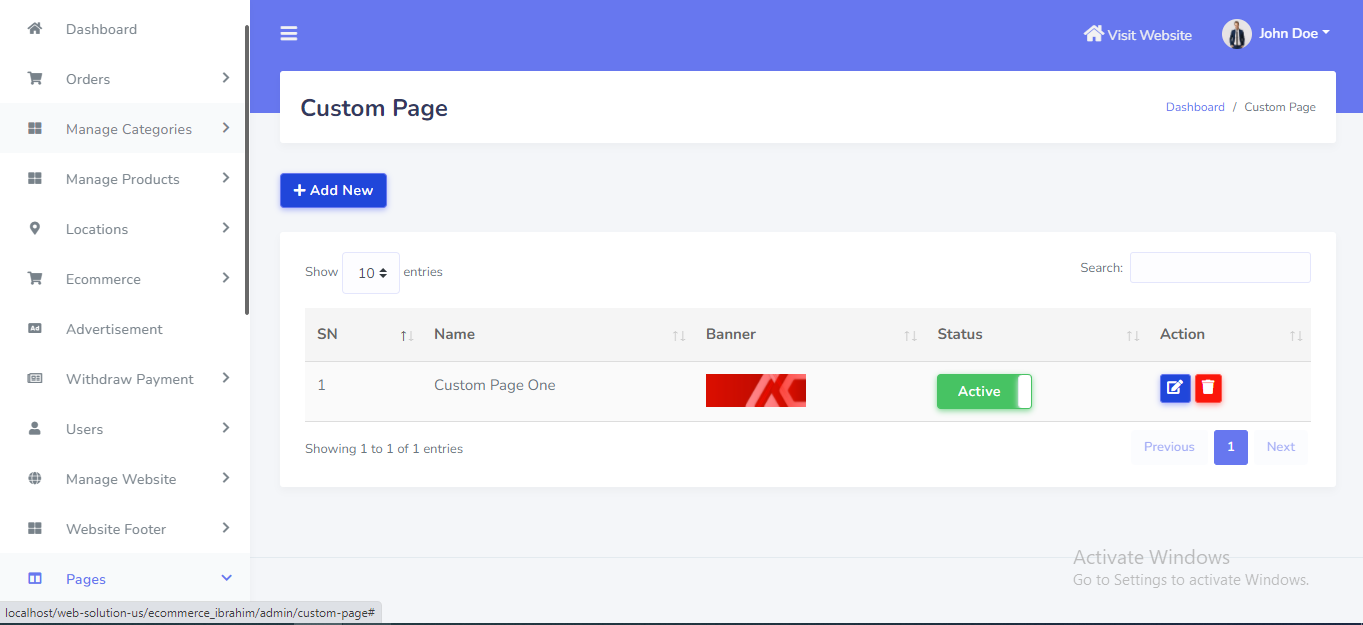
Custom Page
Custom Page can be manage from the admin panel. Go to "Pages >> Custom Page" from sidebar. See:
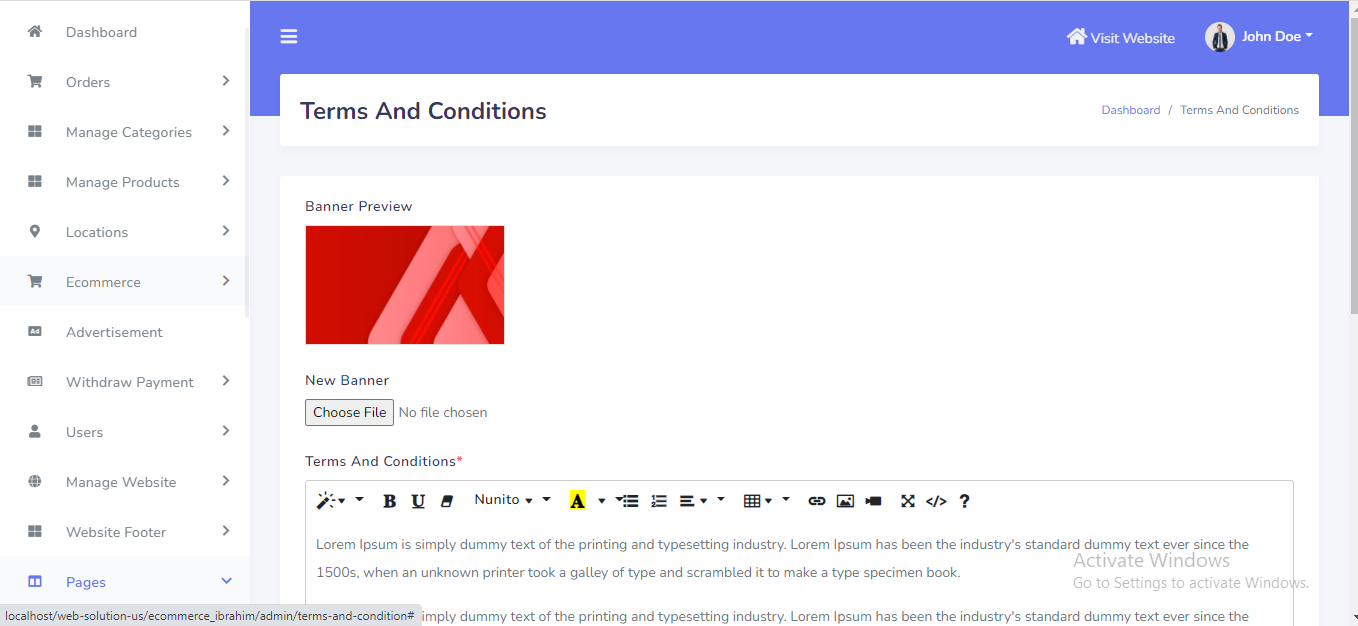
Terms and Conditions
Terms and Conditions Page can be manage from the admin panel. Go to "Pages >> Terms and Conditions" from sidebar. See:
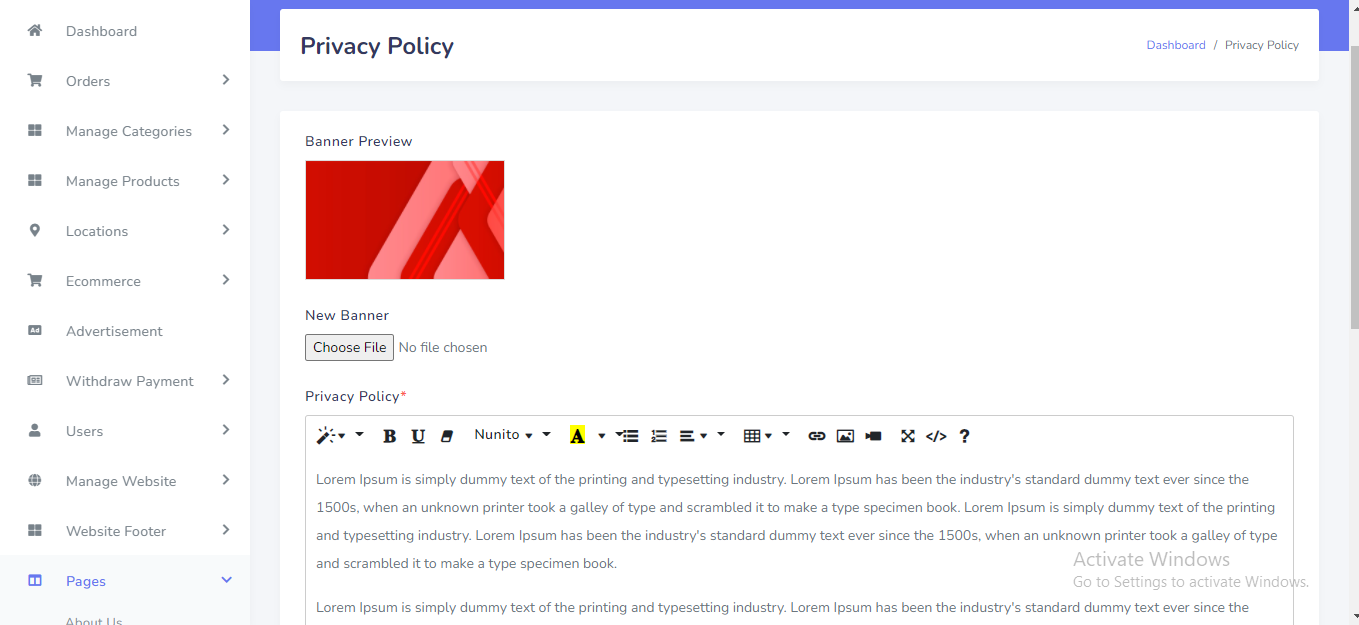
Privacy Policy
Privacy Policy Page can be manage from the admin panel. Go to "Pages >> Privacy Policy" from sidebar. See:
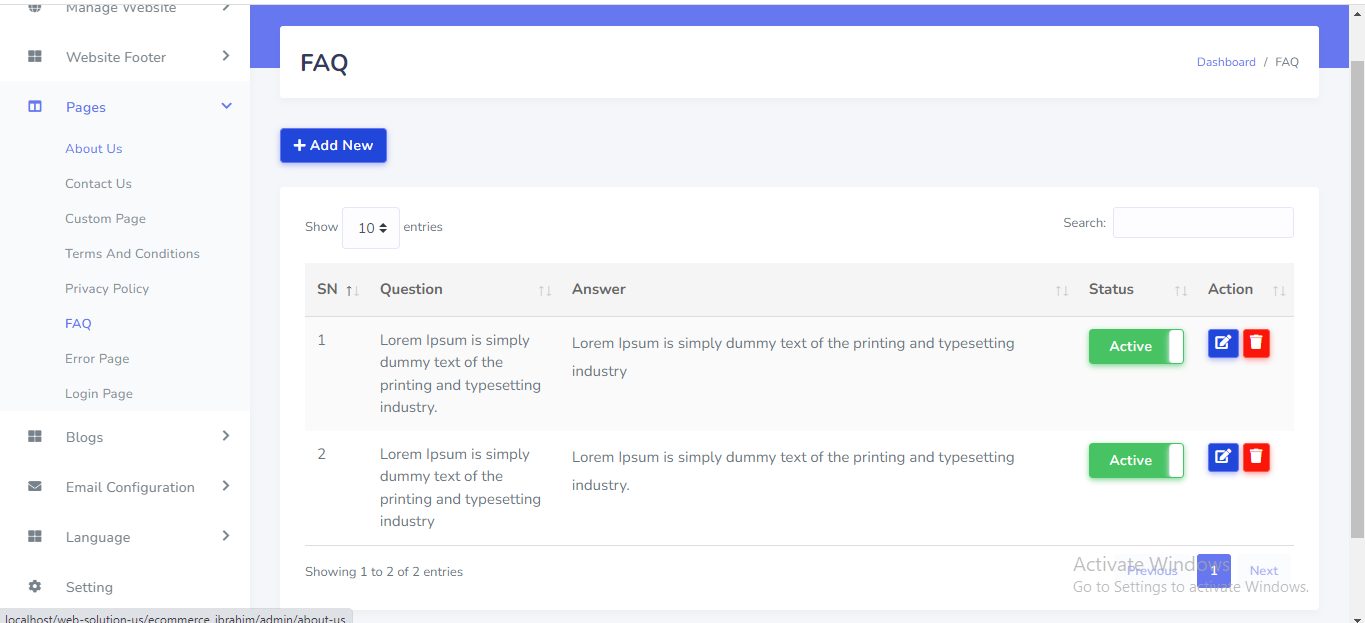
FAQ
FAQ Page can be manage from the admin panel. Go to "Pages >> FAQ" from sidebar. See:
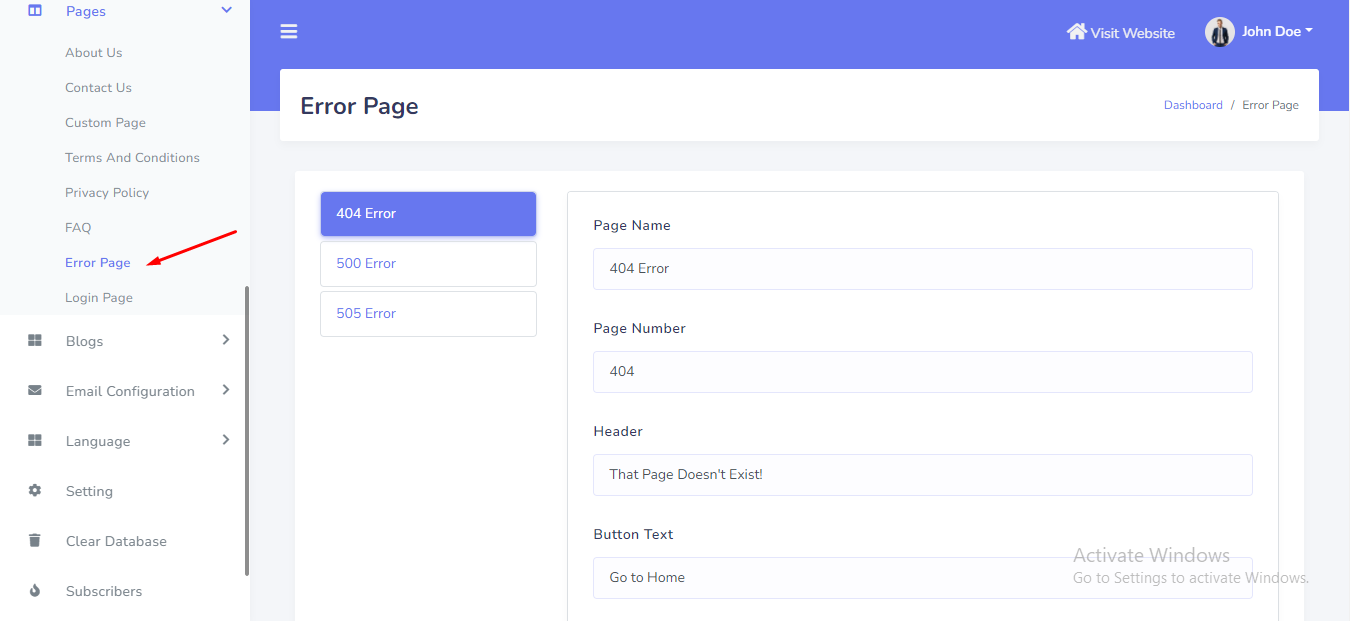
Error Page
Error Page can be manage from the admin panel. Go to "Pages >> Error Page" from sidebar. See:
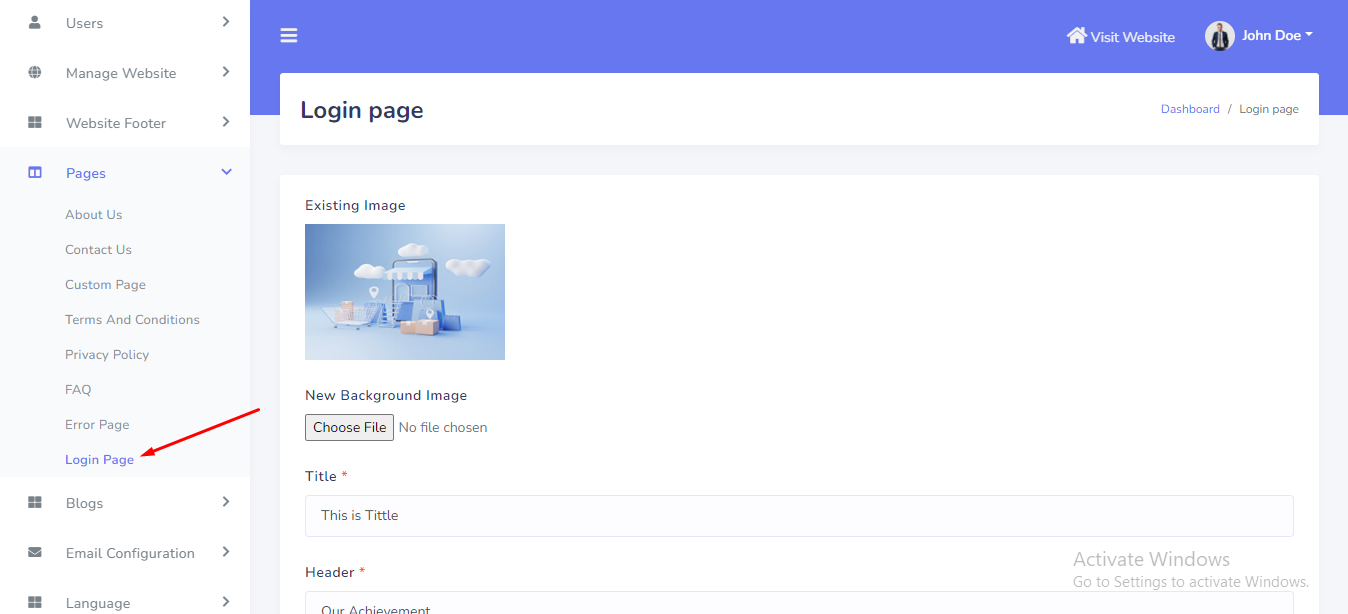
Login Page
Login Page can be manage from the admin panel. Go to "Pages >> Login Page" from sidebar. See:
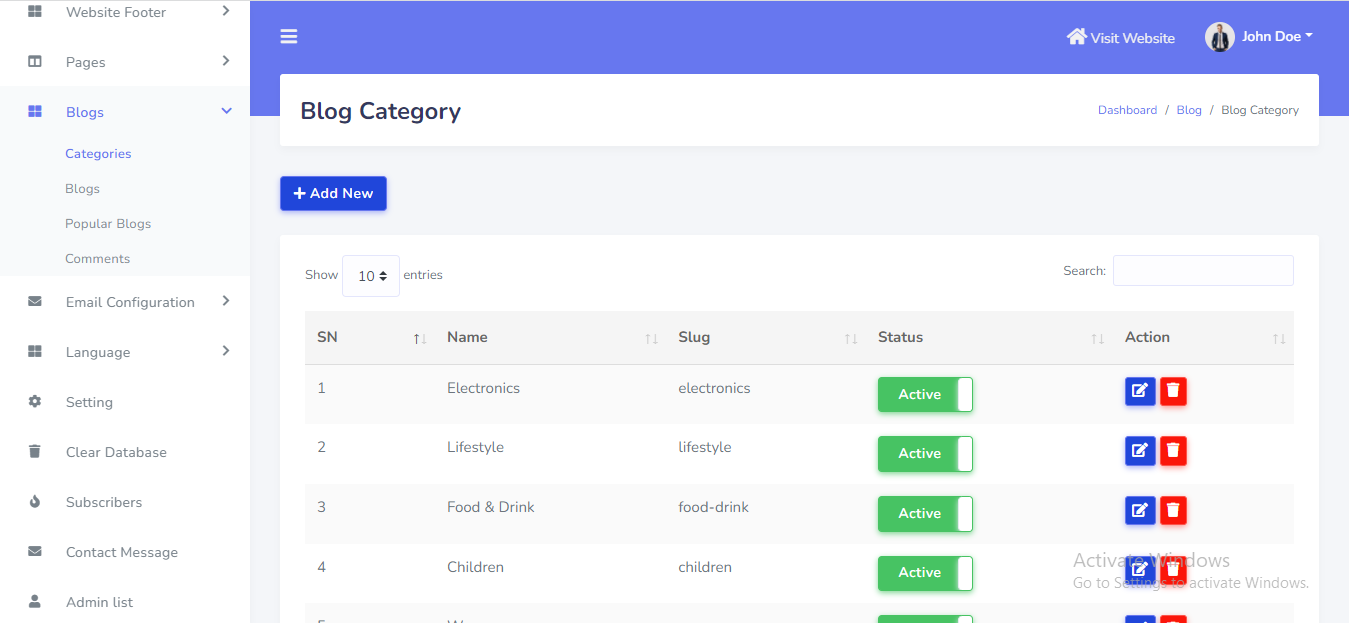
Blog Category
Blog Category can be setup from the admin panel. Go to "Blogs >> Blog Category" from sidebar. See:
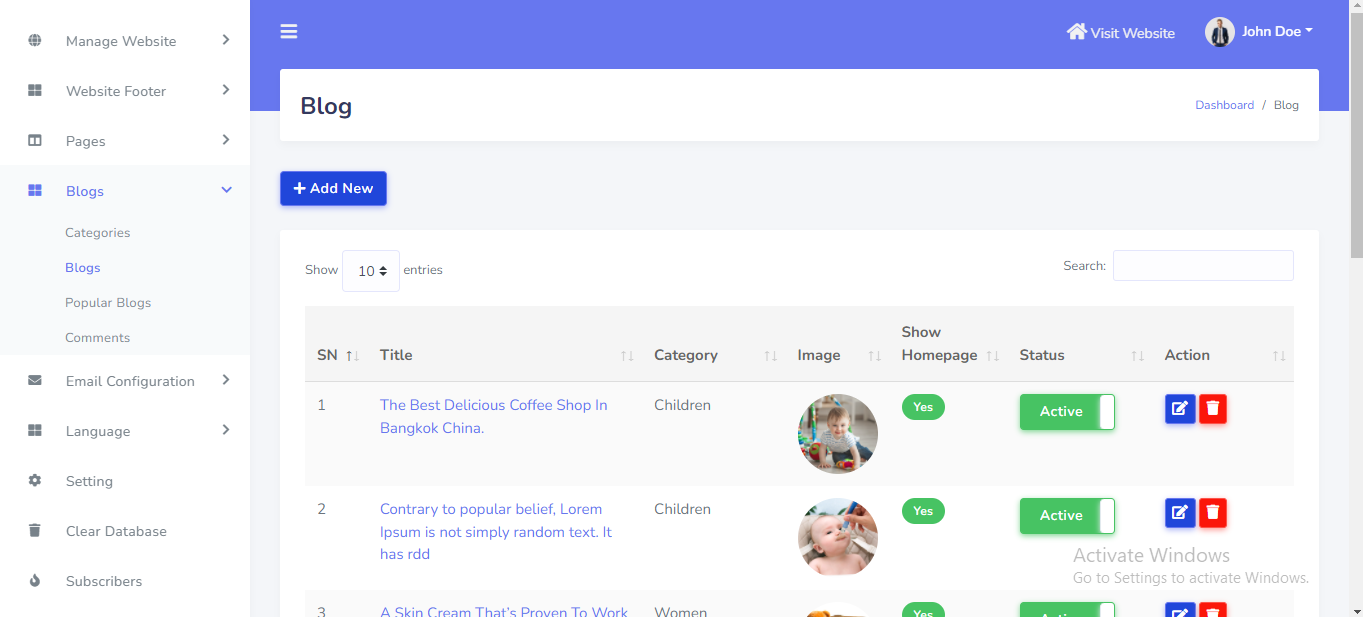
Blog
Blog can be setup from the admin panel. Go to "Blogs >> Blog" from sidebar. See:
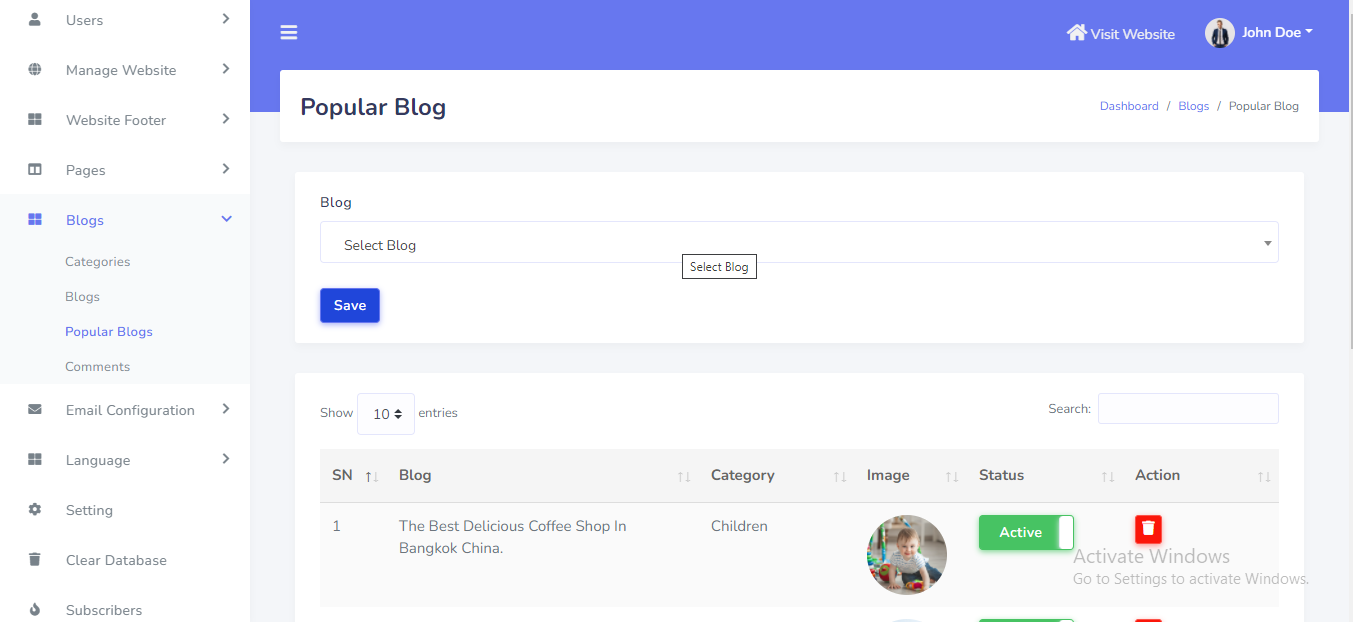
Popular Blogs
Popular Blogs can be setup from the admin panel. Go to "Blogs >> Popular Blogs" from sidebar. See:
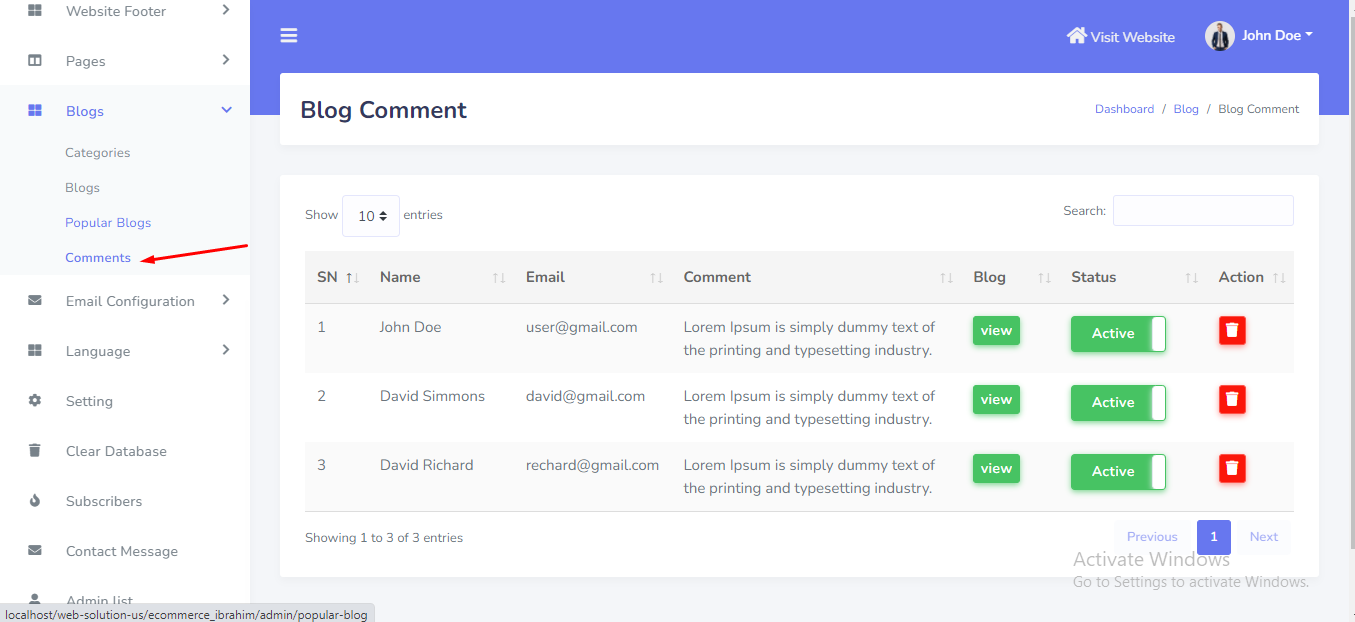
Blog Comment
Blog Comment can be manage from the admin panel. Go to "Blogs >> Comments" from sidebar. See:
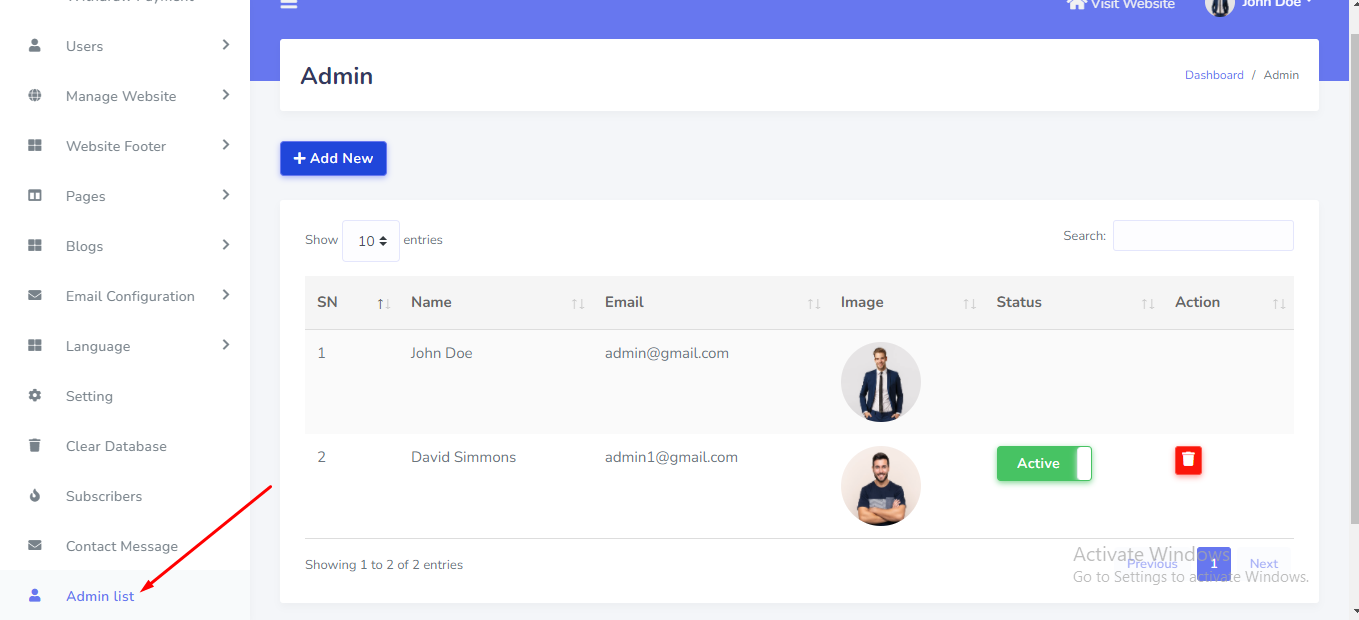
Admin List
The main Admin can add more admins into the system. Other admins can not delete the main admin. But the main admin can delete other created admins in this system. Go to "Admin List" from sidebar. See:
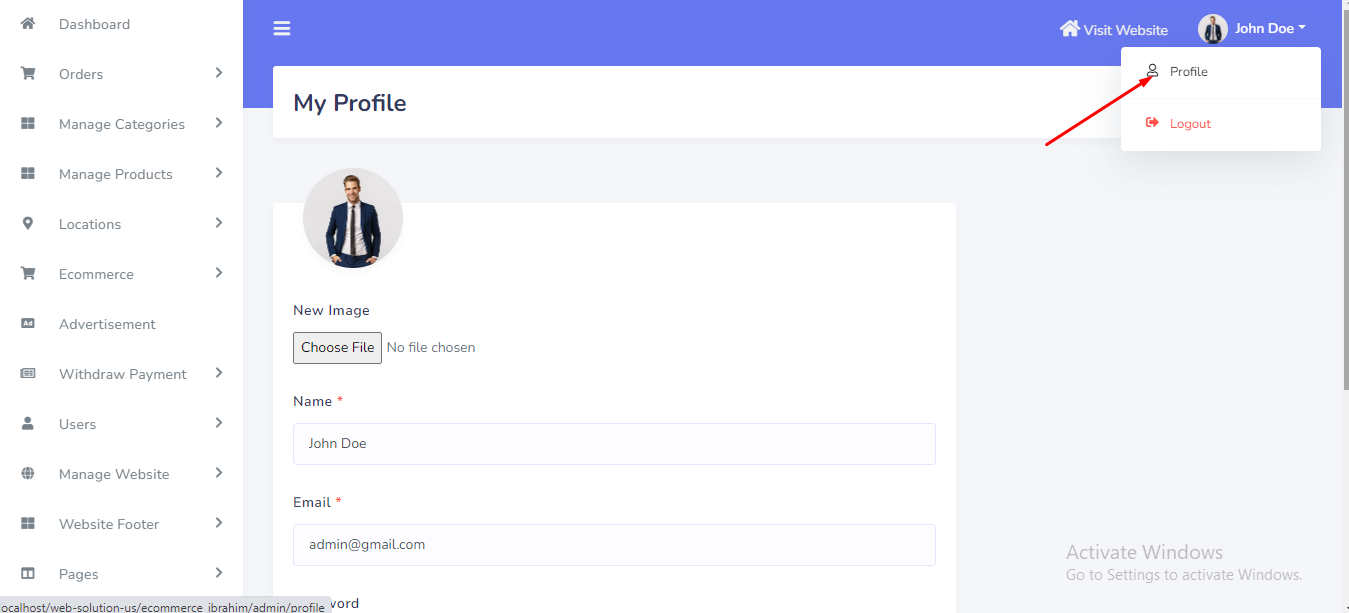
Admin Profile
Admin can change personal information and password from topbar. See:
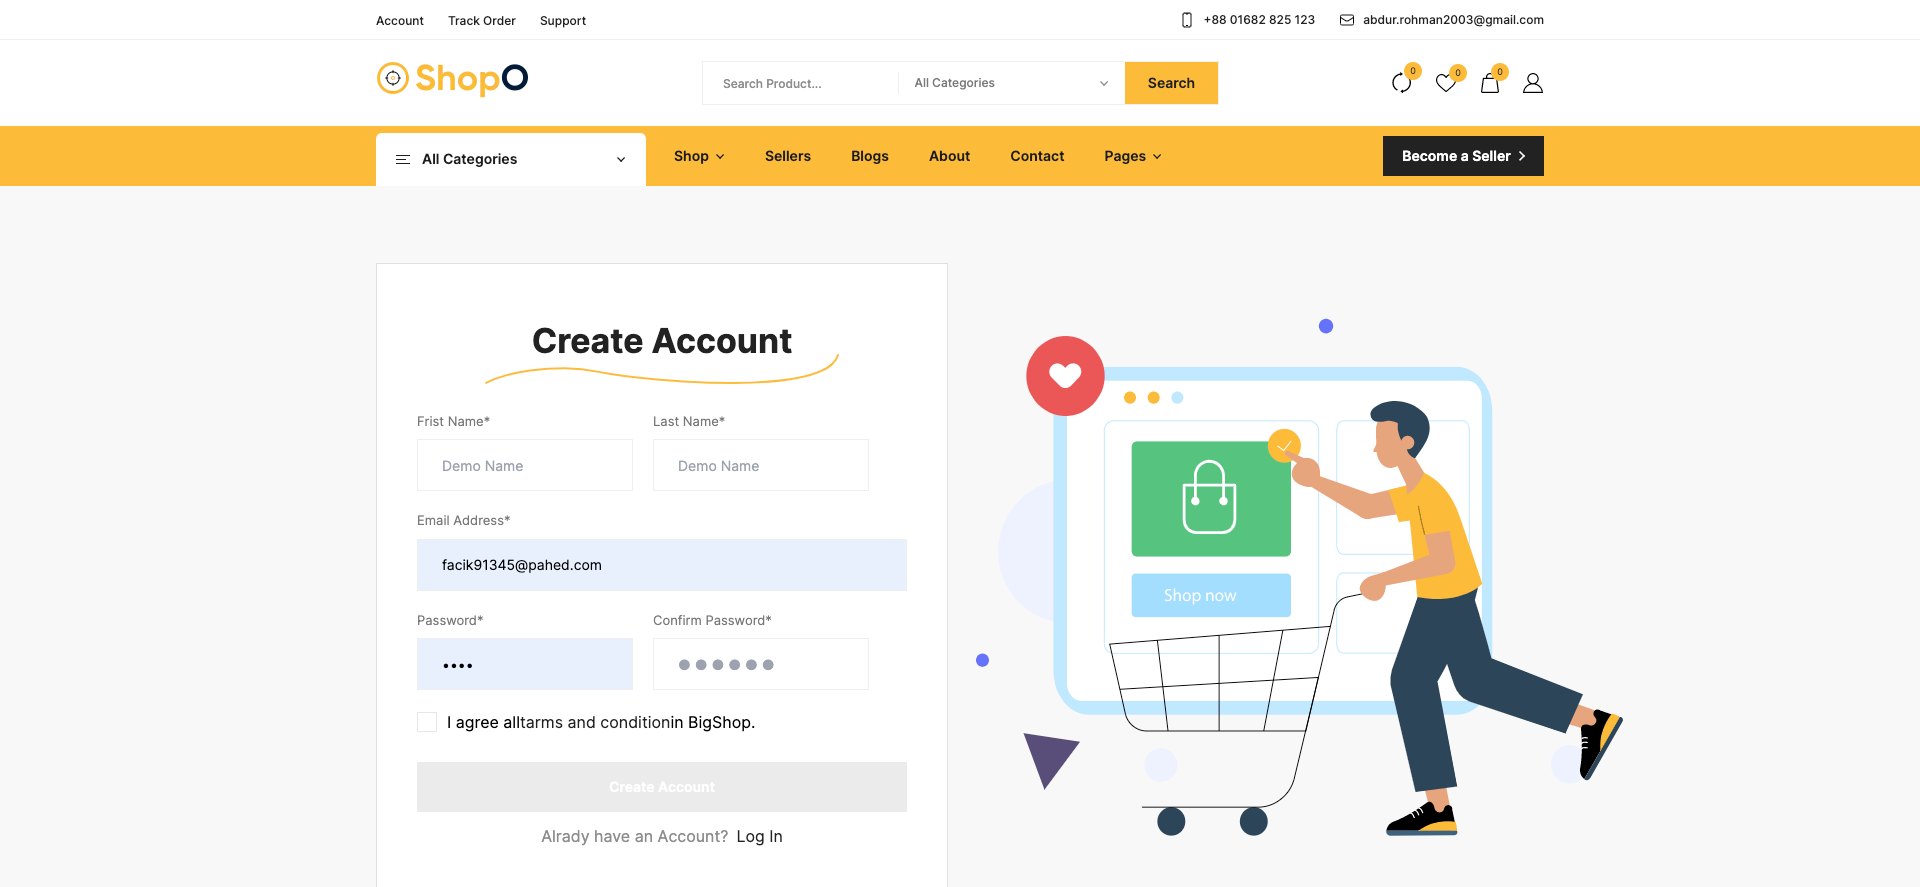
User Registration
From the top menu, User can click on registration.
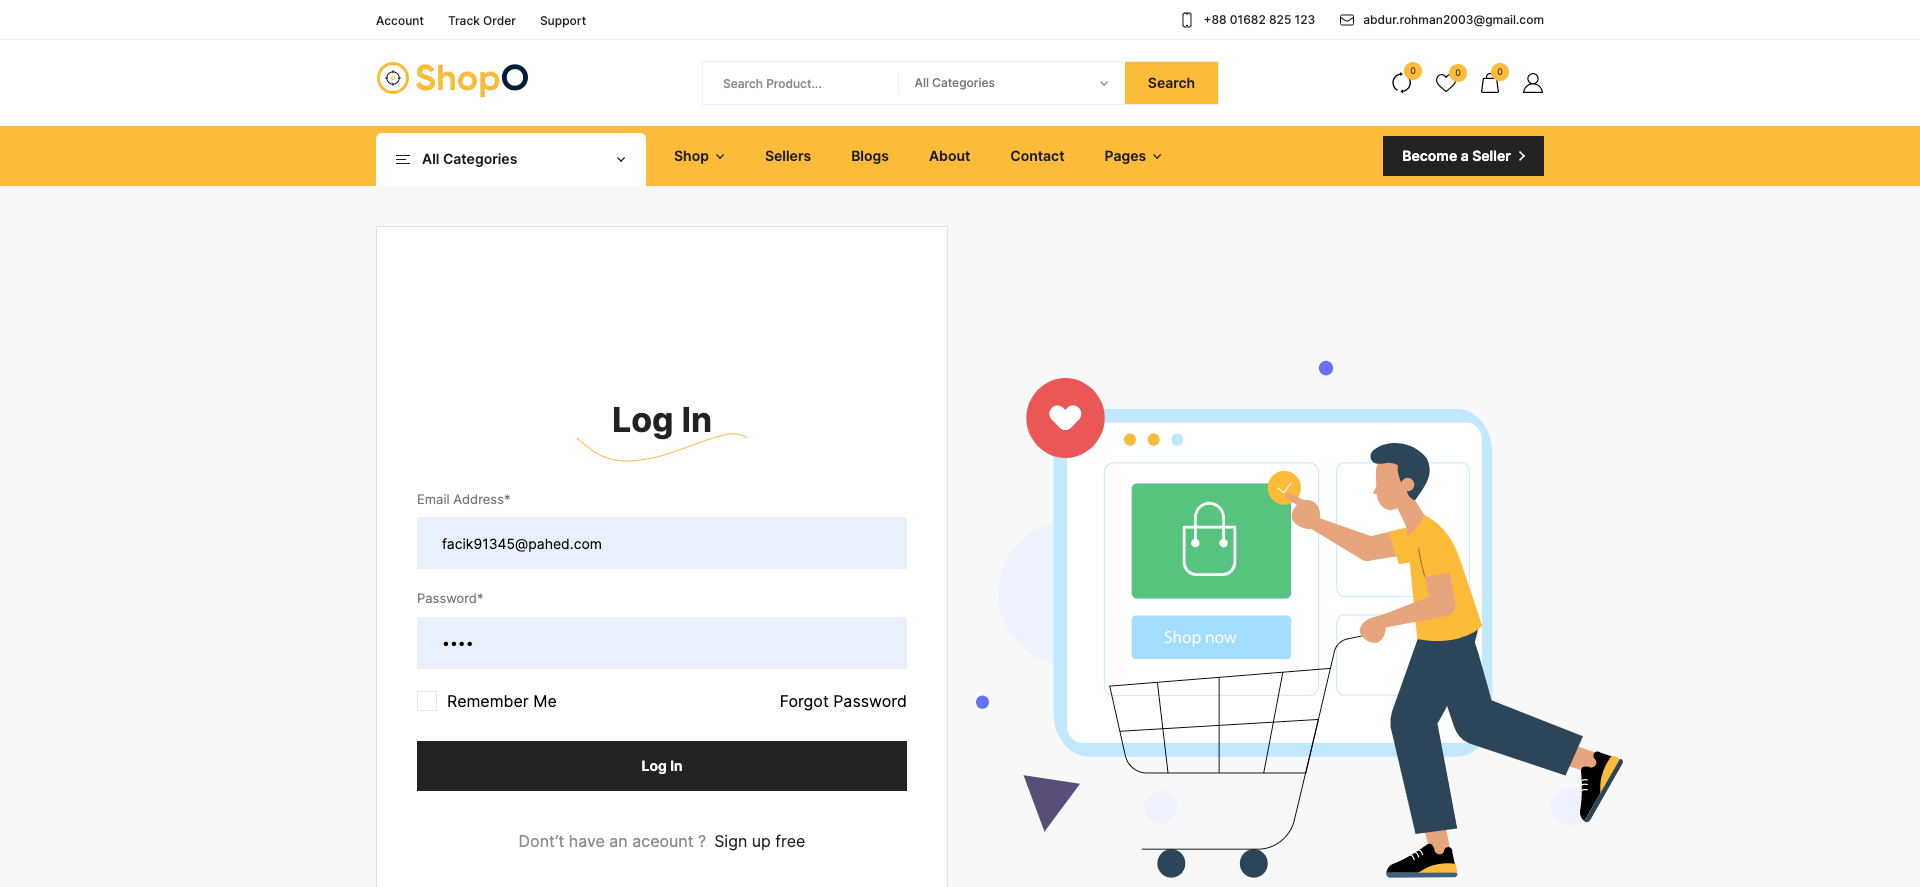
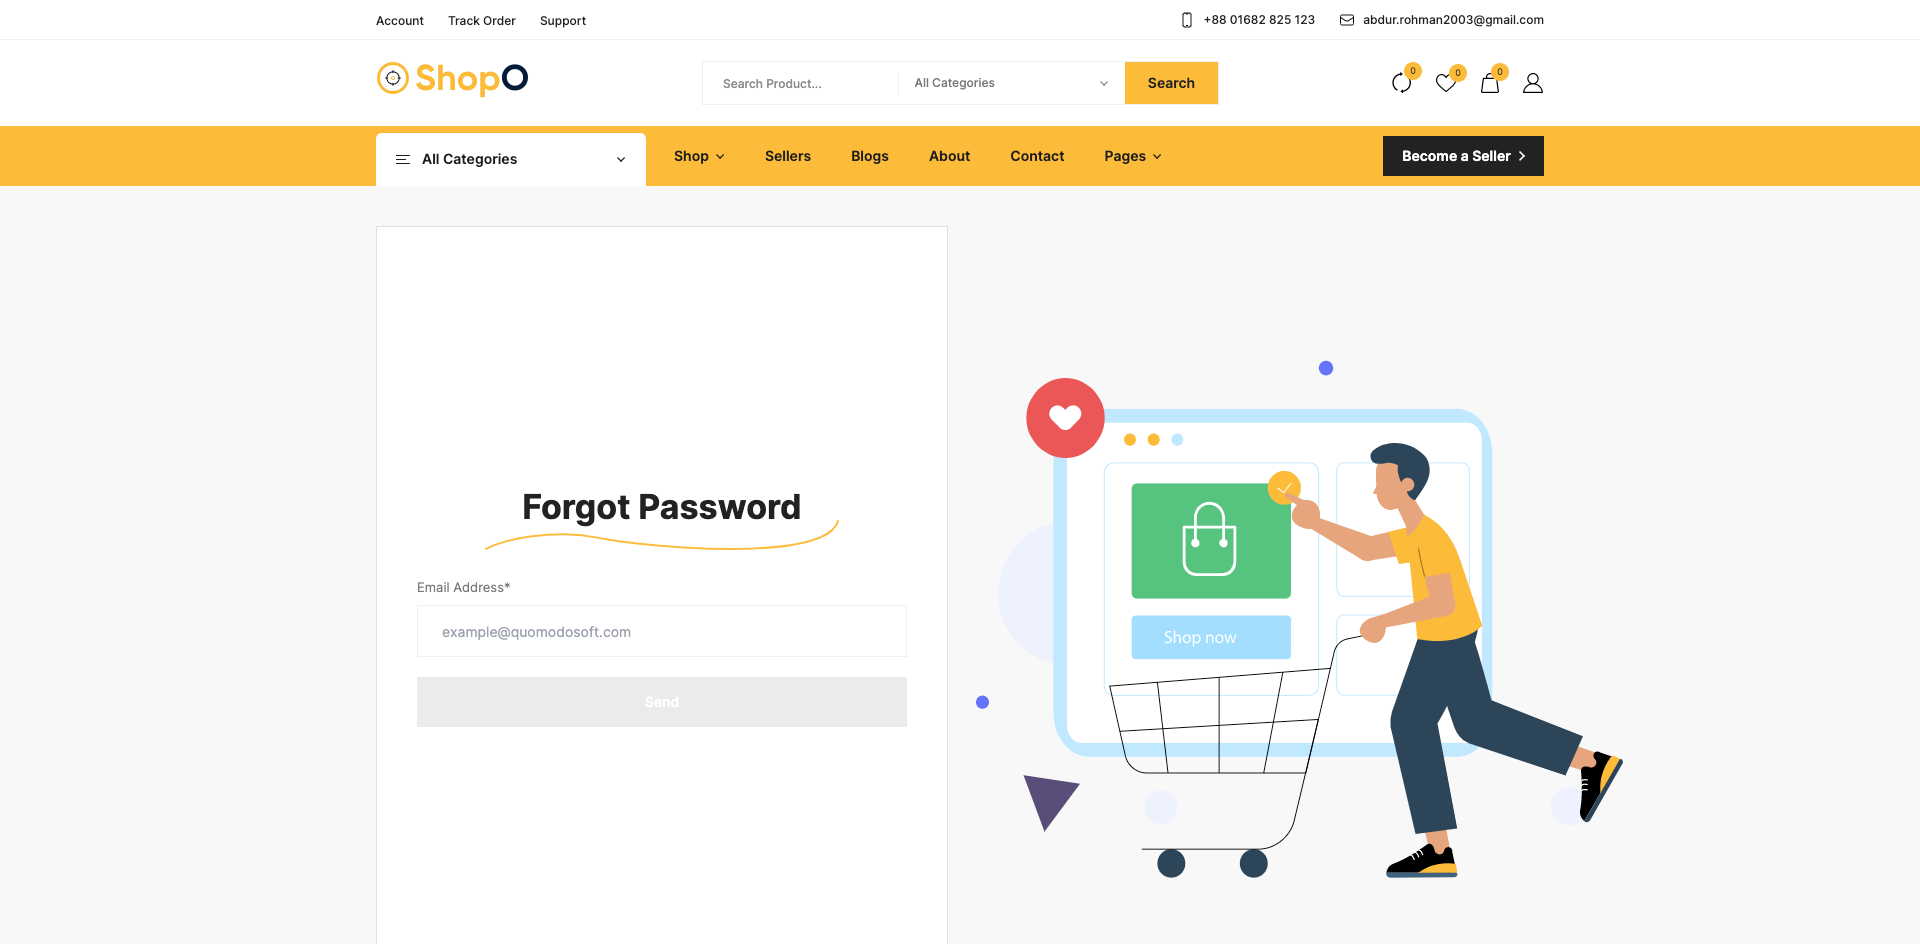
User Forget Password
In the login page, there is a link to reset the password if user forgets the existing password.
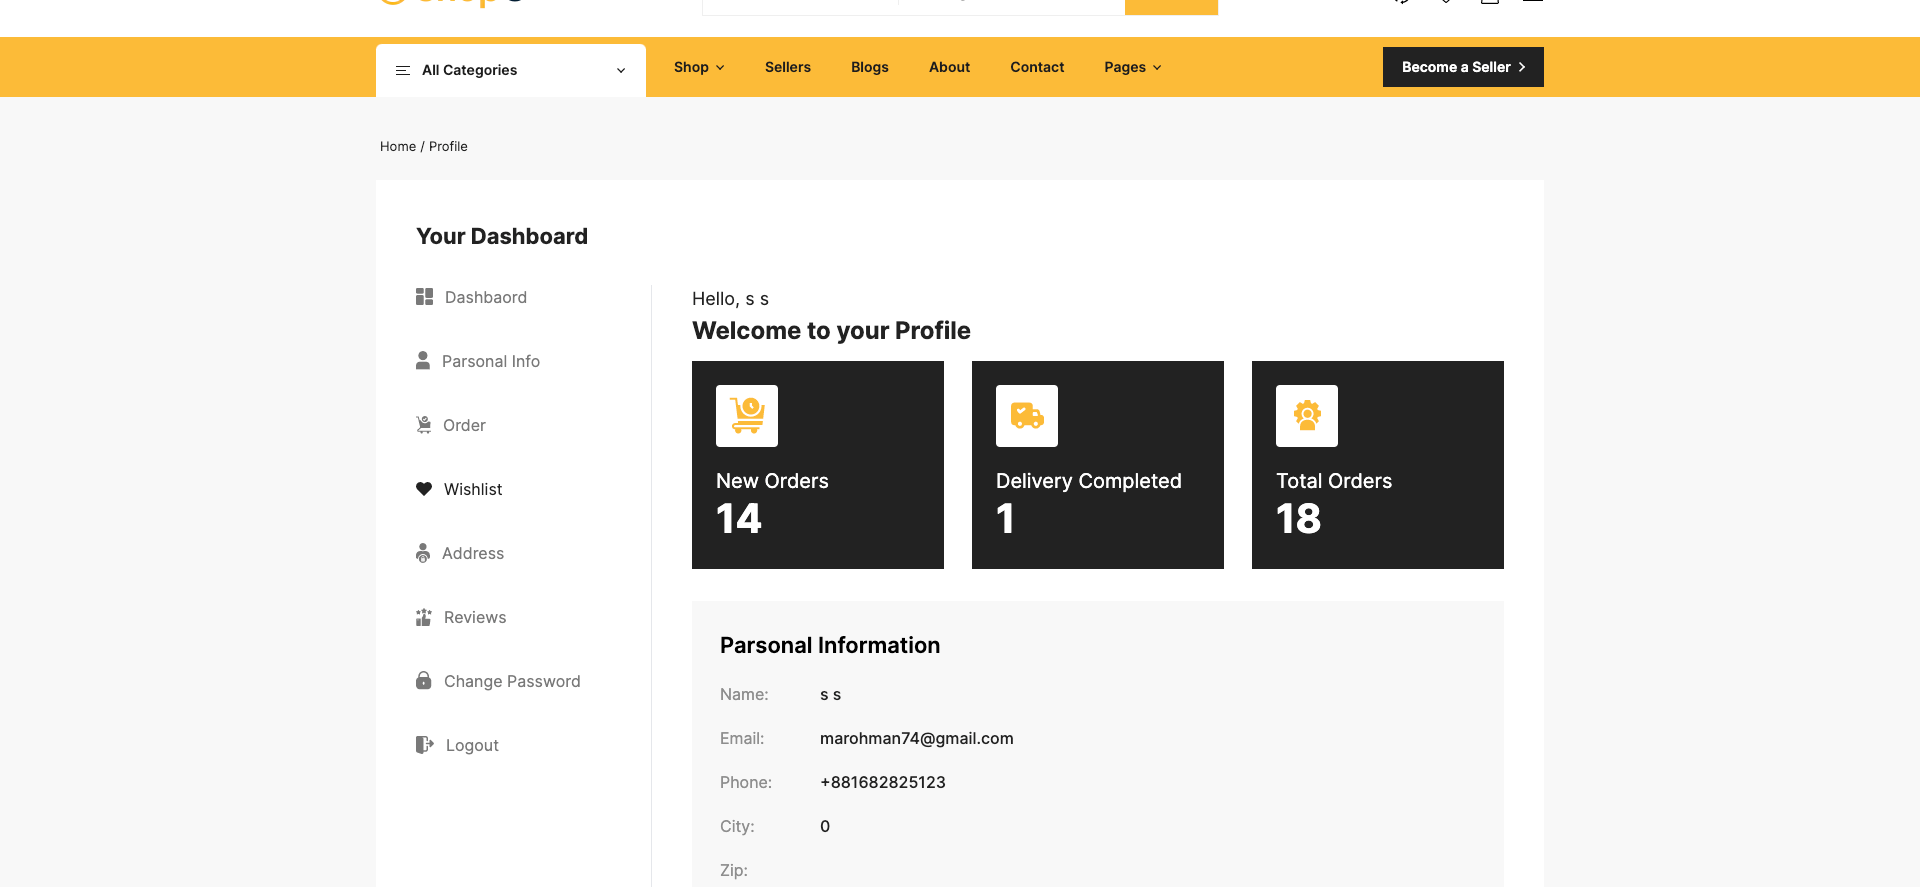
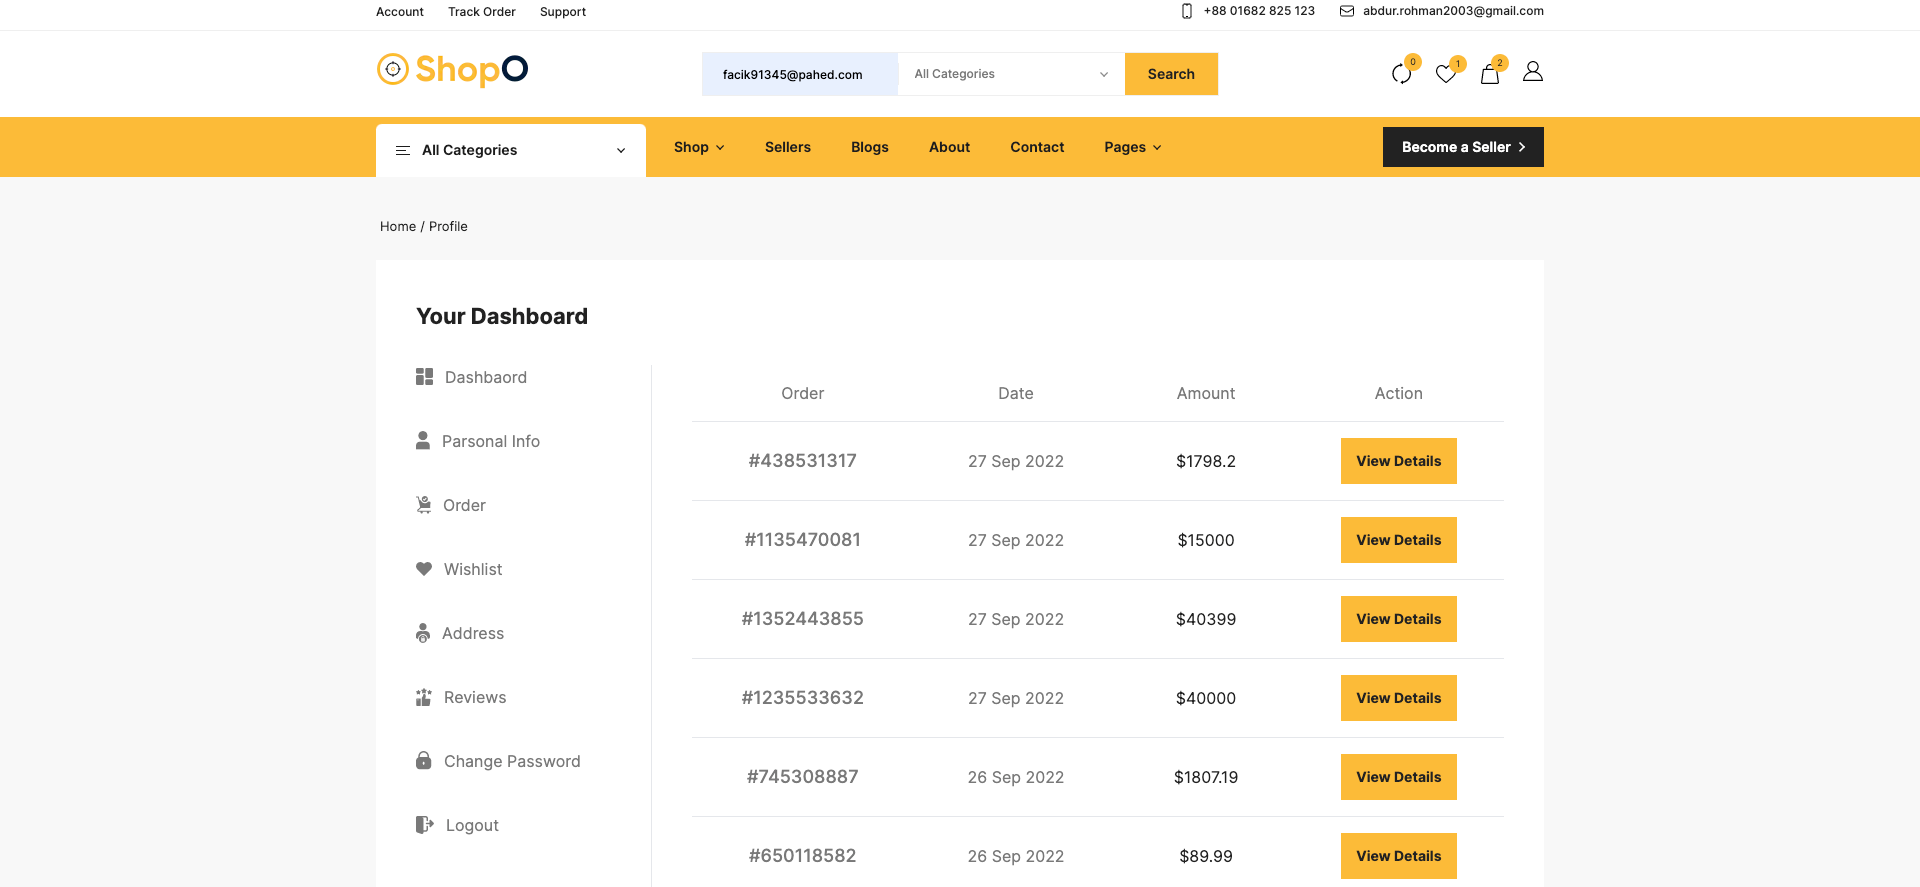
User Dashboard
After login, User will see his dashboard. See:
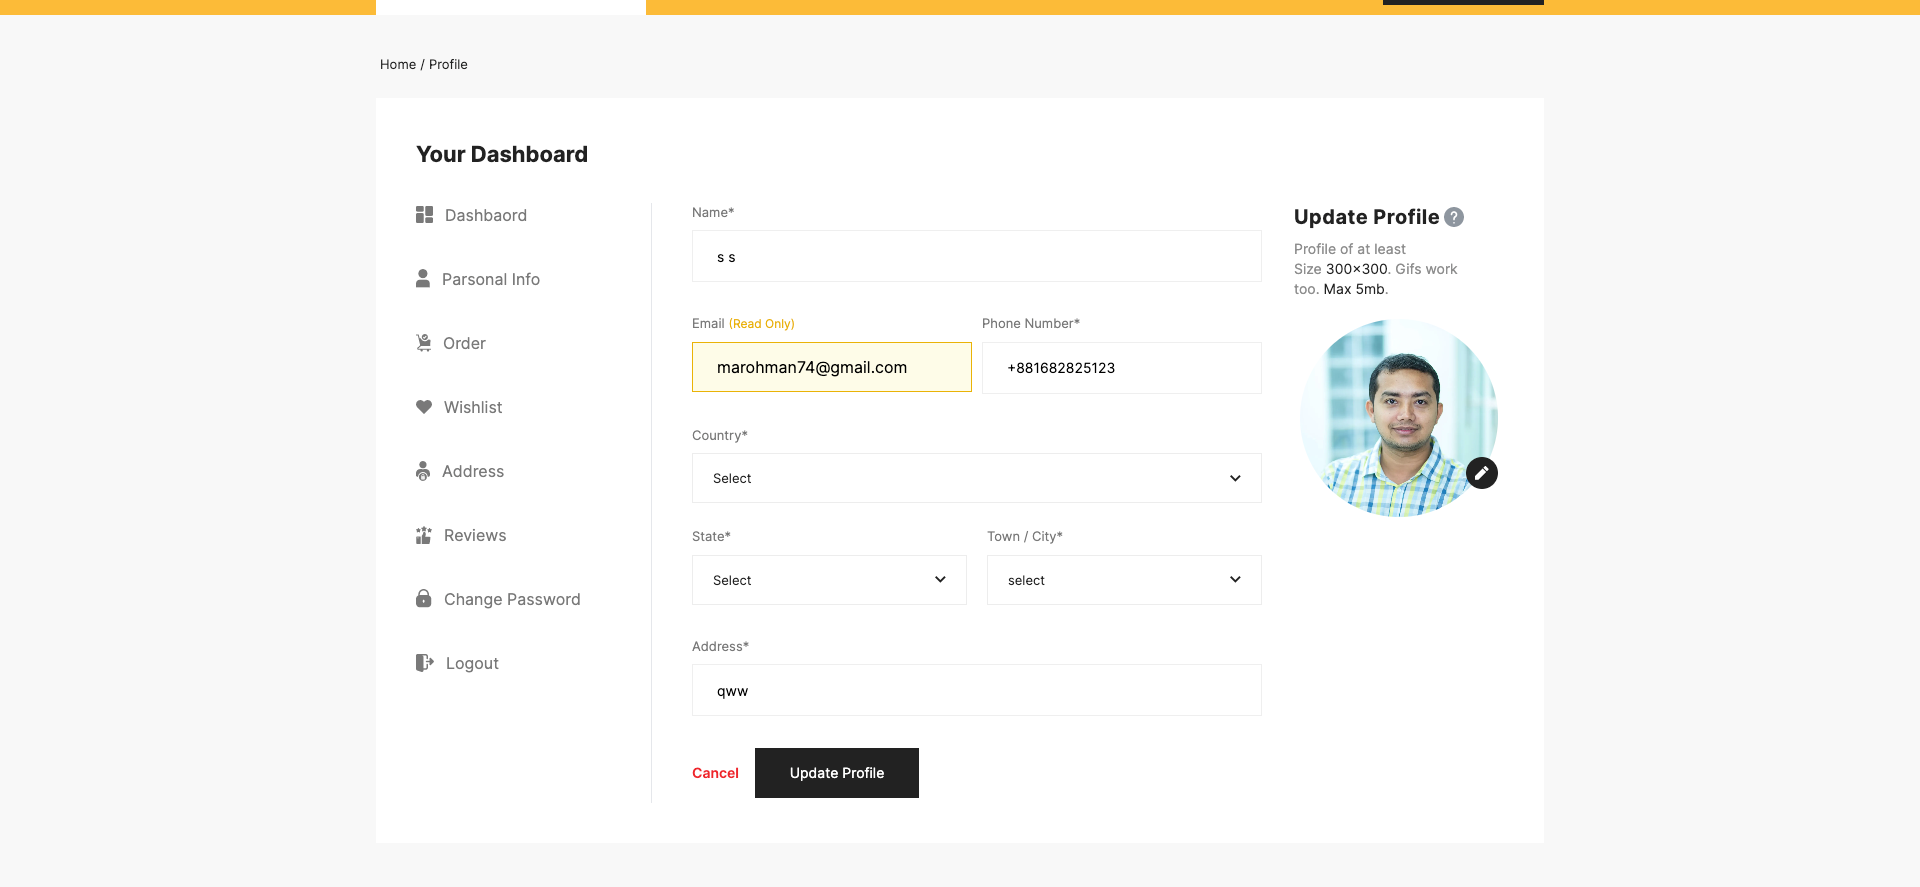
User Profile
User can edit his profile from sidebar. See..
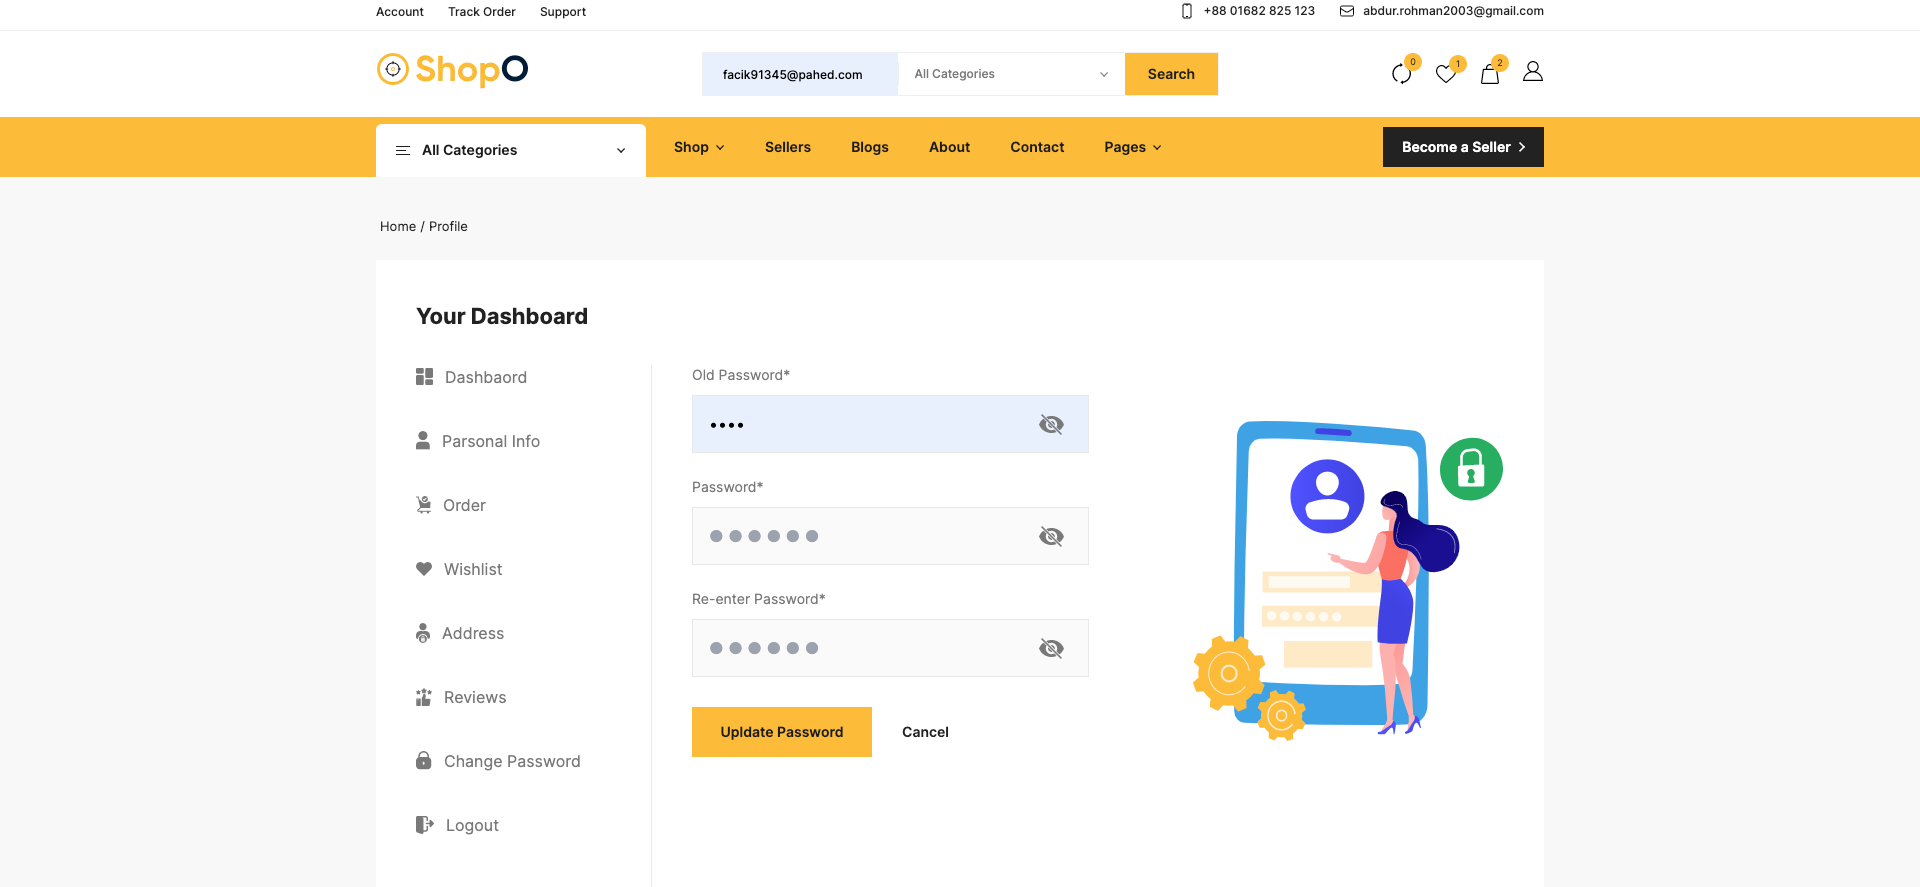
Change password
User can edit his password from sidebar. See...
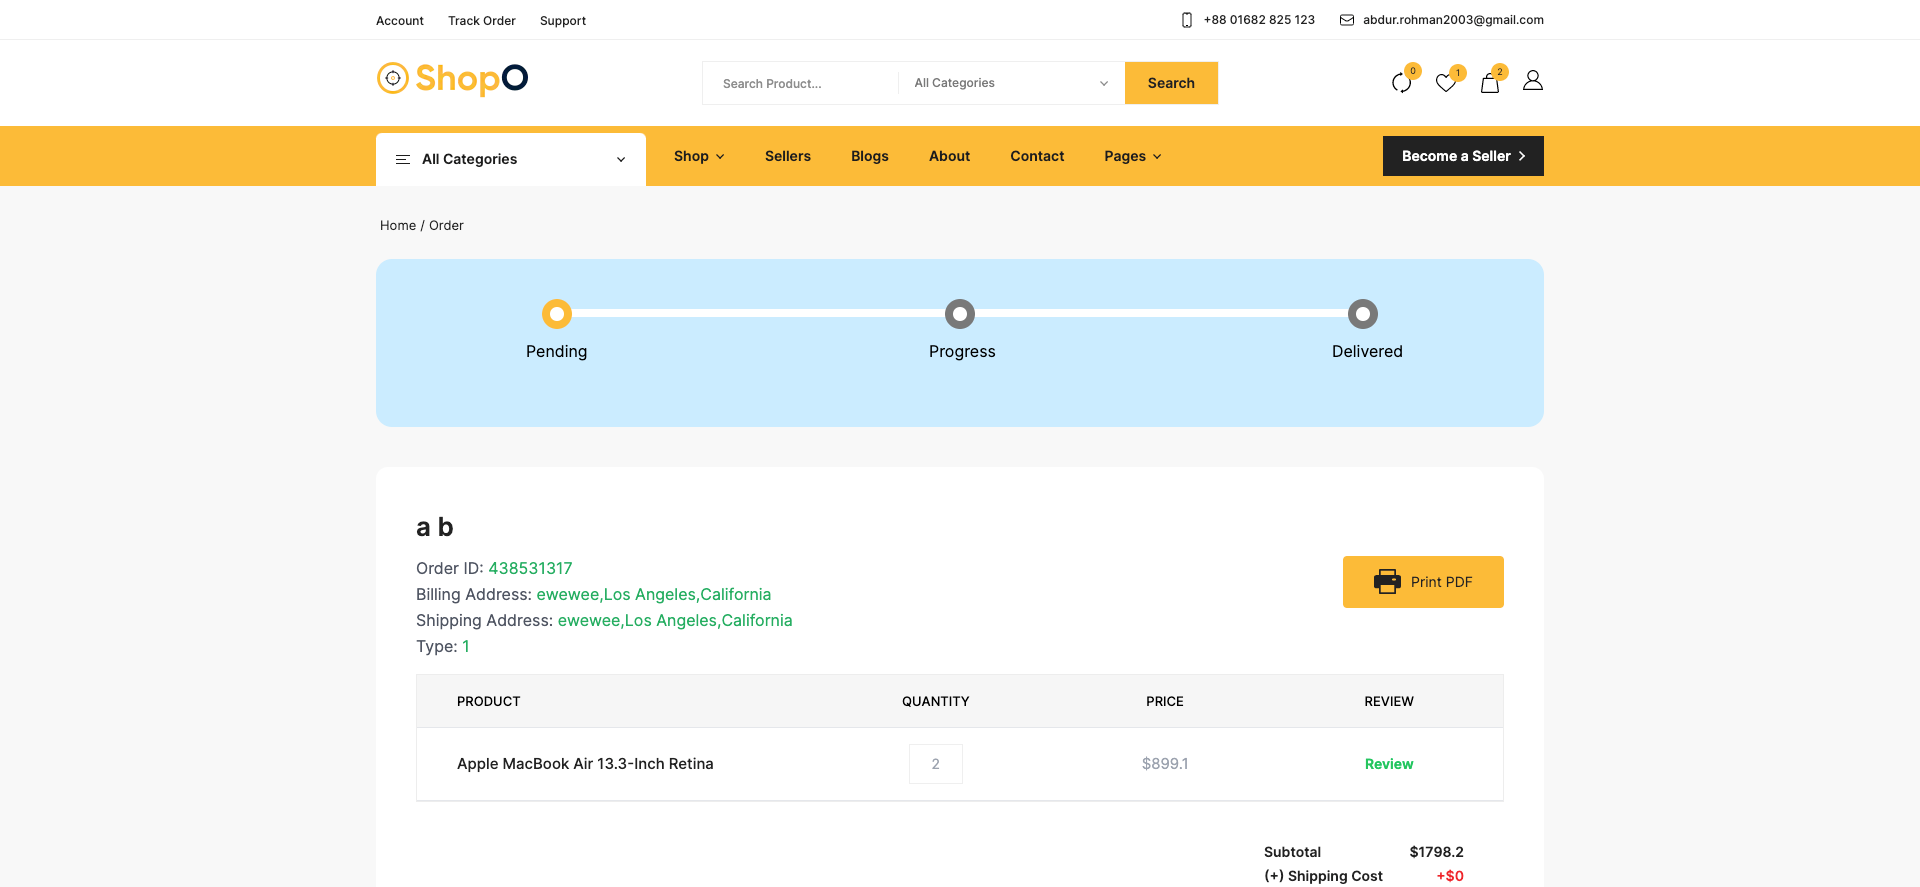
Order
User can see all his order as a list. See...
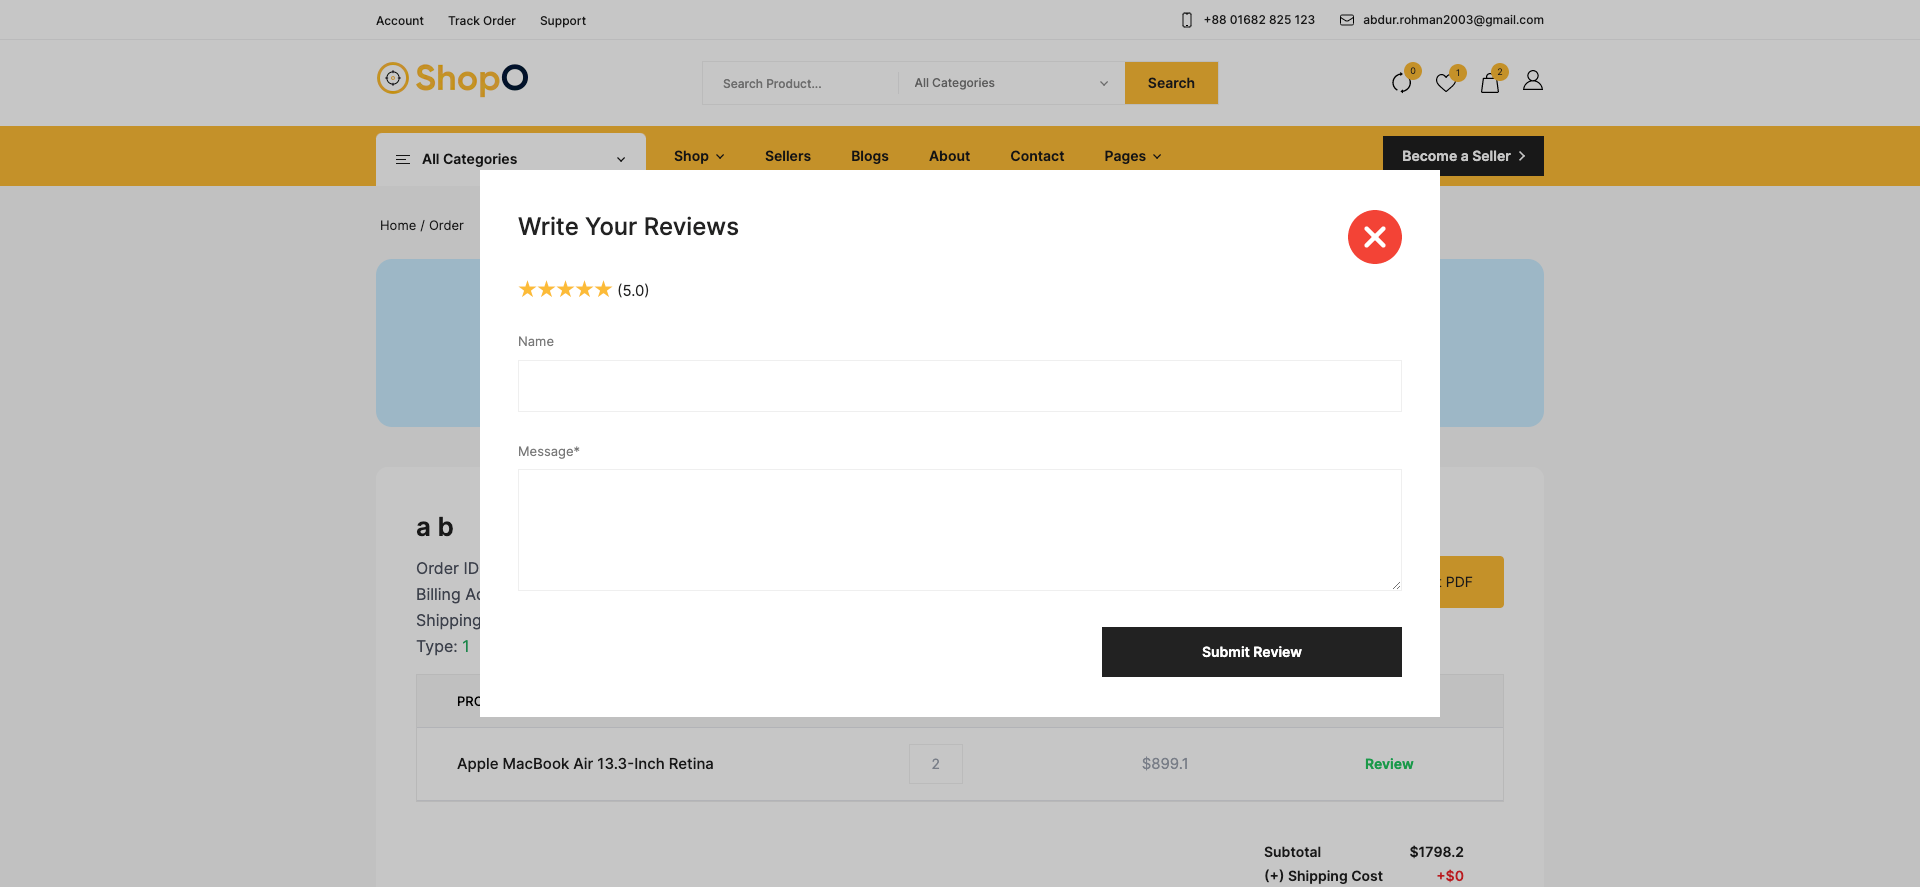
Review
User can manage his review from the sidebar. See...
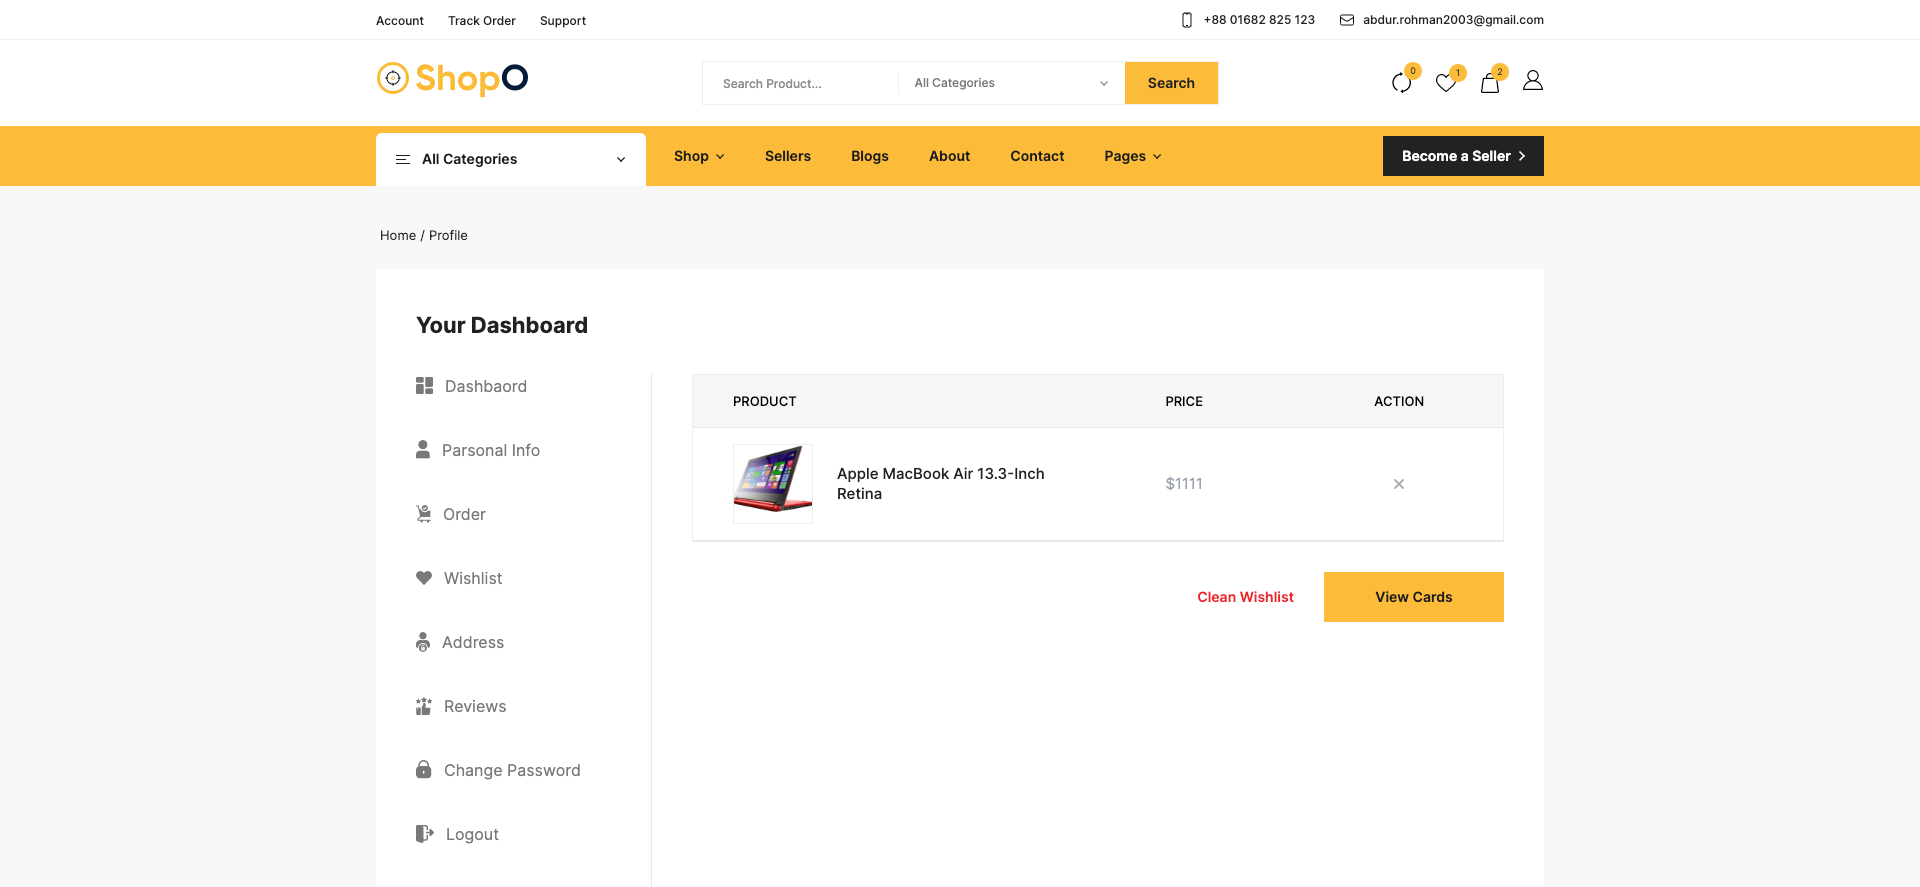
Wishlist
User can see all wishlist as a list. See...
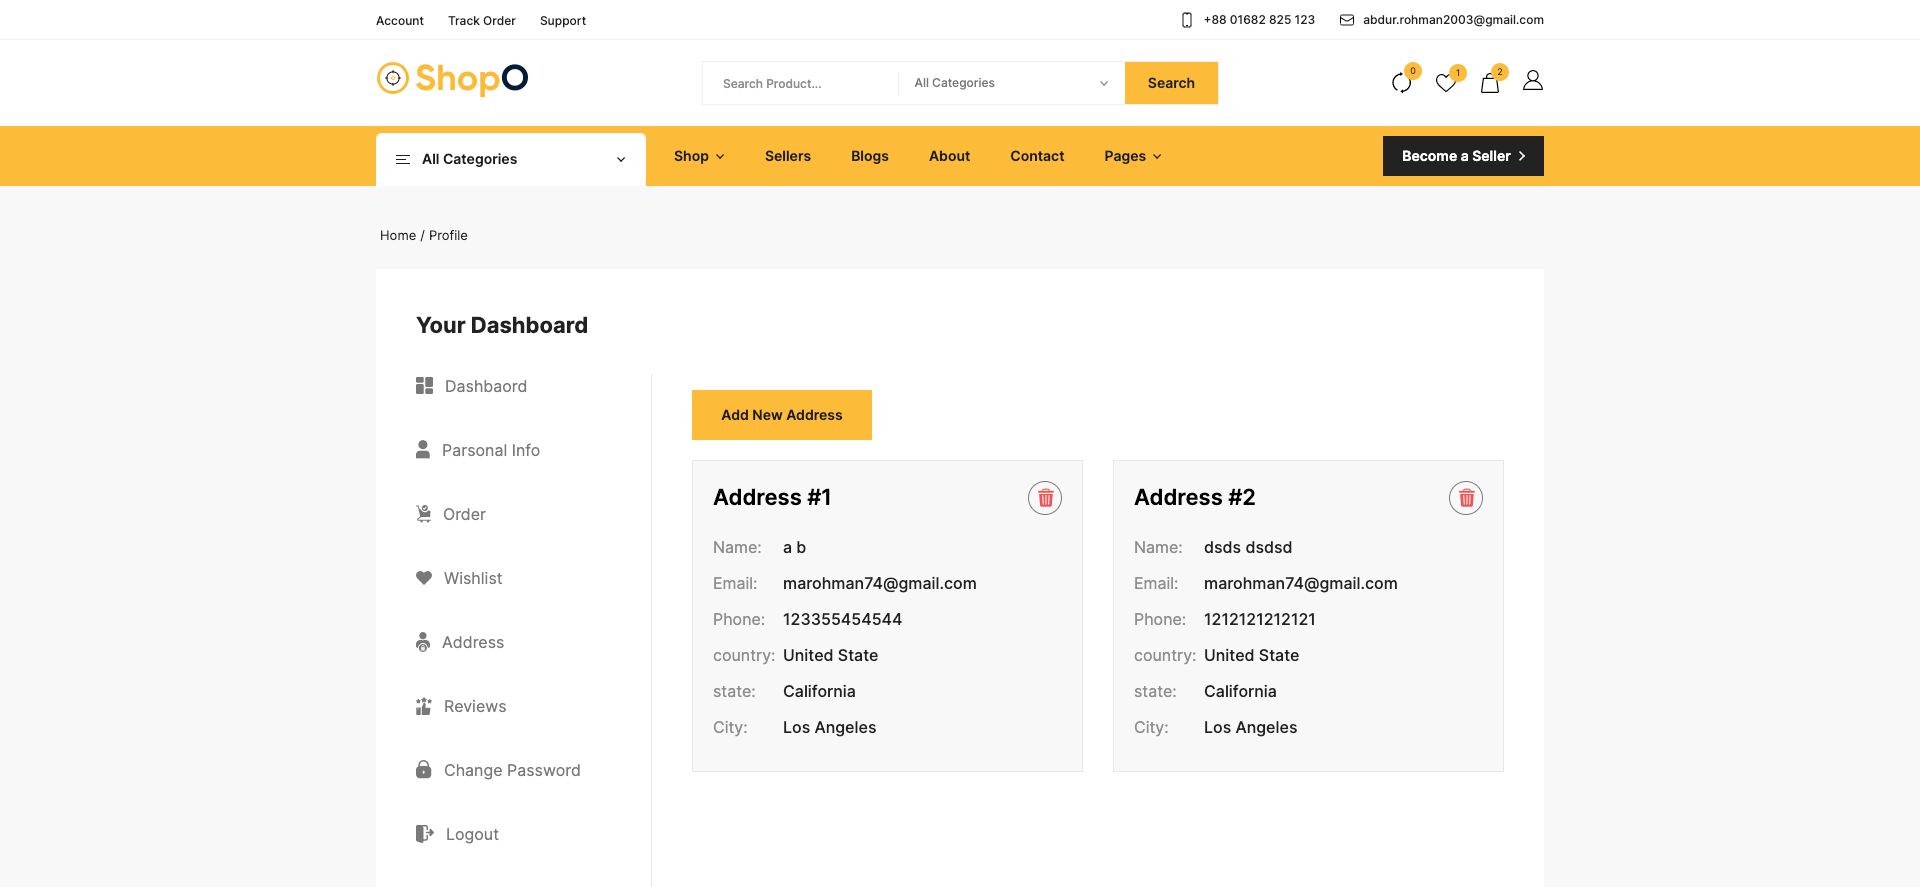
Address
User can manage billing and shipping address from the sidebar. See...
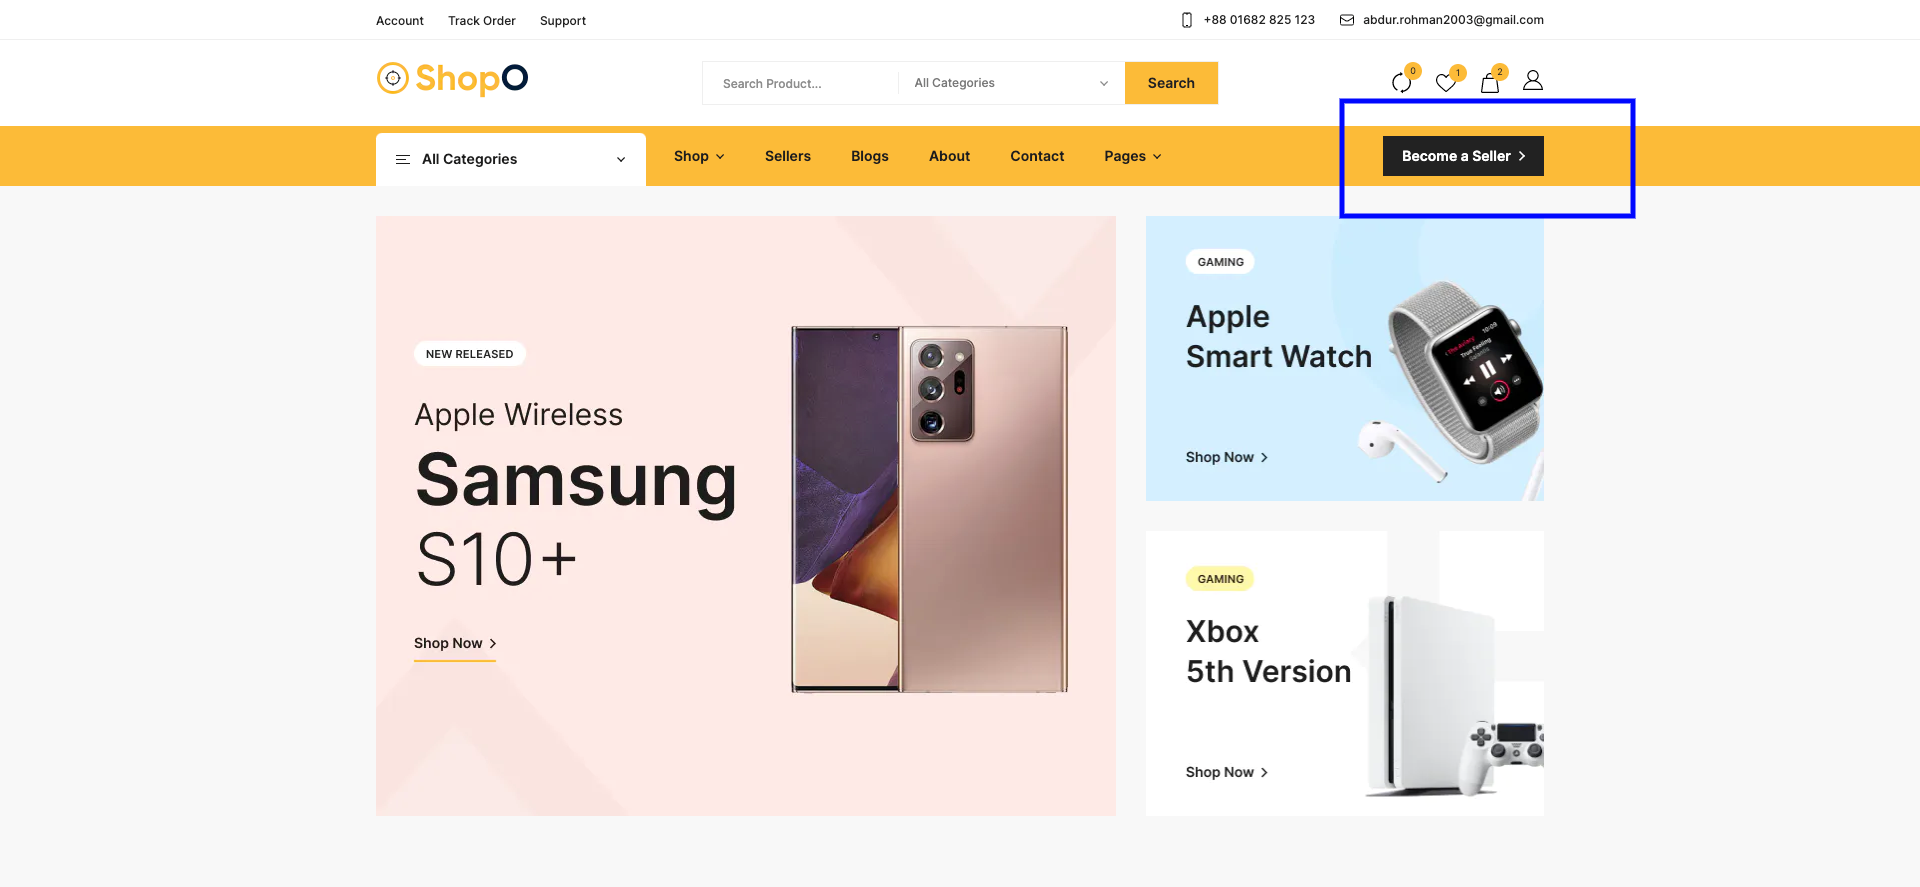
Become a seller
If user want to become a seller, he can easily apply from the sidebar. See..
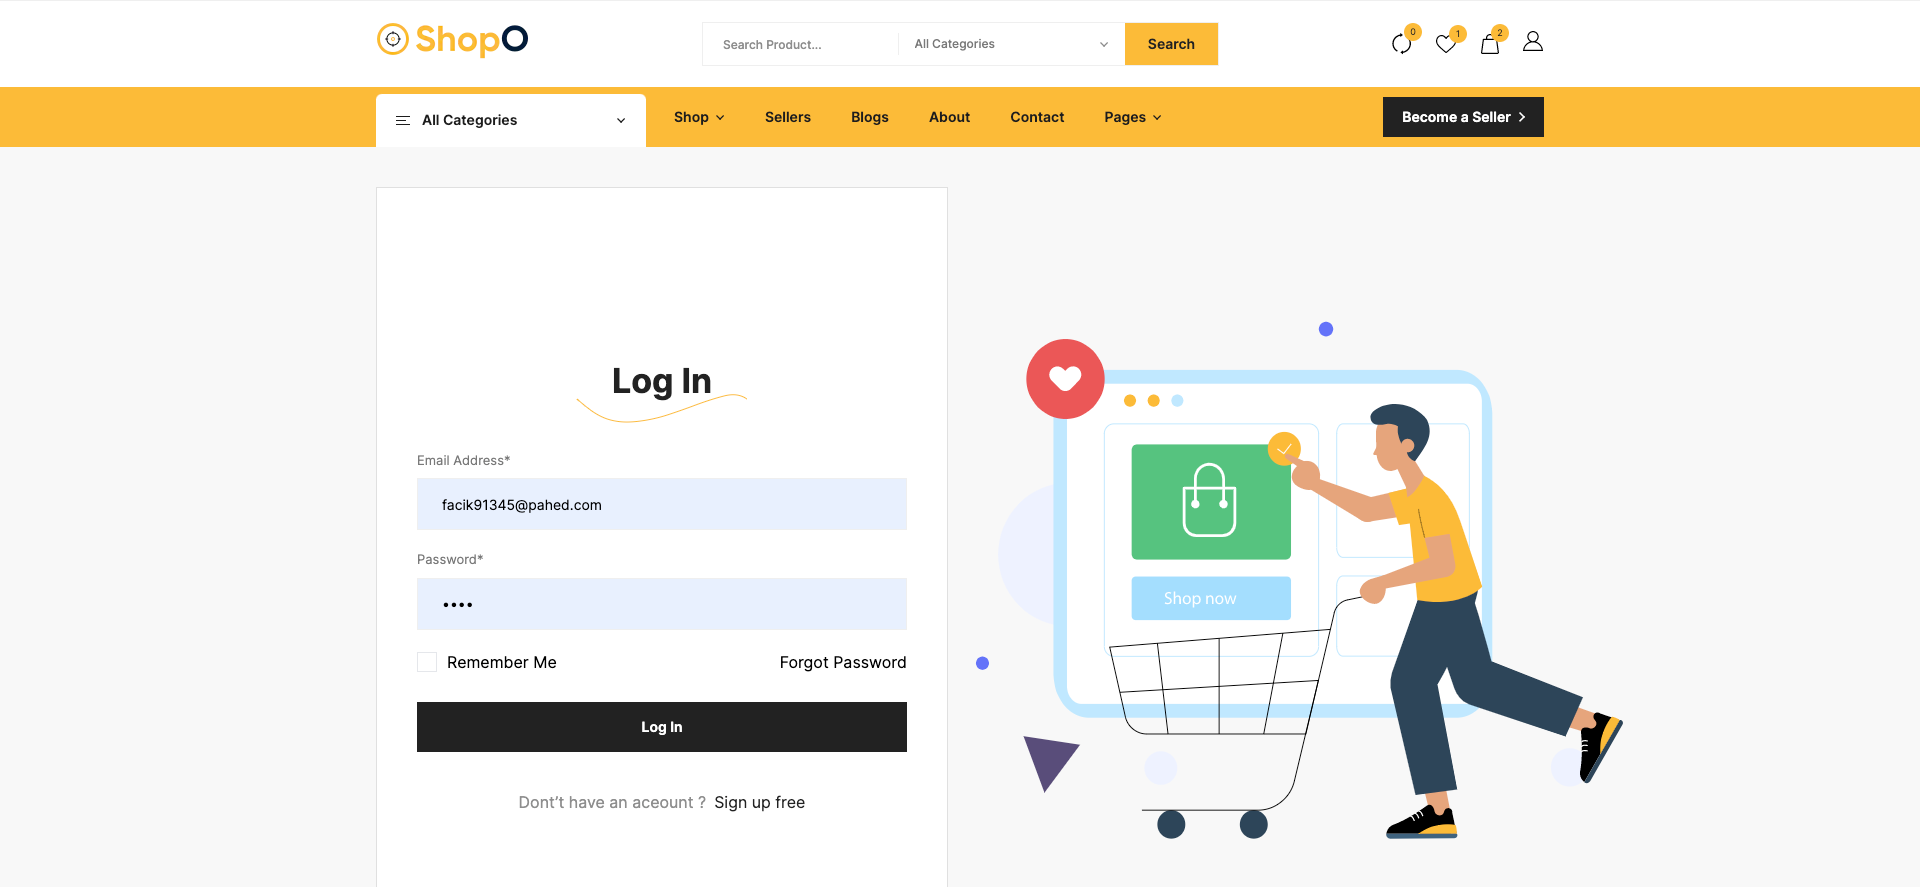
Seller Login
From the top menu, Seller can click on Login.
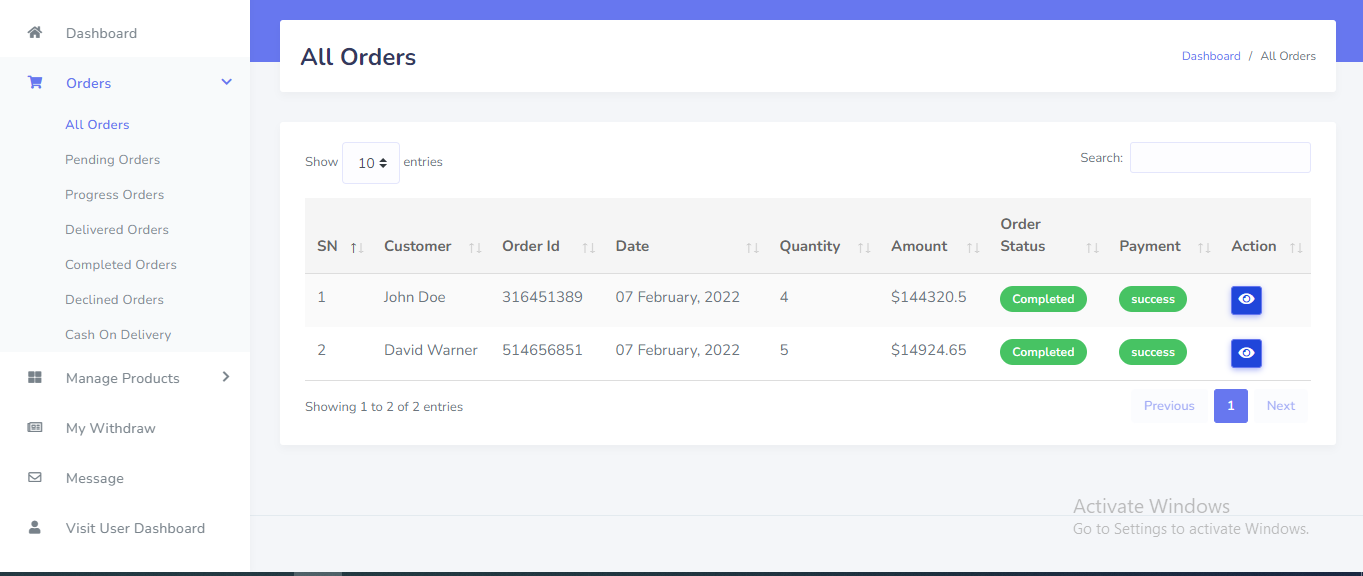
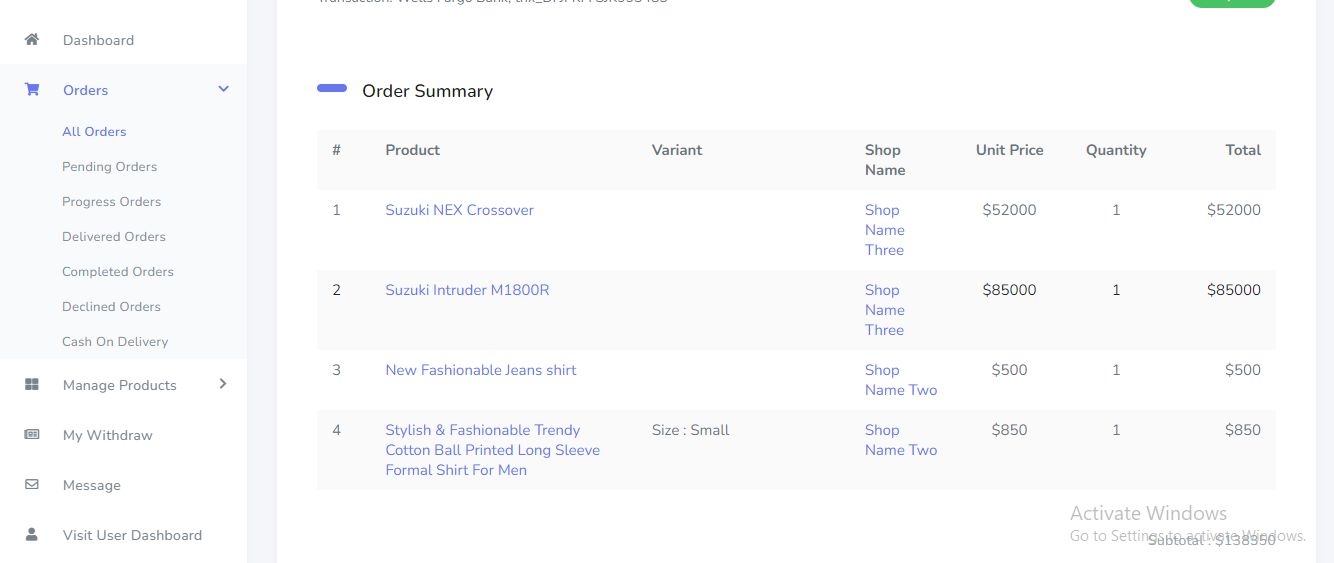
Orders Log
Order can be manage from the Seller panel. Go to "Orders >>..." from sidebar. See:
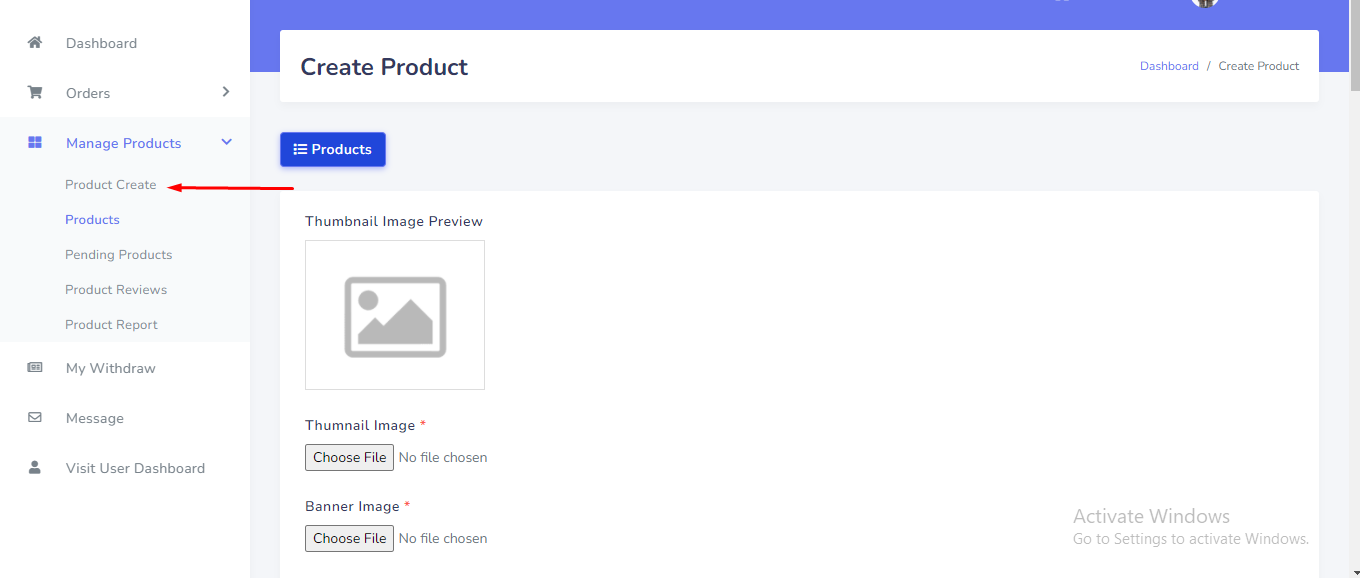
Create Product
Create product can be manage from the Seller panel. Seller product won't be display until admin approval. Go to "Manage Products >> Create Product" from sidebar. See:
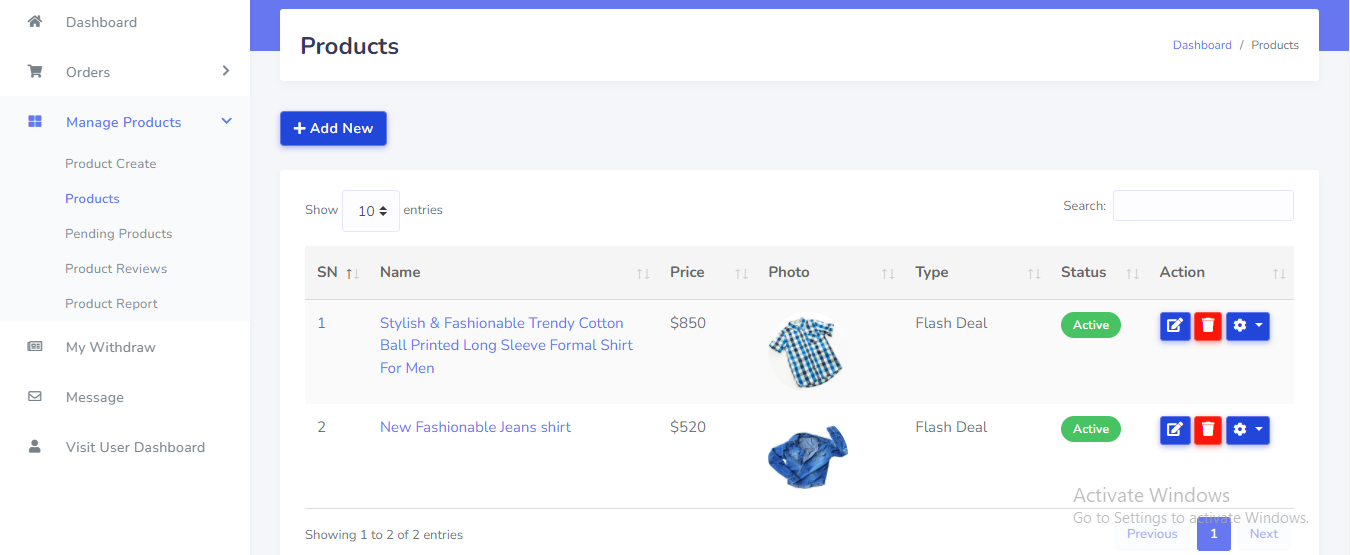
Manage Product
Product can be manage from the Seller panel. Go to "Manage Products >> Products" from sidebar. See:
Product Gellary
Product Variant
Product Highlight
Product Review

Product Report
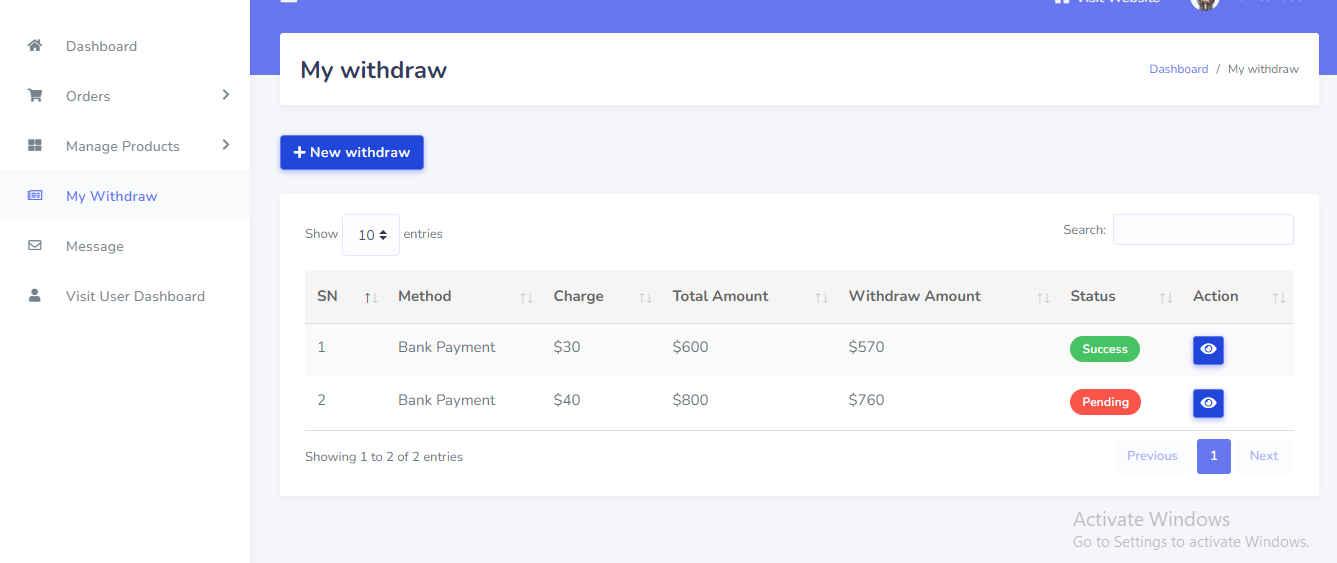
Seller Withdraw
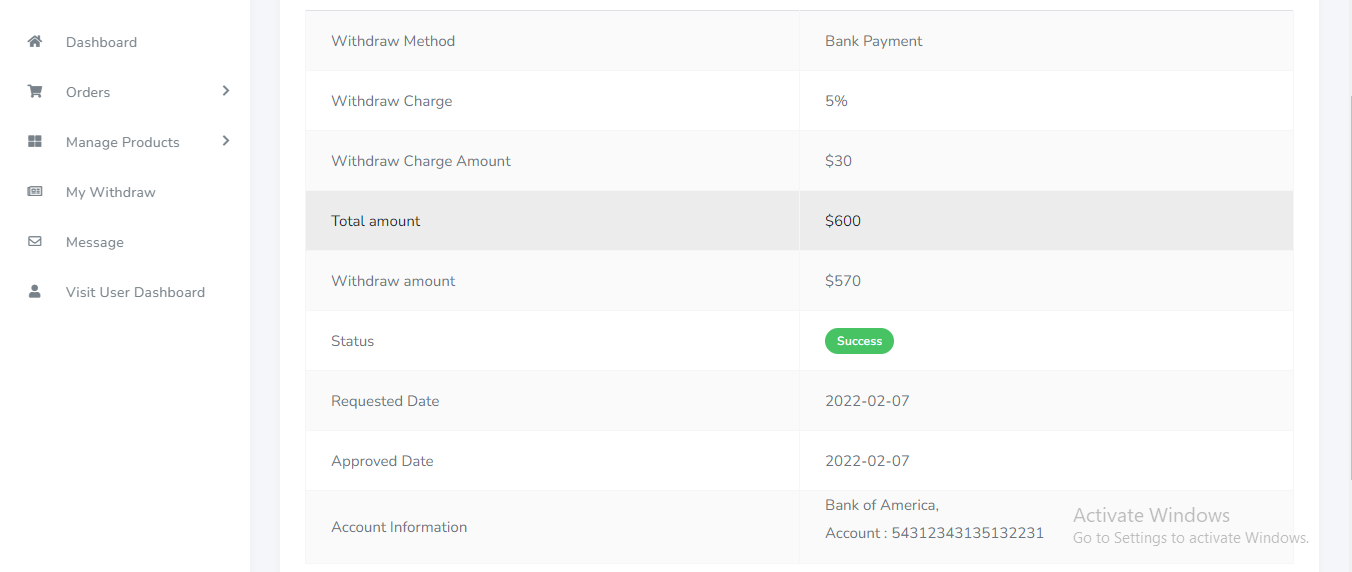
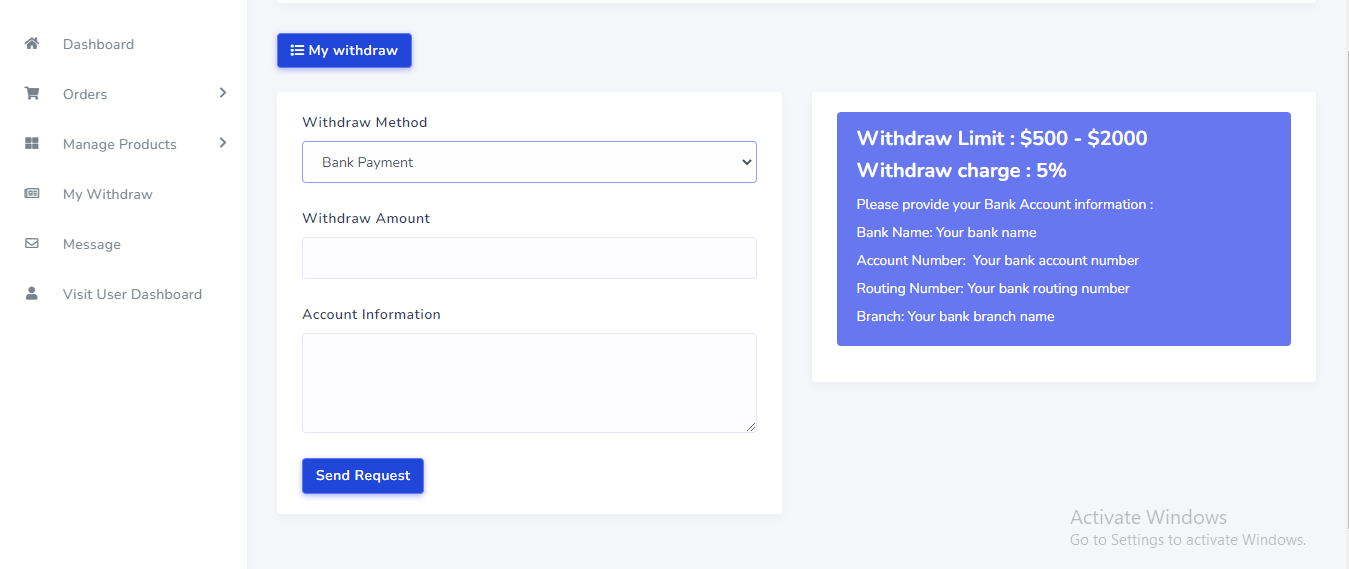
Seller can withdraw his payment from the Seller panel. Go to "My Withdraw" from sidebar. See:
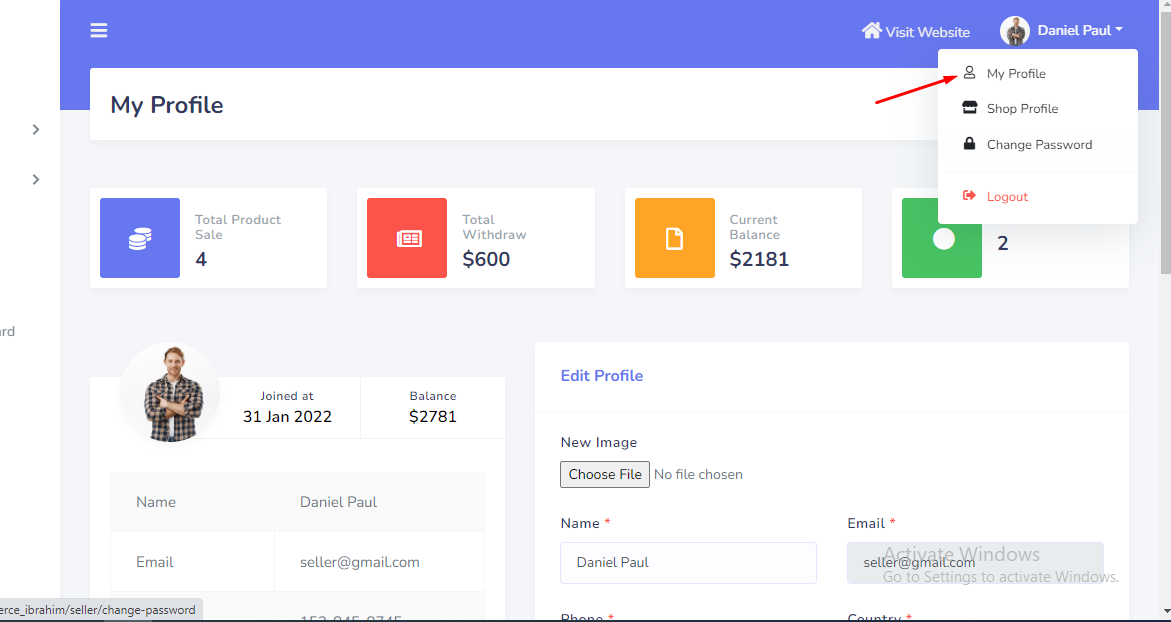
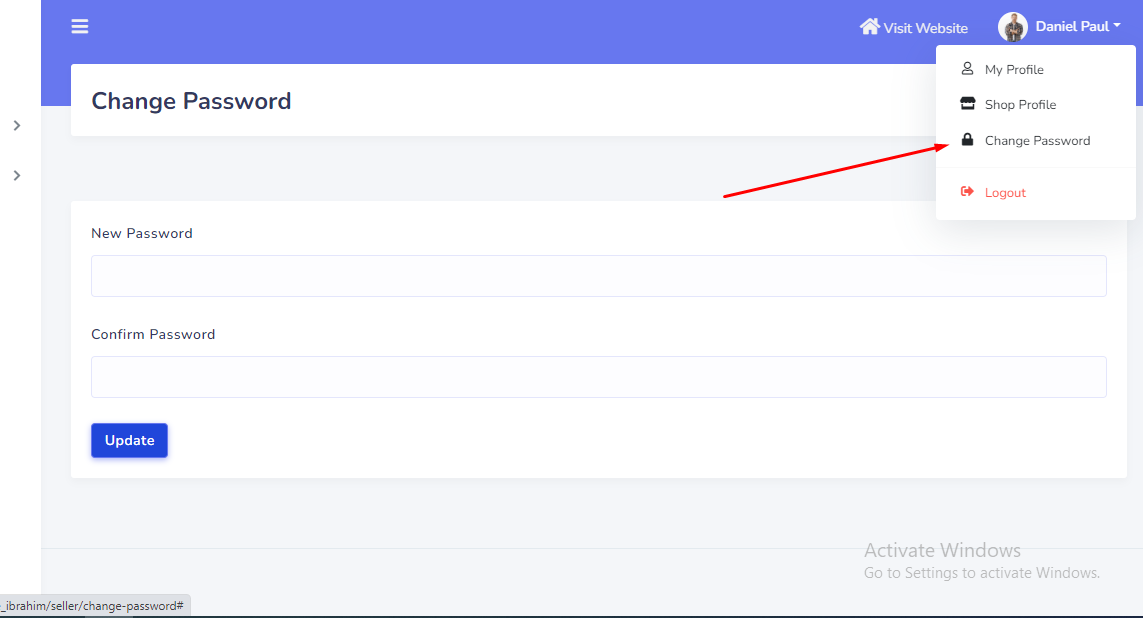
Seller Profile
From the topbar seller can manage profile information and change password . See:
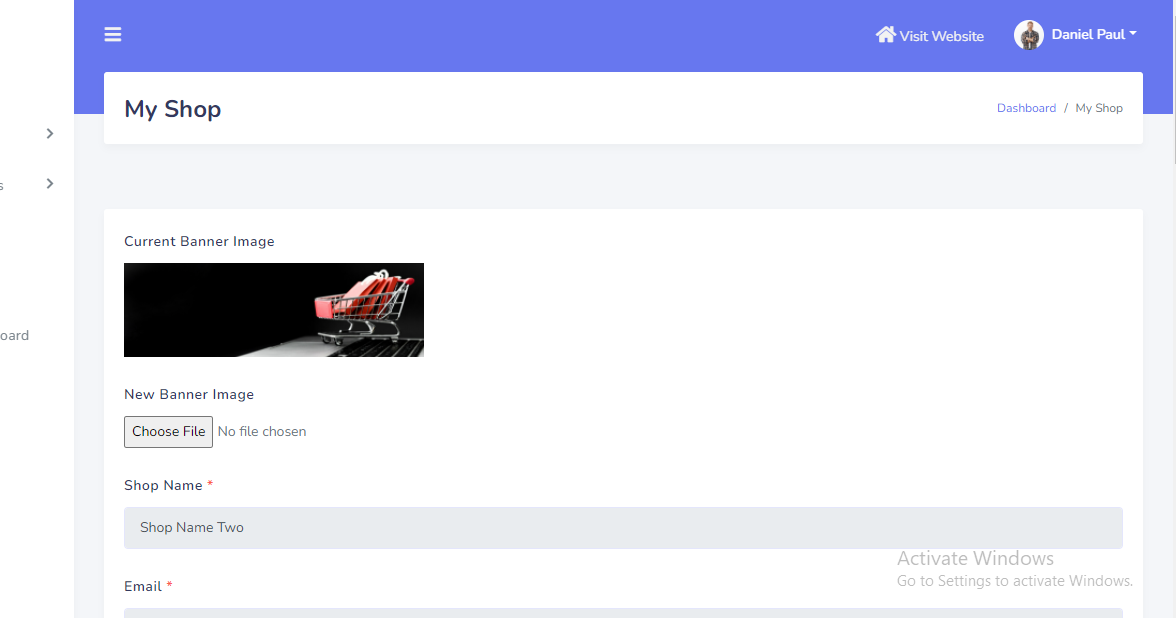
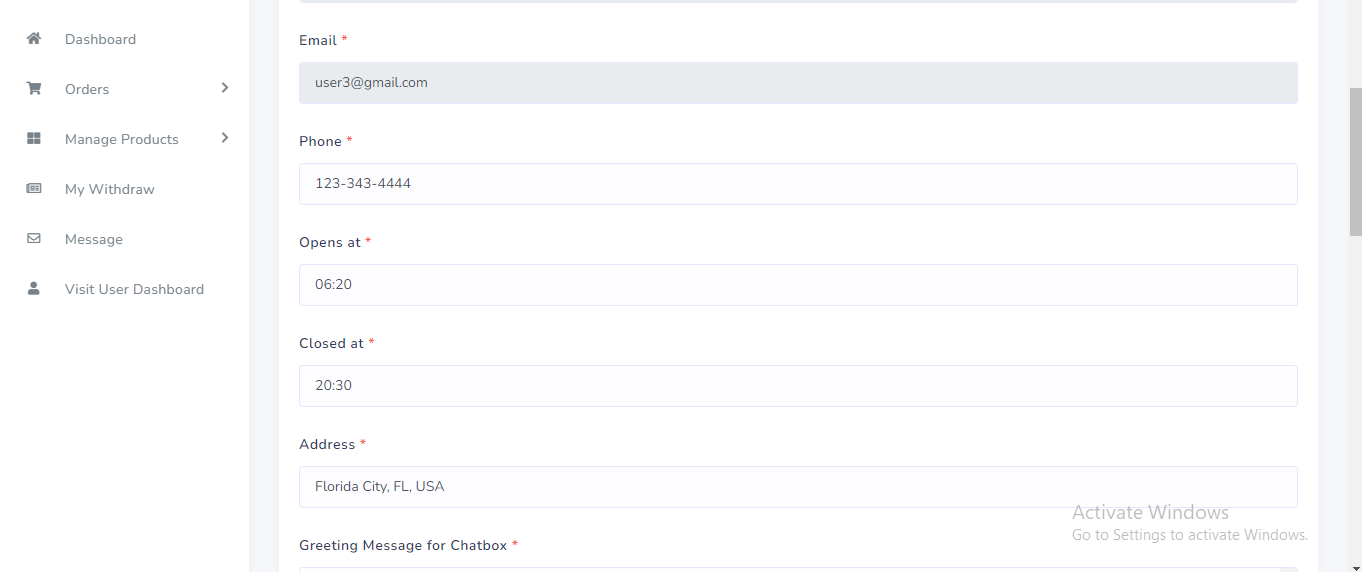
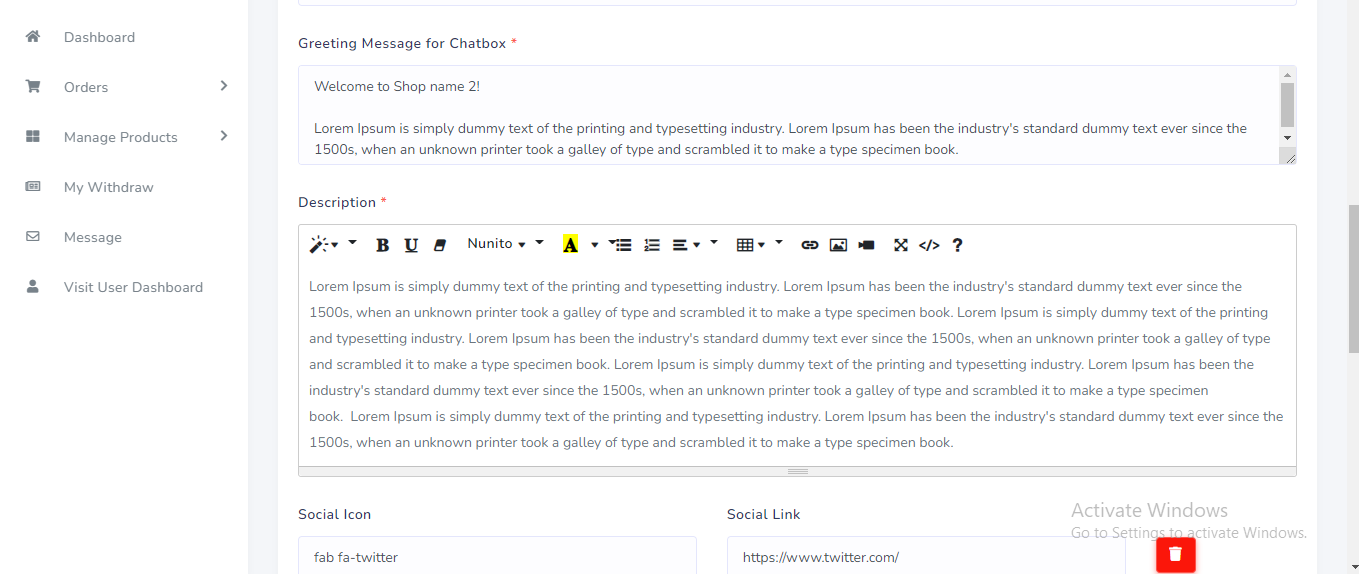
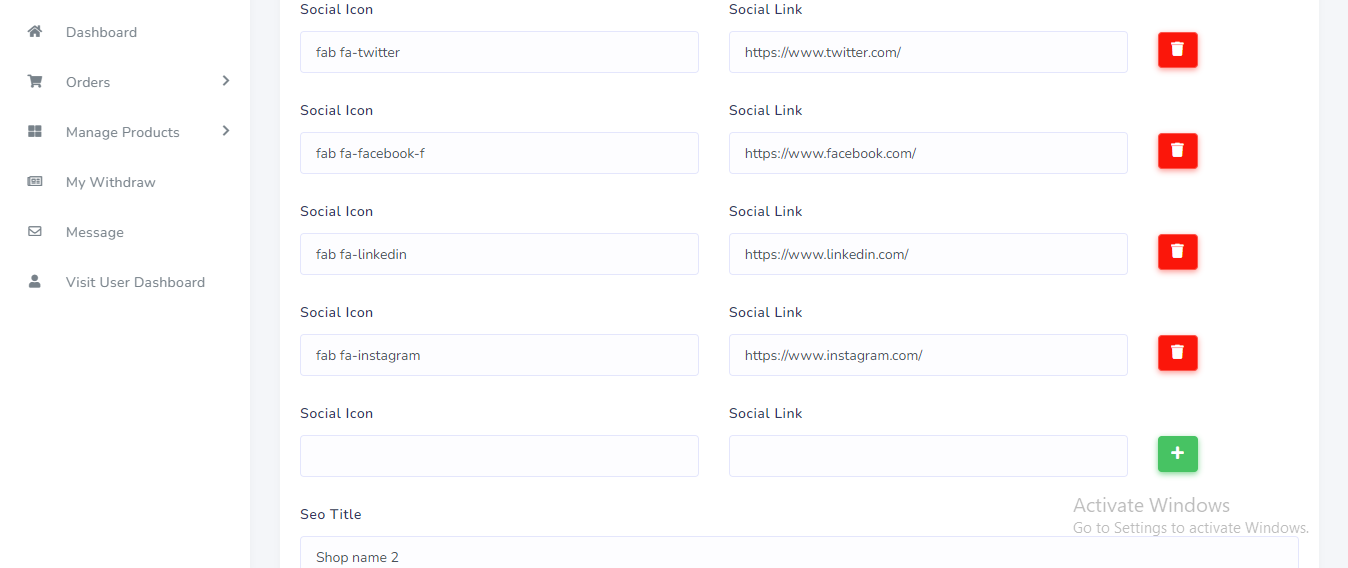
Shop Profile
From the topbar seller can manage shop profile information. See:
How to update the script version ?
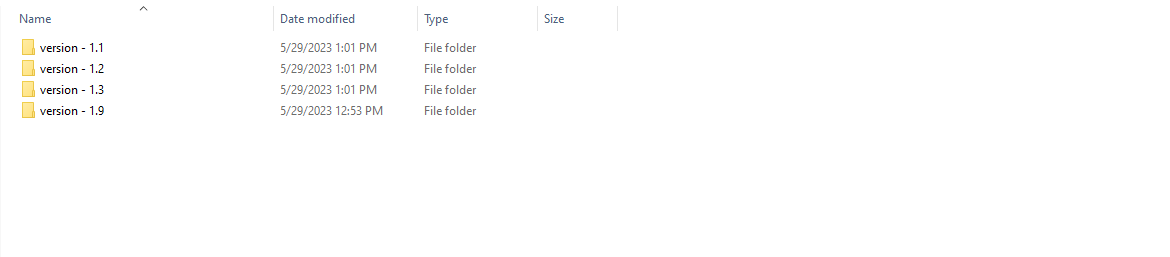
After download the script from codecanyon you can get a zip file. After unzip the file you can total 4 folders. In the 'admin_panel' folder you can see 2 folder. In the 'main_files' folder there are main laravel script exist. Inside the 'all version' folder you can see version list. See:

For update any version go to the version folder and you can see a "update.zip" file. See:

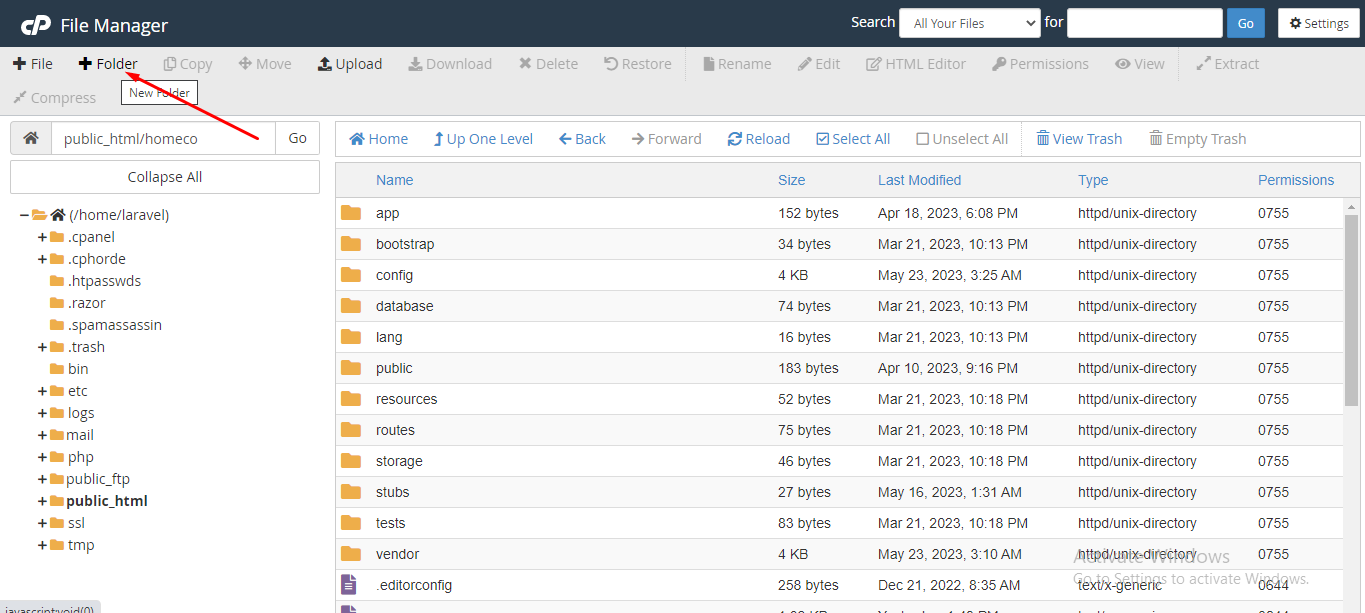
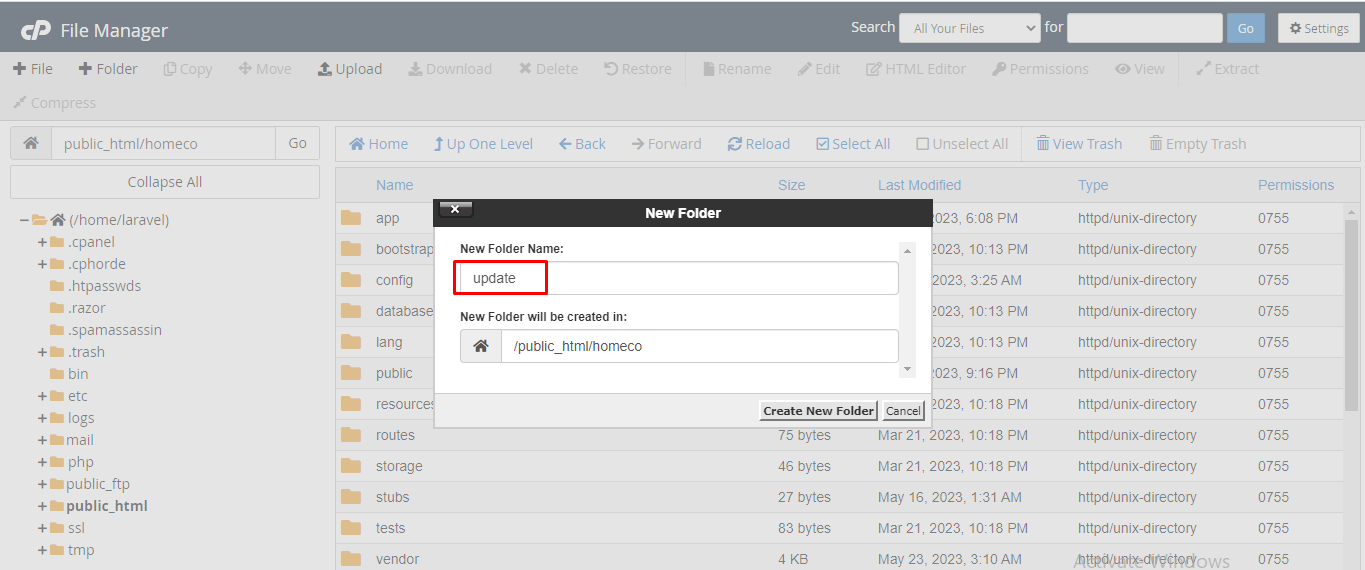
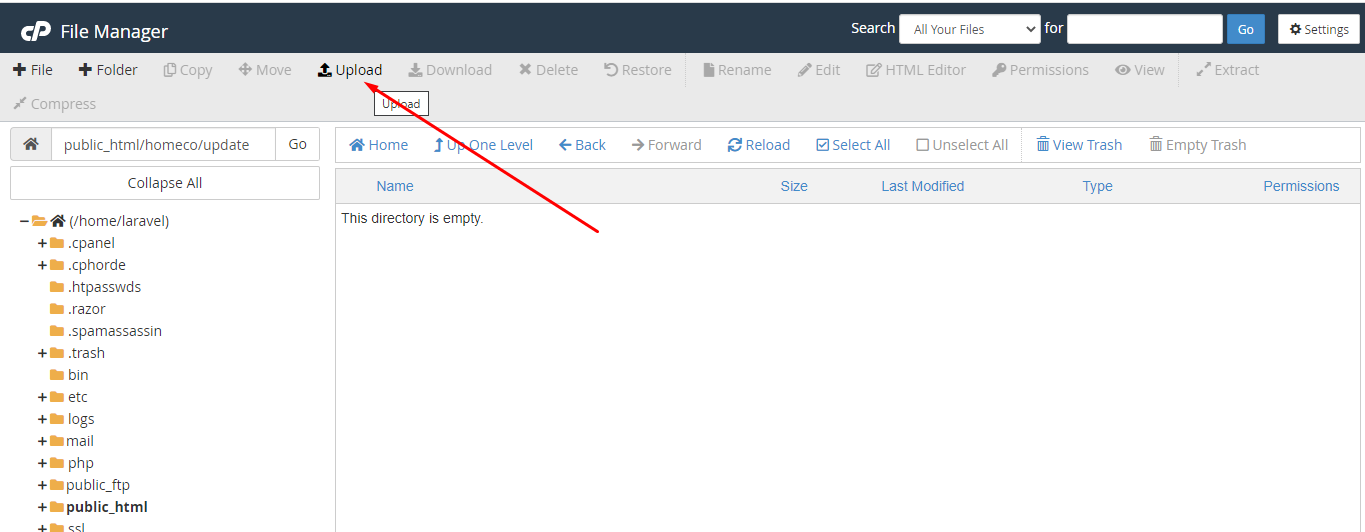
Now goto your server and root project directory. Create e new folder, the name of folder is "update". See:
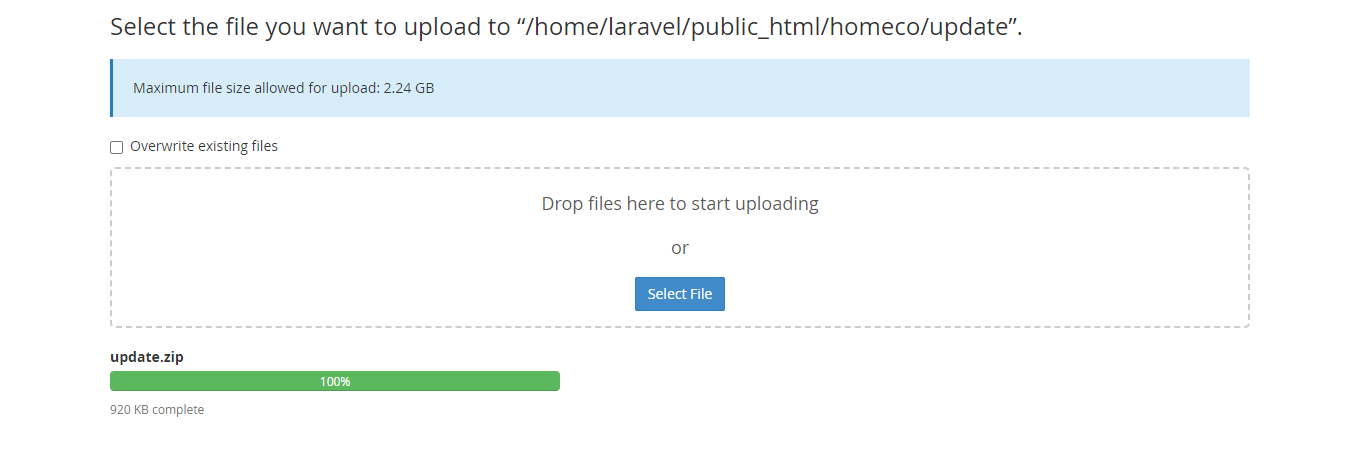
Inside the 'update' folder you need to upload the "update.zip" file. See:
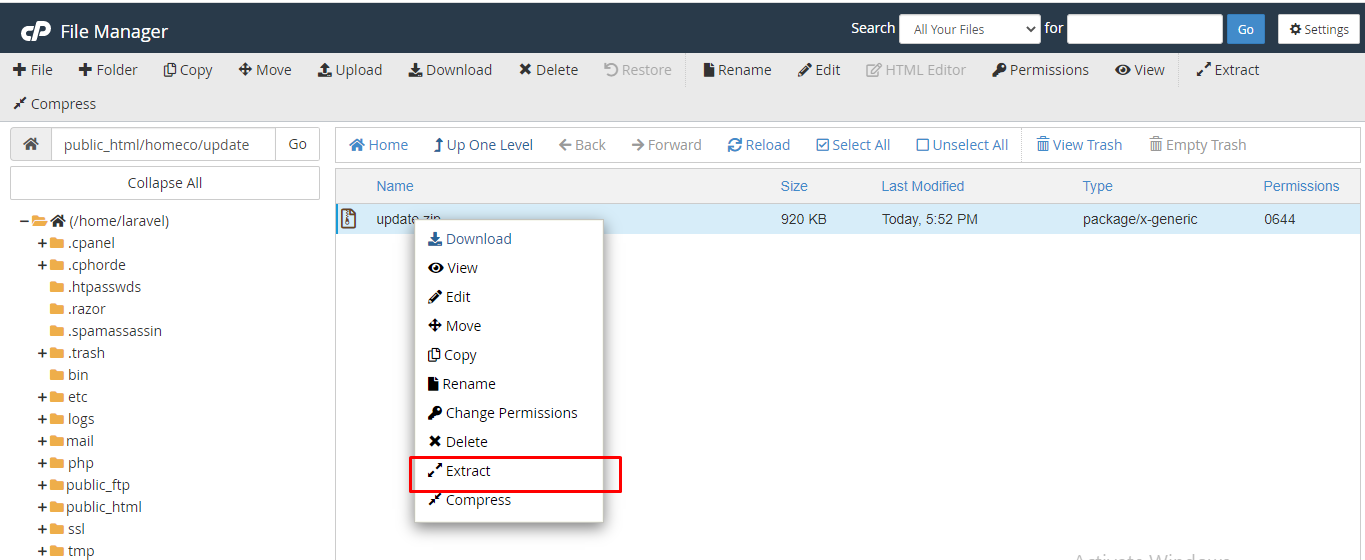
Now extract the zip file. See:
Now go to your "http://your_domain.com/update". See:

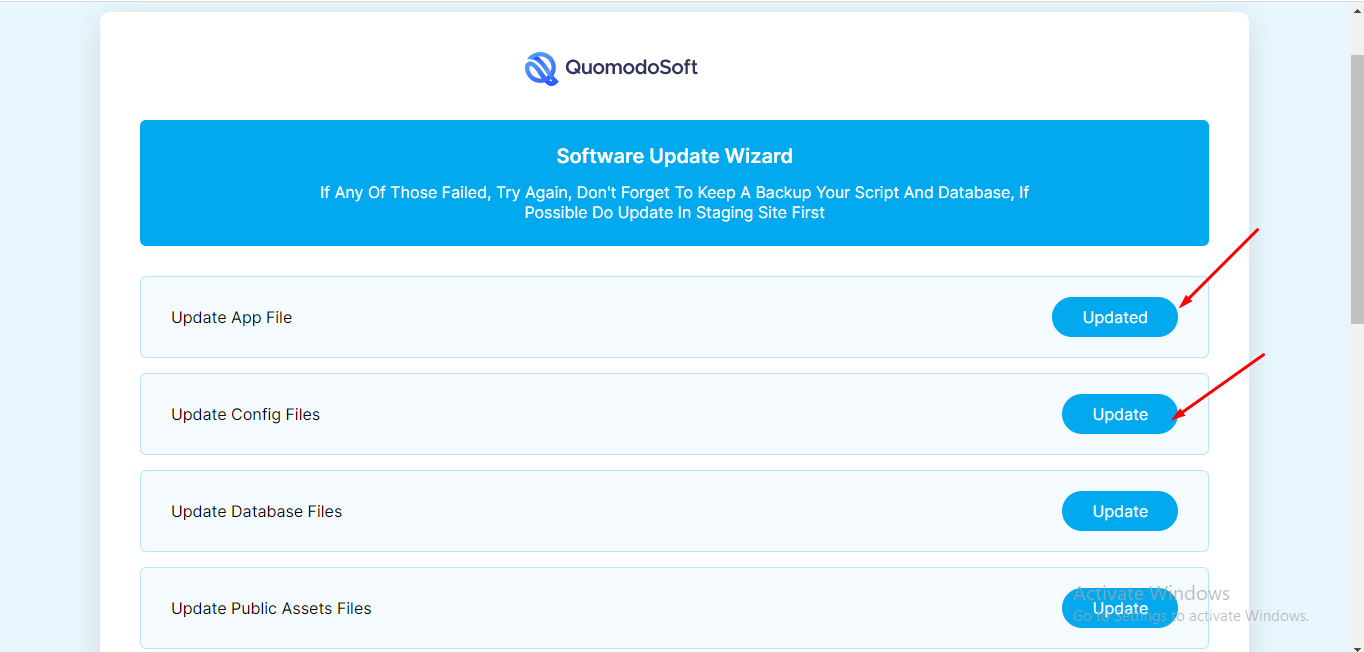
Now you can see our version wizard. See:
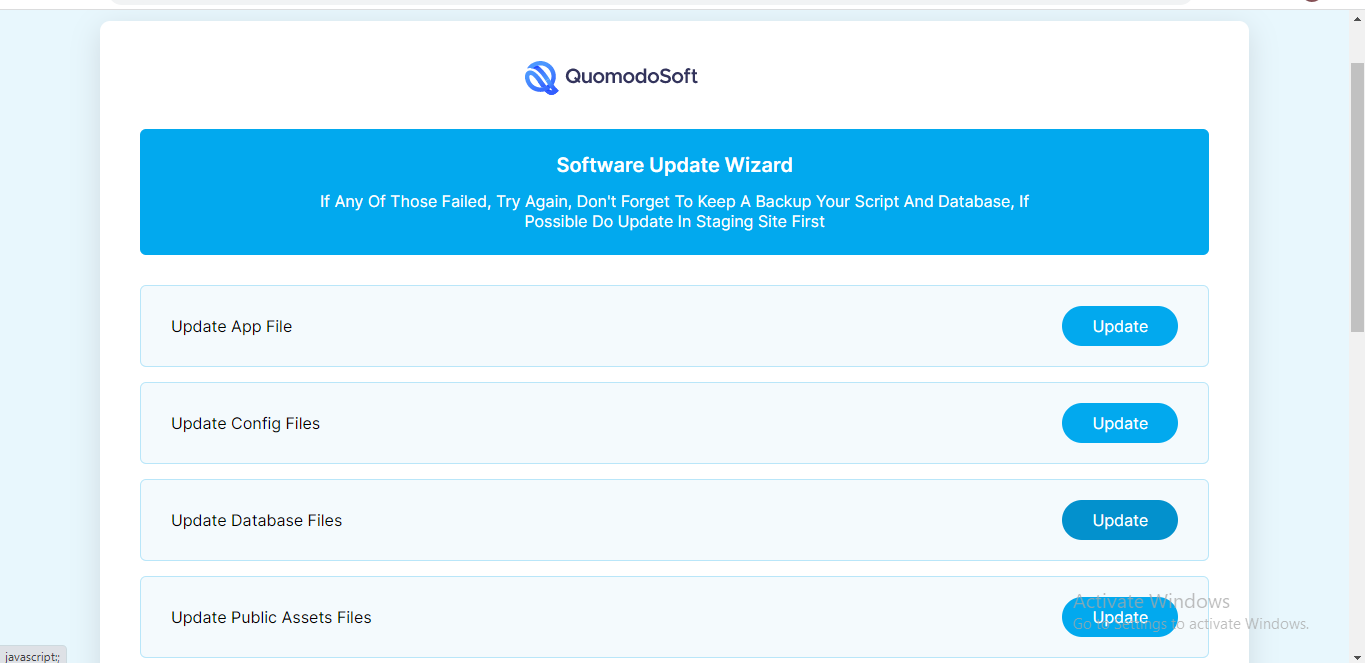
In this page you need to click the update button step by step. After successfully update you can visit your site and enjoy latest version See:
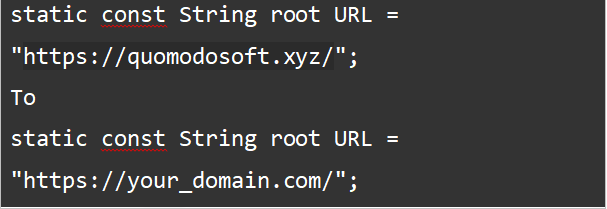
How to change the website root URL?
You must host your website, then go to libcoreremote_urls.dart and change the root URL to your website's root URL.
Example:
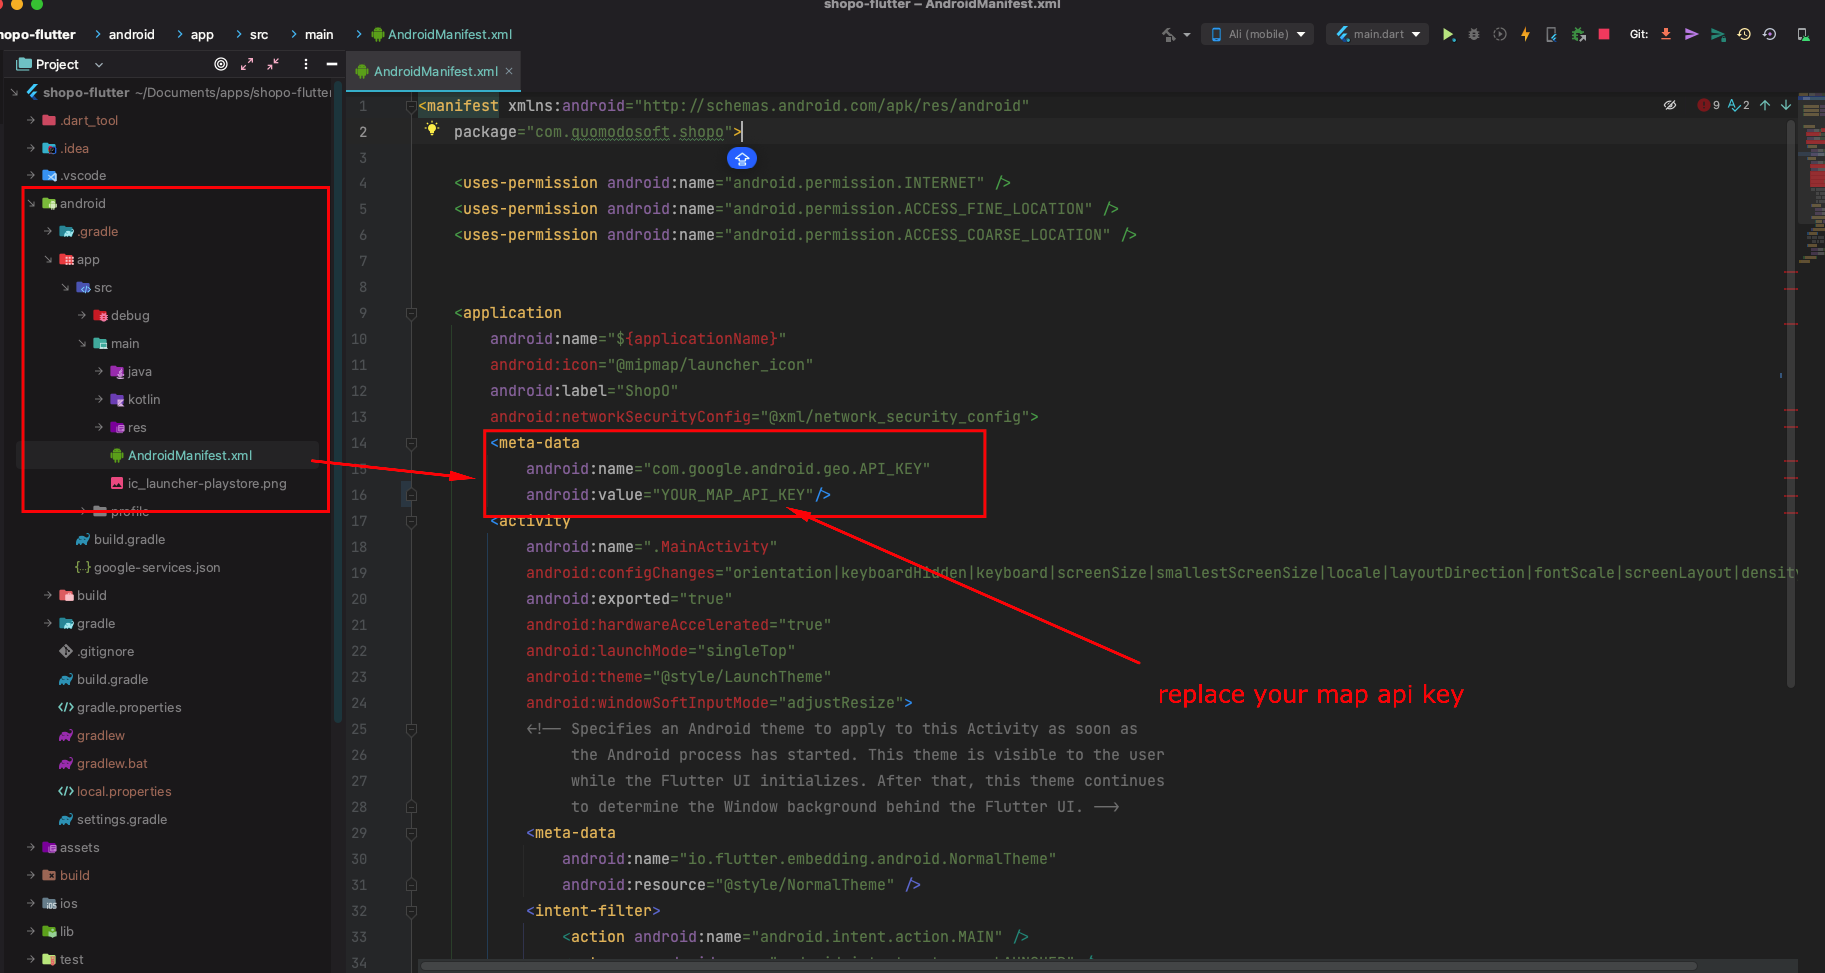
How to change Goggle Map API KEY for Android?
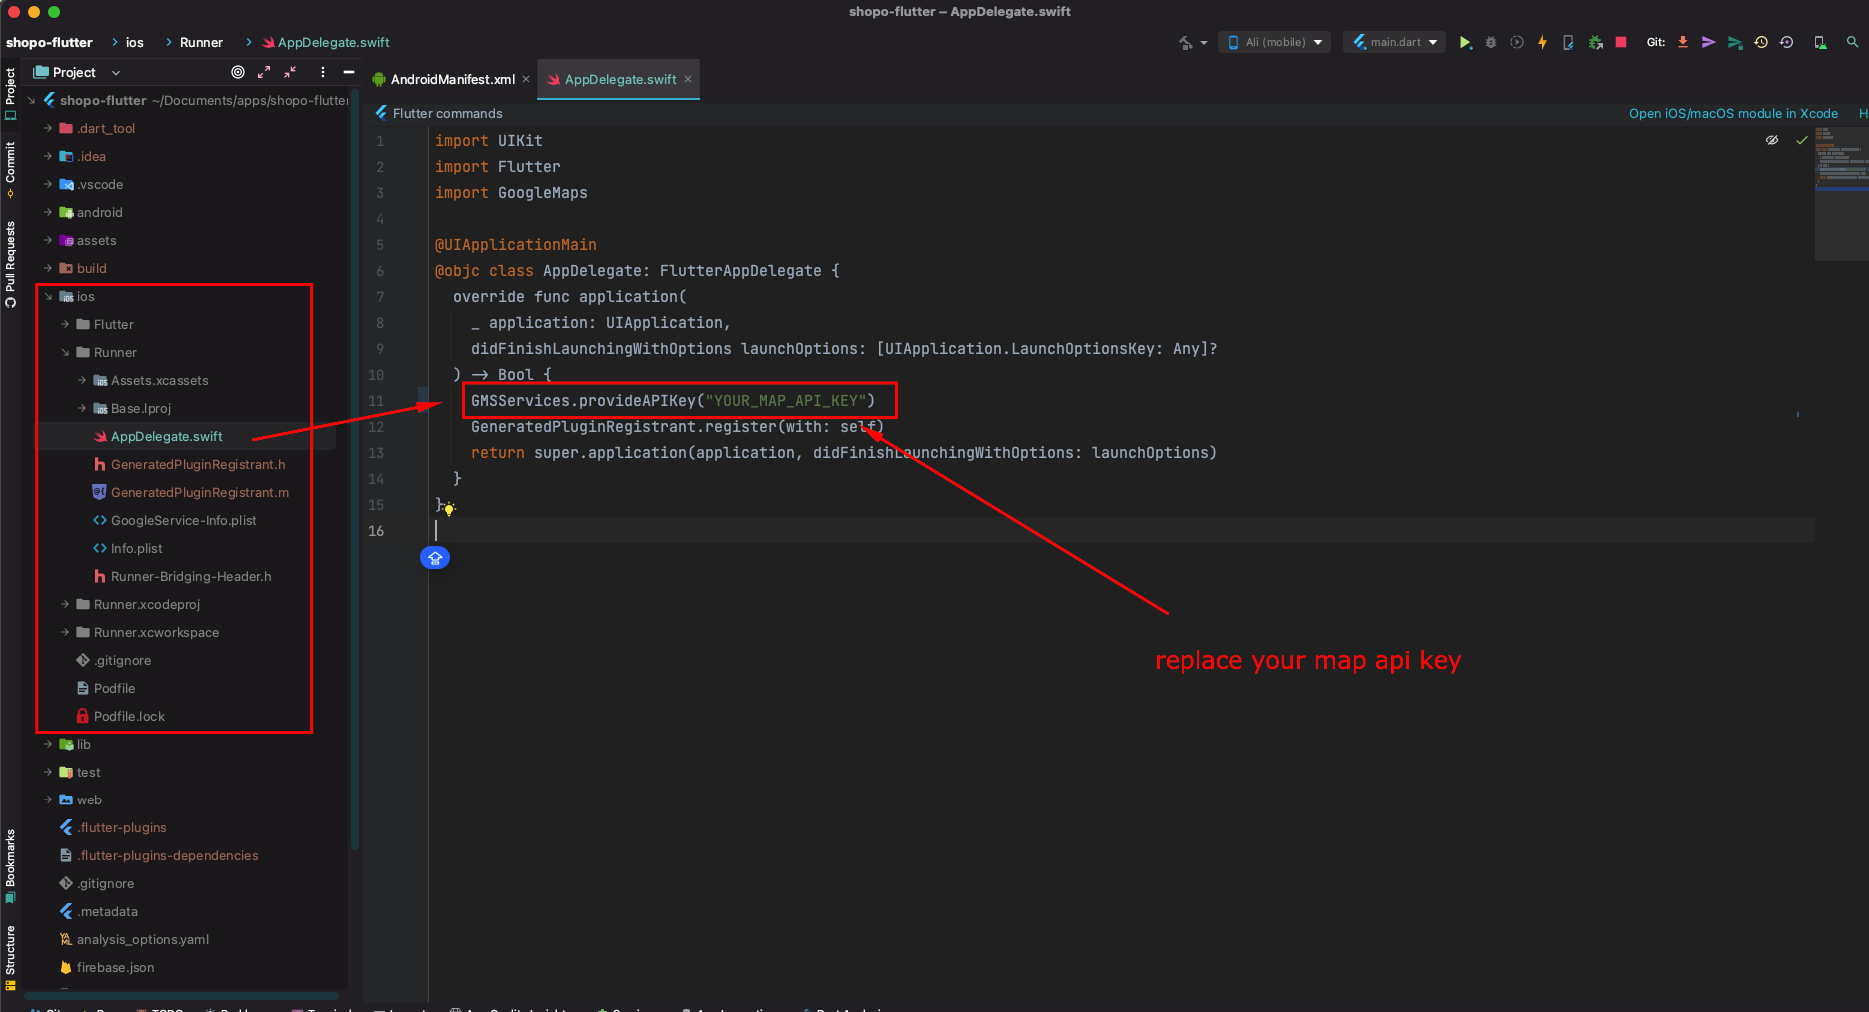
How to change Goggle Map API KEY for iOS?
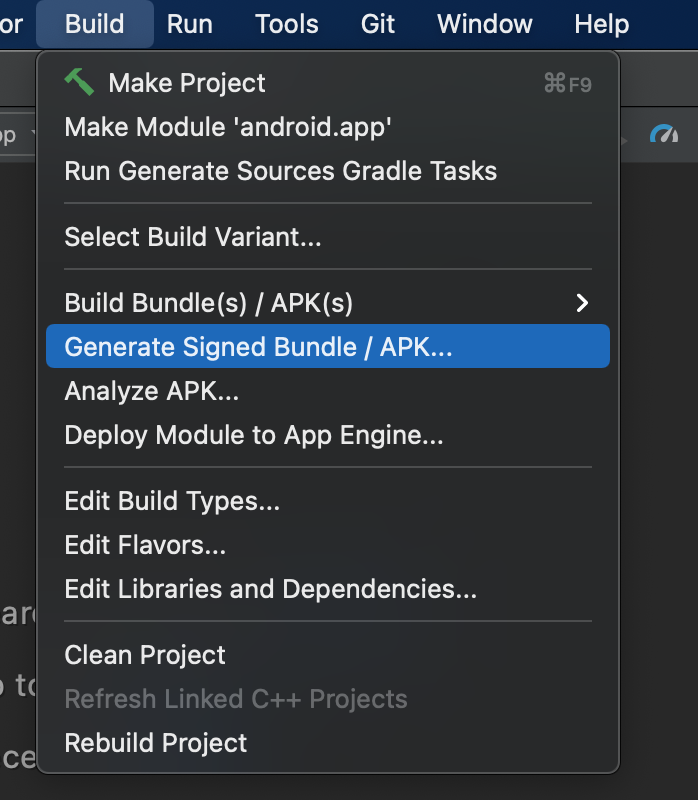
How to generate a play store uploadable file for release?
https://docs.flutter.dev/deployment/android see the doc for reference.
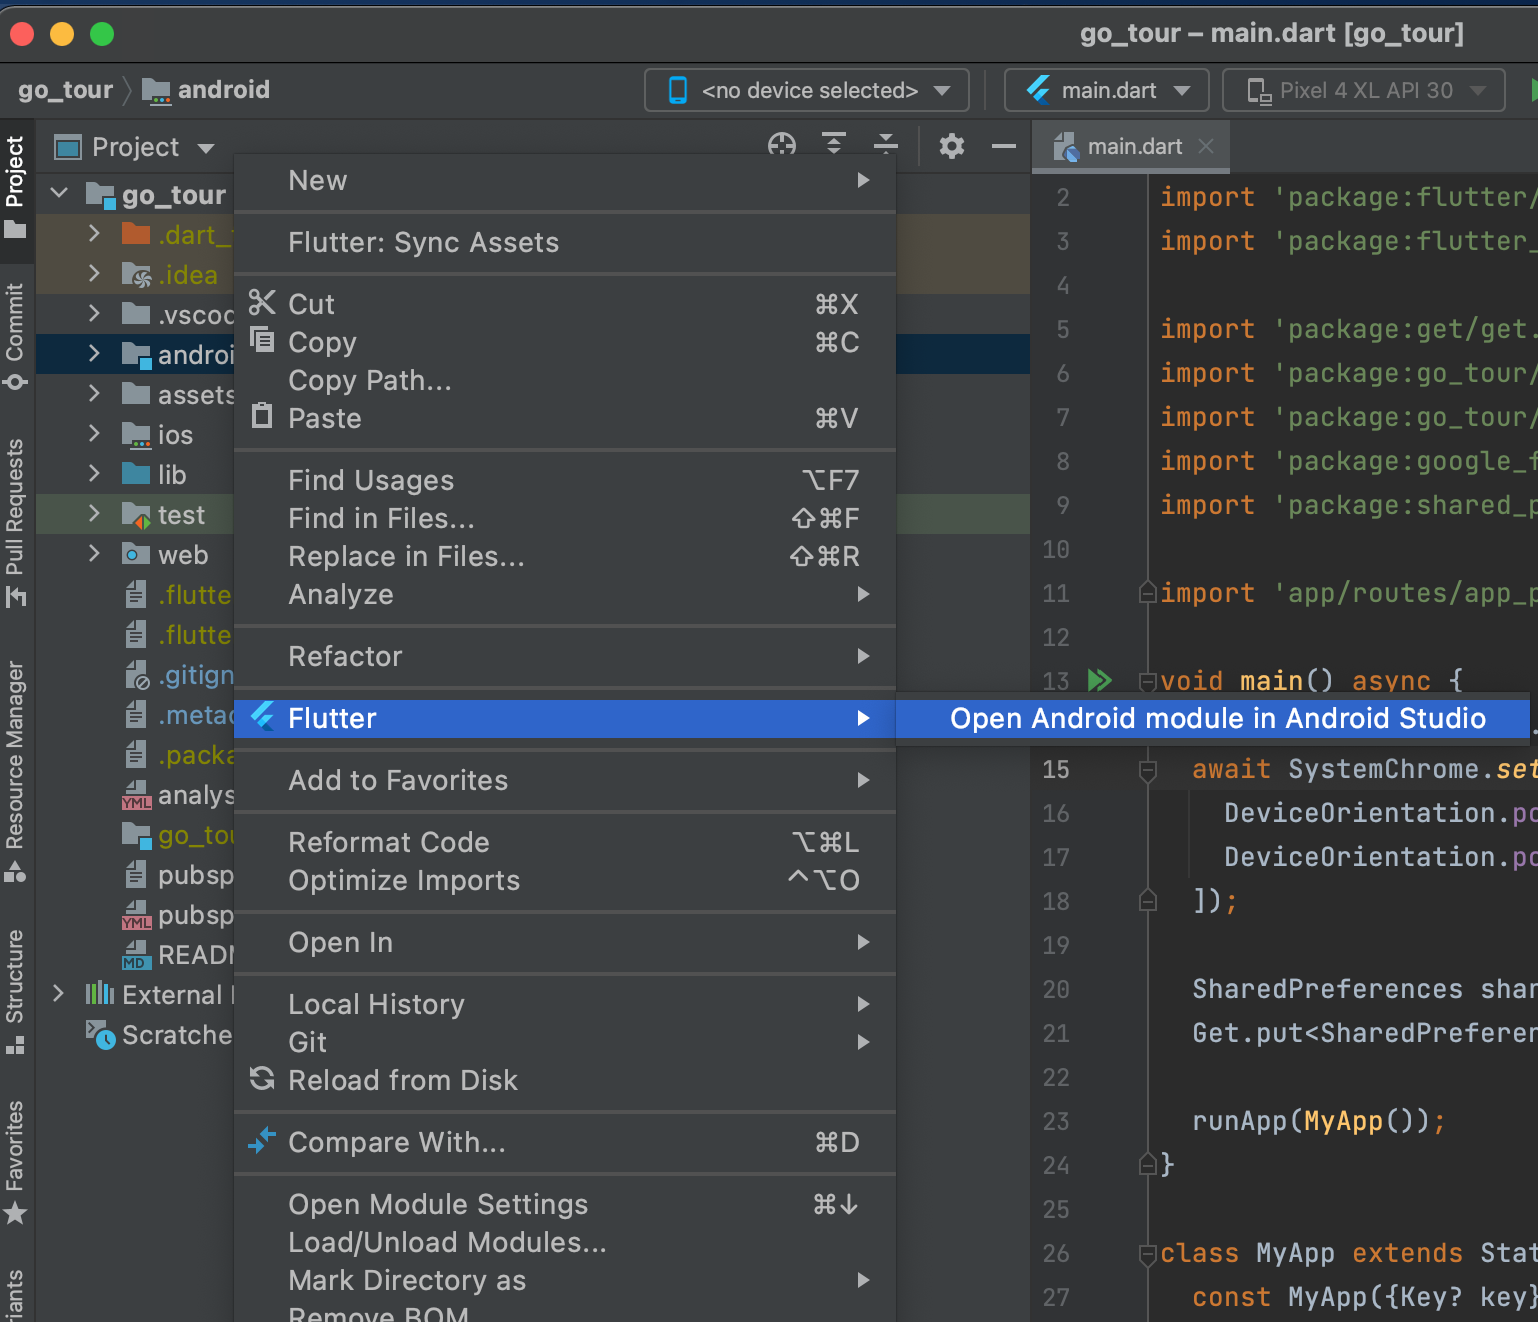
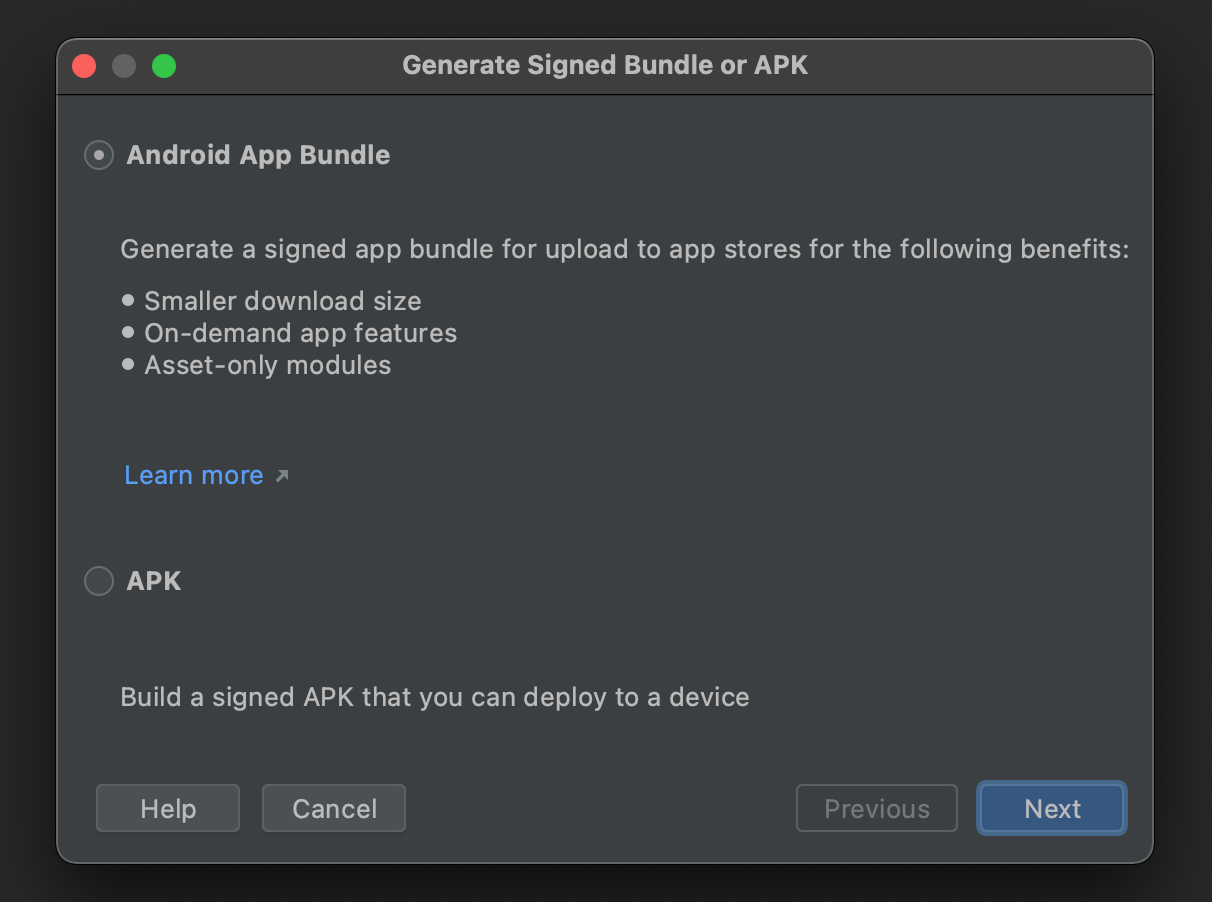
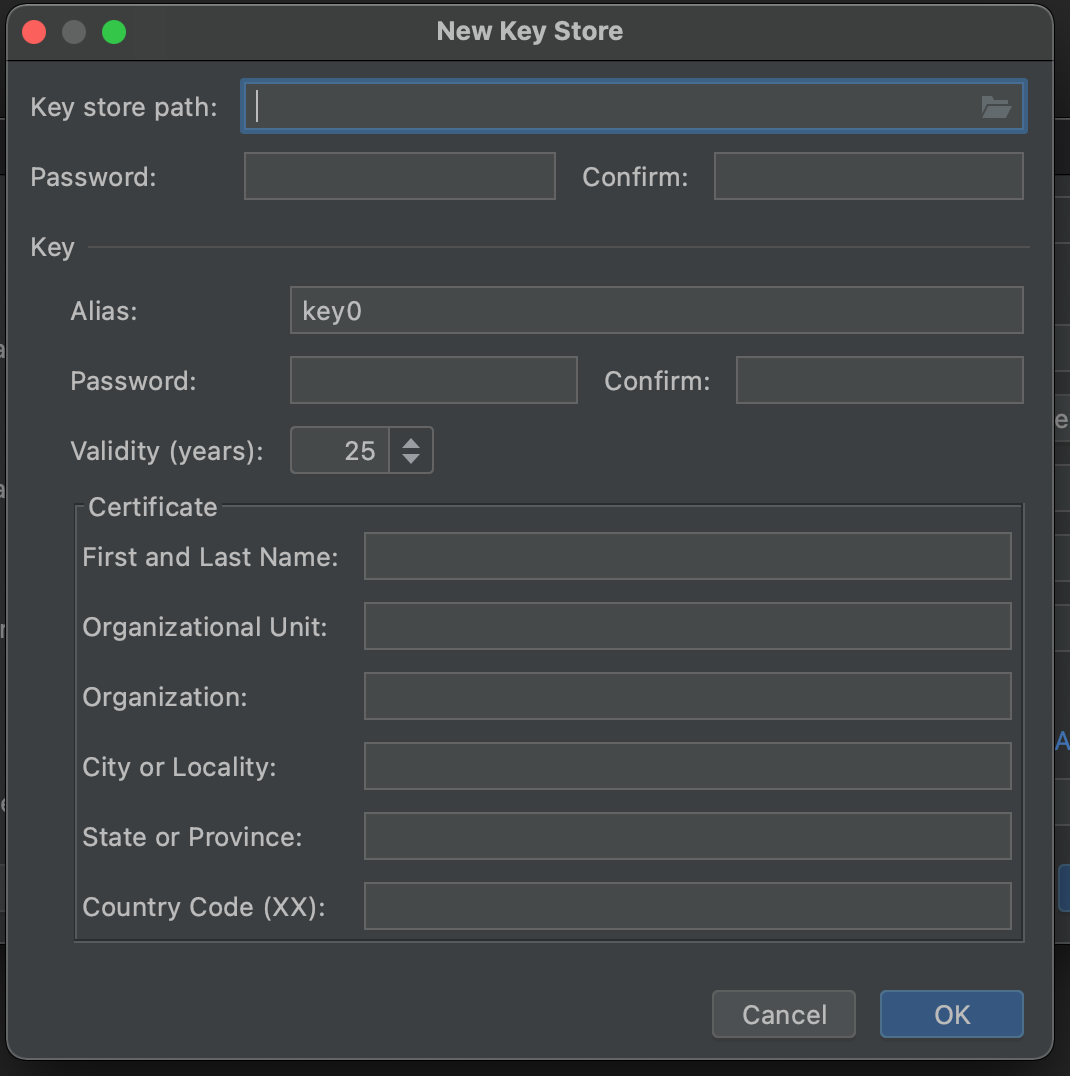
Signing the app:
To publish on the Play Store, you need to give your app a digital signature. Use the following instructions to sign your app.
Go through the screenshots below carefully to understand how to generate a key and use it for the released signed app:
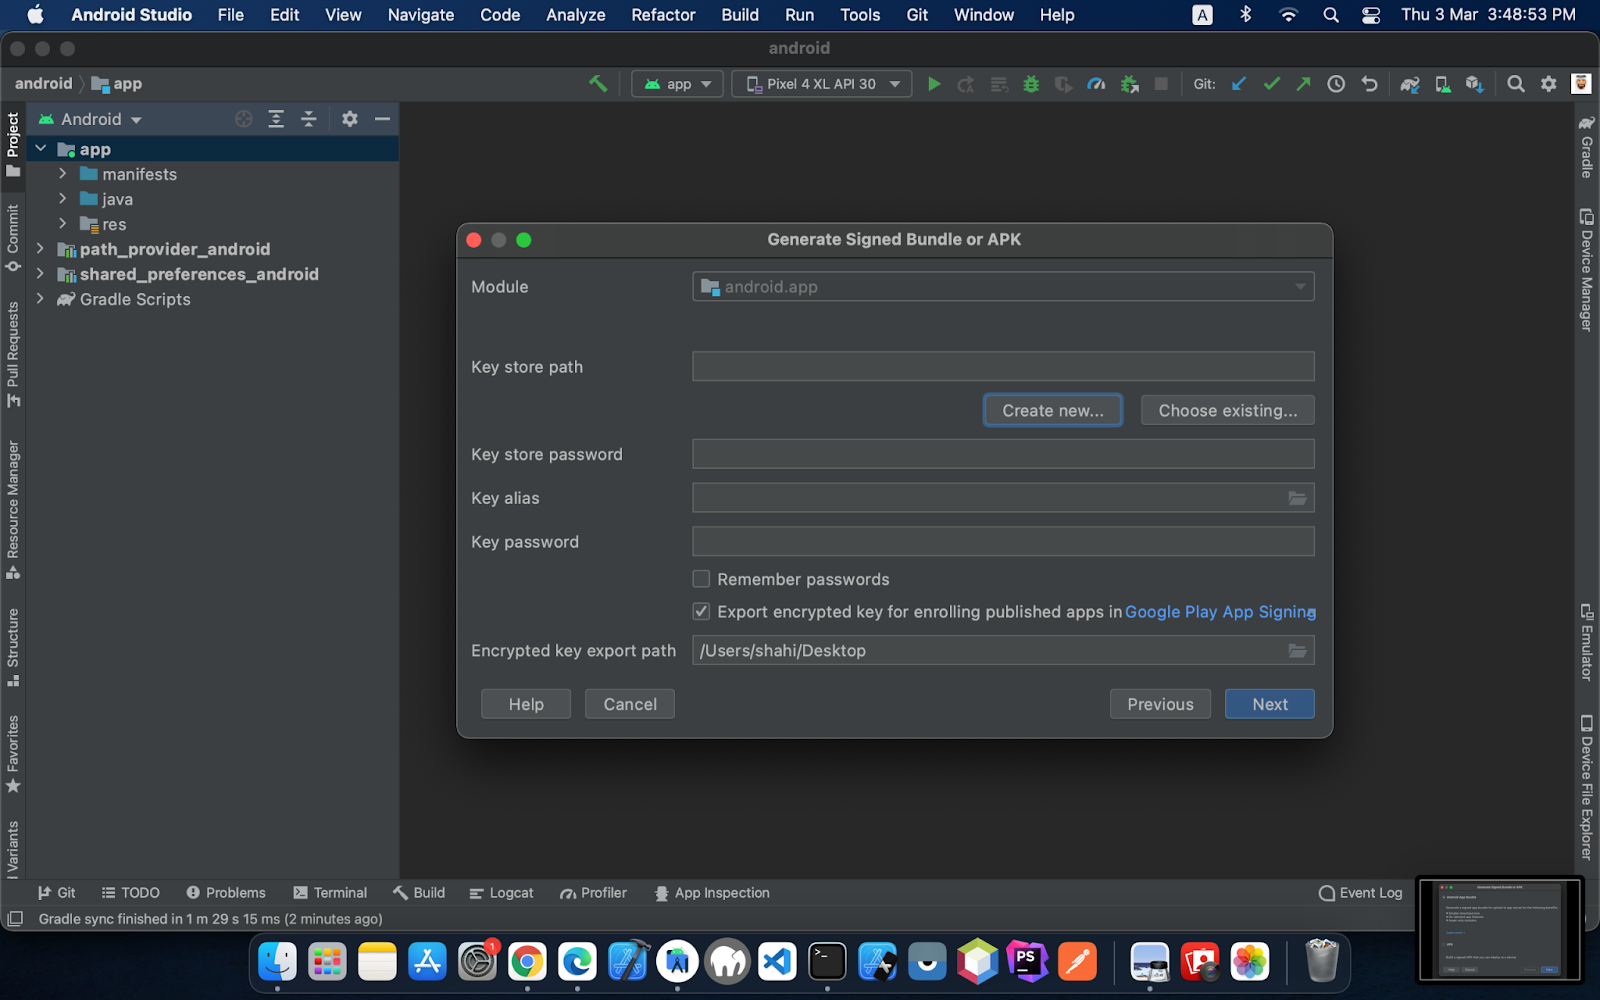
Then copy the key.jks from the root folder and paste it in the android folder.
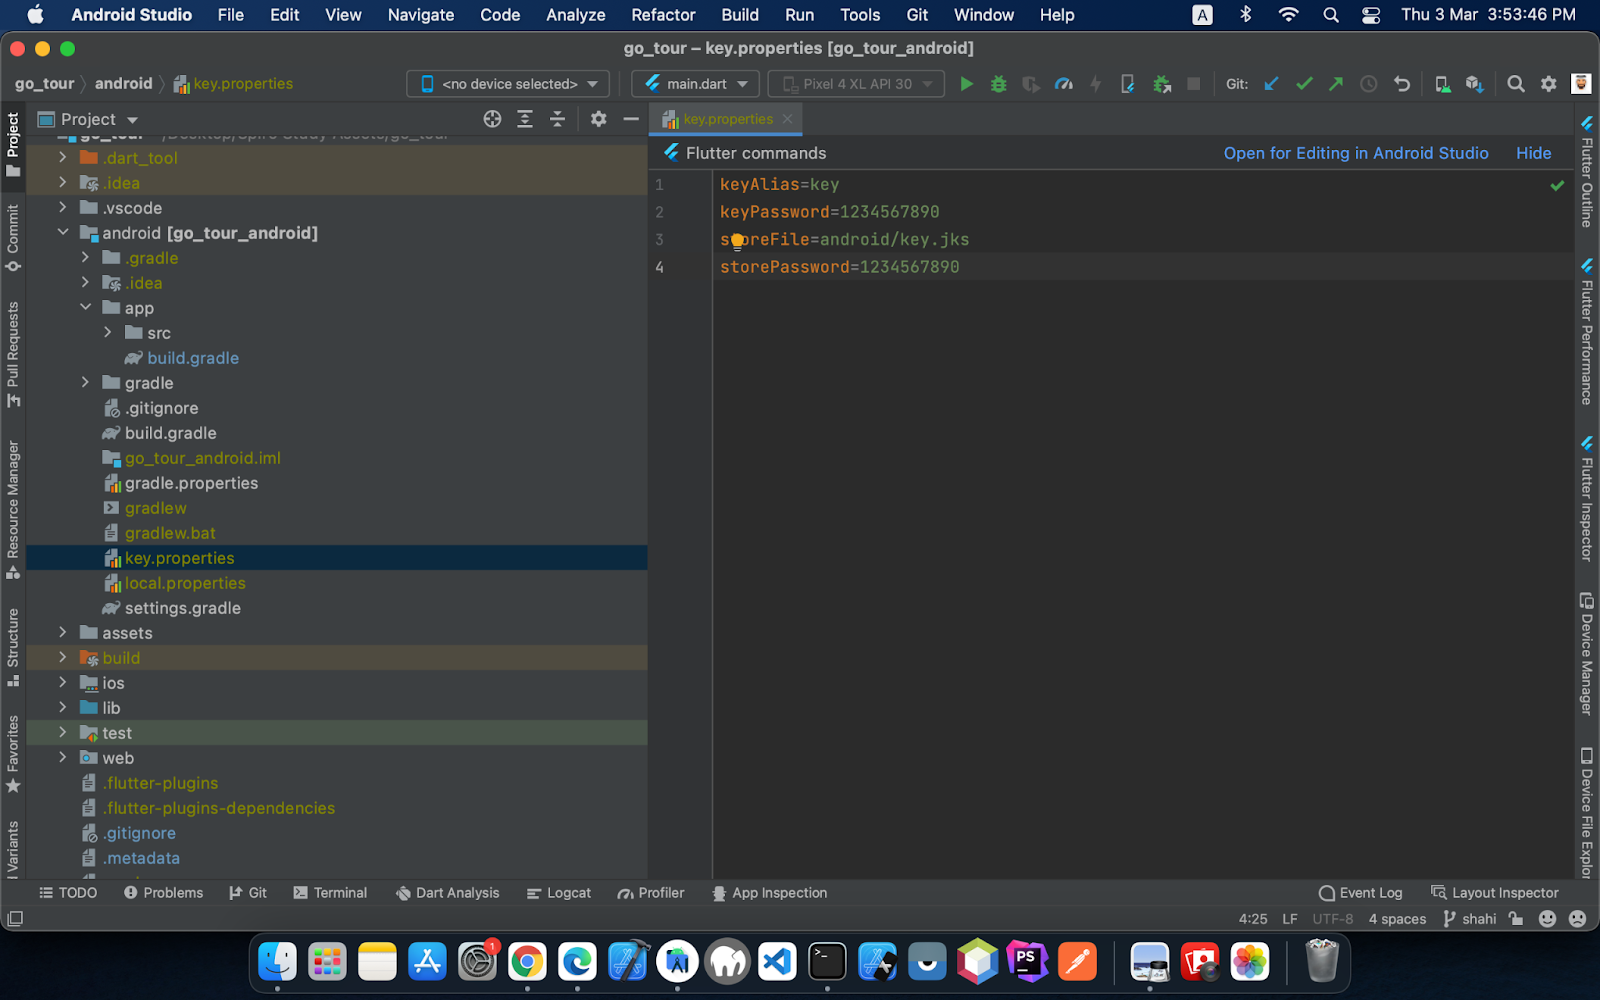
Create a new file key.properties in the android folder. Enter the information.

** If you lose the JKS file, you will not be able to release a new update of your app in the play store.
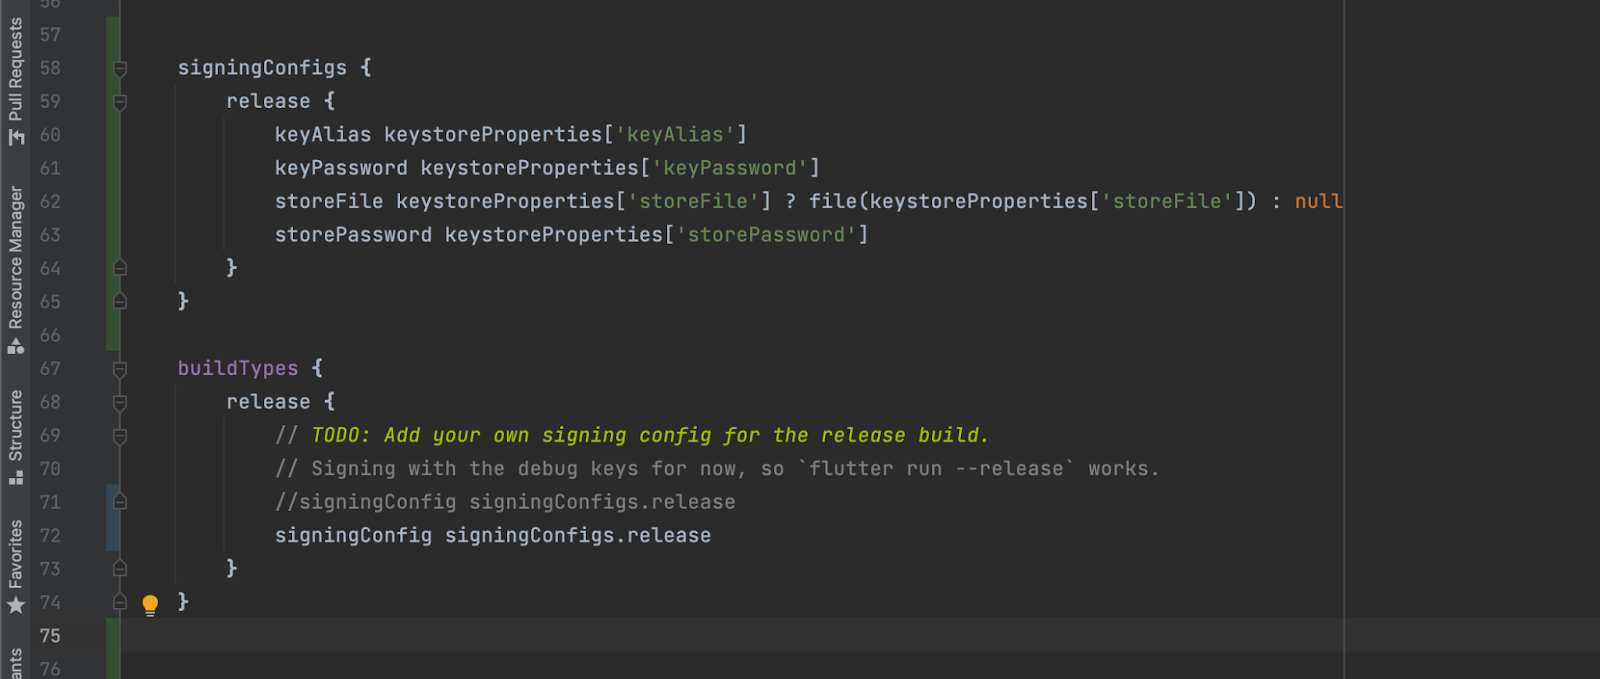
Note: You may need to run flutter clean after changing the Gradle file. This prevents cached builds from affecting the signing process.
Now you are almost done.
In your terminal run: flutter build appbundle
The release bundle for your app is created at <your app dir>/build.app.outputs/bundle/release/app.aab
Upload this app.aab file to your google play console.
Build For IOS
Apple doesn’t allow to installation and distribution of apps like an android. To install it on your iOS device or distribute it, you have to deploy it on TestFlight or AppStore. For deployment, you can follow this link: https://docs.flutter.dev/deployment/ios
Payment method.
○ Stripe
○ Paypal
○ Razorpay
○ Flutterwave
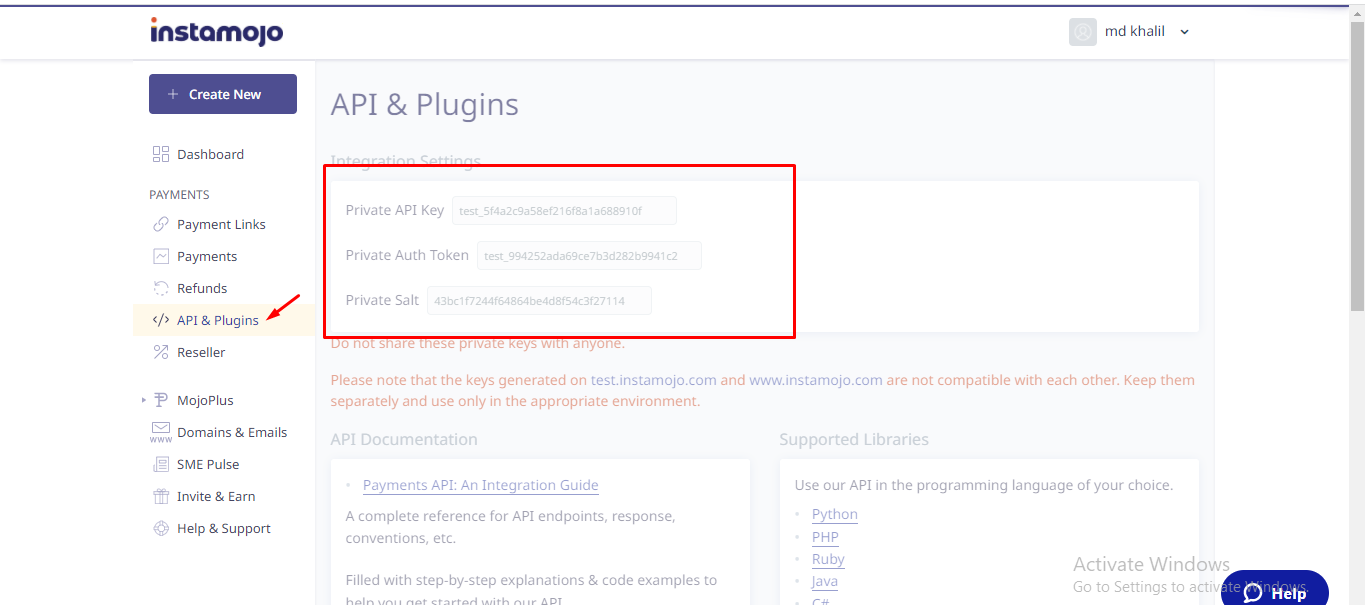
○ Instamojo
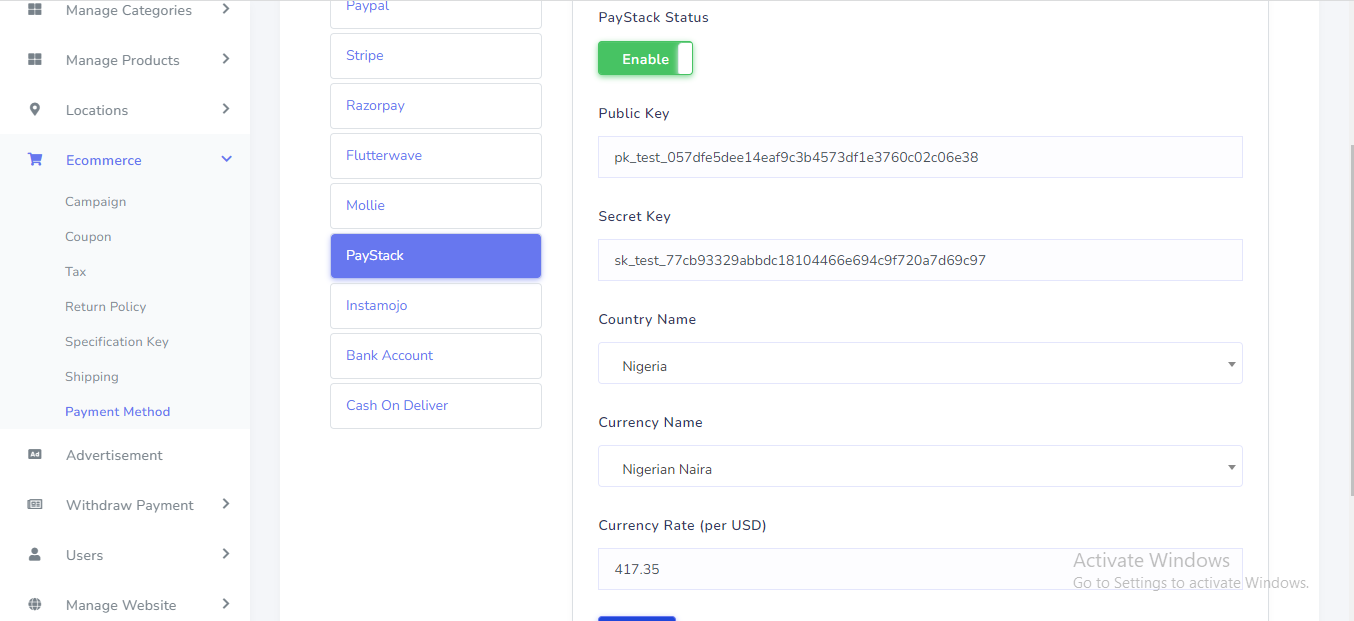
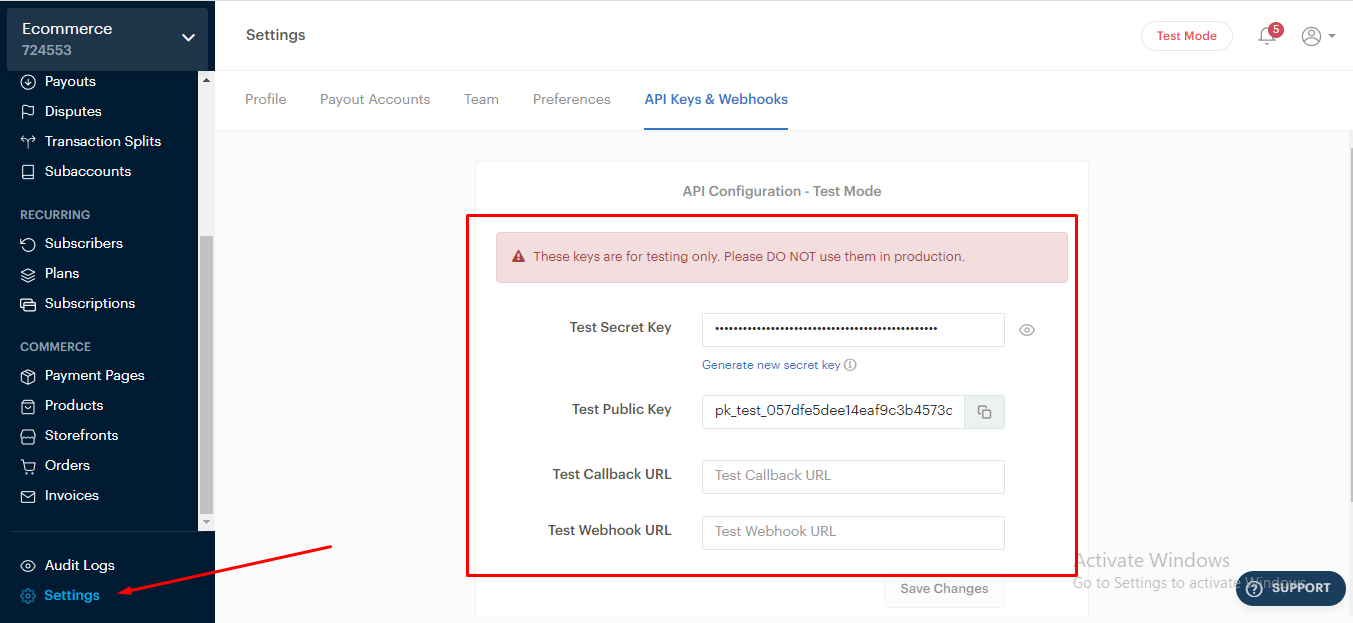
○ PayStack
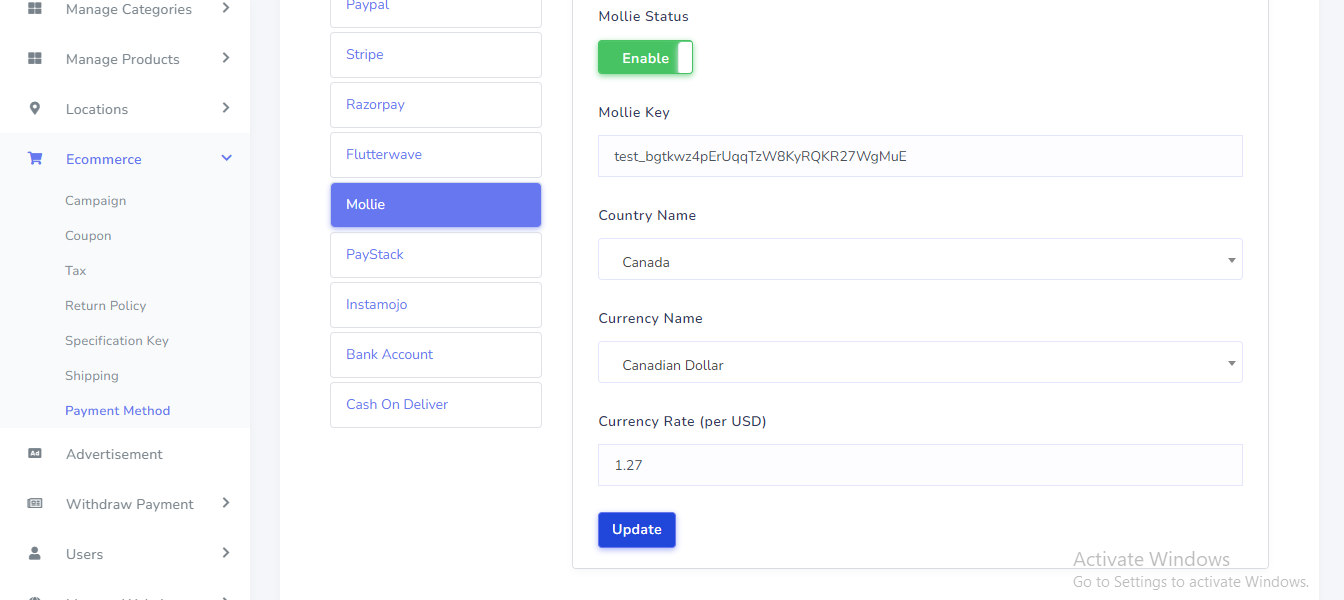
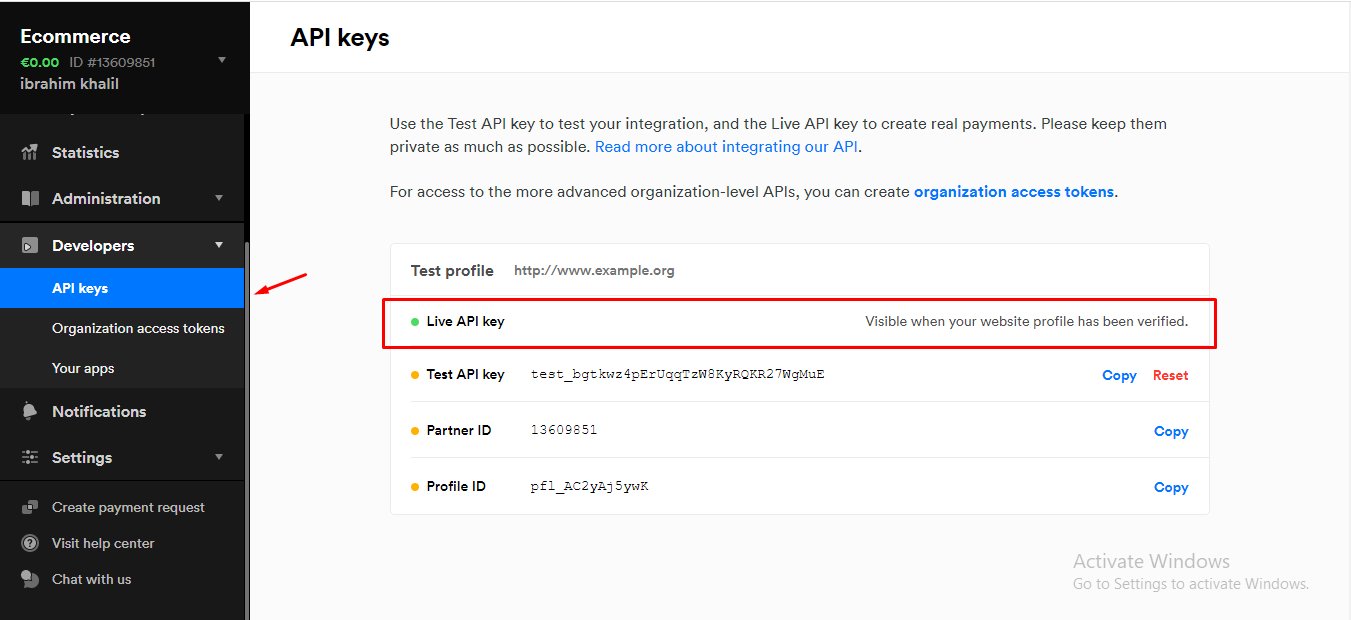
○ Mollie
○ sslCommerz
○ Cash on Delivery
○ Bank
Aforementioned payment methods has implemented on the ShopO application, you don't need to customize anything all processes are handled by the backend.
You can find payment module lib/modules/place_order
Note: In case you need any further help or have any confusion, please email us at abdur.rohman2003@gmail.com With an appropriate Subject: ShopO Flutter App Ui Kit
We will surely respond to your query and will solve the issue if it's relevant to Our Product.
Thank You!
quomodotheme
Social Login
Social Login credential can be set up from the admin panel. Go to "Setting" from sidebar. See:
To get facebook credentials. go to this link and create a new app :
https://developers.facebook.com/apps
To get google credentials. go to this link and create a new app :
https://console.developers.google.com